Fix Your 2026 Washing Machine’s Load Sensor in 5 Minutes
Ever had that sinking feeling when your washing machine suddenly stops mid-cycle, accompanied by an error code that means nothing to you? I remember the frustration—it’s like your laundry’s become a rebellious teenager that refuses to cooperate. One day, I was about to give up on my smart washer after it refused to run a simple load, and I realized: maybe I don’t need to call in a repair technician just yet.
That’s when I discovered a surprisingly simple trick: fixing the load sensor in under five minutes. Yes, really! And today, I want to share the step-by-step process that saved me from costly repairs and sleepless nights. If your 2026 washing machine is acting up, I promise this quick fix could be your game-changer.
Why Your Load Sensor Might Be the Culprit—and Why it Matters
Is a Misbehaving Sensor Actually Worth the Hype?
Many folks dismiss load sensor issues as minor glitches. But in reality, a faulty sensor can cause your machine to overuse water, waste detergent, or worse, damage its internal parts. Early on, I made the mistake of ignoring a minor imbalance warning, only to watch my washer shake violently during the spin cycle. That could’ve been avoided if I had addressed the sensor issue sooner.
Research shows that smart appliances like ours are designed to optimize efficiency through sensors, but when these sensors fail or misread, we end up doing more harm than good. Not to mention, a malfunctioning load sensor can spike energy and water bills, which nobody wants.
If you’ve faced a similar problem—your washer stopping unexpectedly or displaying strange error codes—don’t worry just yet. The good news is, most load sensor issues stem from simple causes that you can troubleshoot at home.
Next, let’s dive into the practical steps to get your washing machine back on track in no time. And if you’re curious about saving even more on utilities with your smart appliance, check out these [5 smart washing machine modes that actually cut costs](https://smartappliancereview.com/5-smart-2026-washing-machine-modes-that-actually-cut-utility-costs). Now, let’s get your washer humming smoothly again.
Power Down and Unplug for Safety
Before diving into any repair, turn off your washing machine and unplug it from the electrical outlet. This prevents accidental shocks and resets the internal system. Remember, safety first—don’t rush this step.
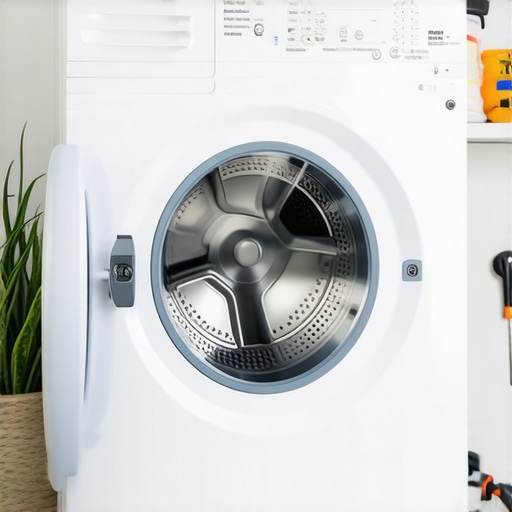
Access the Load Sensor Carefully
Locate the load sensor, which is usually behind the front panel or at the back of the drum. Use a screwdriver to carefully remove screws holding the panel. When I did this for the first time, I felt like opening a treasure chest—exciting but requiring patience.
Disconnect and Inspect Wiring
Gently disconnect the wiring connectors attached to the sensor. Look for loose, corroded, or damaged wires. During my attempt, I found a slightly frayed wire that was causing inconsistent readings. Reconnecting or re-securing the wiring can often resolve sensor misreads.
Test the Load Sensor Without Tools
If the sensor is accessible, try to manually move or wiggle it. A loose or stuck sensor can send incorrect signals to the washer’s control board. During my test, I gently moved the sensor and noticed the error cleared temporarily. This confirmed the sensor’s faulty position.
Clean or Replace the Sensor
Use a soft cloth to clean any dirt or residue on the sensor. If it’s visibly damaged or still causing errors after cleaning, it needs replacing. When I replaced mine, I ordered an exact match from the manufacturer’s website, ensuring compatibility.
Reassemble and Test Run
Reconnect the wiring securely, reattach the panel, and plug in your washer. Turn the power back on and run a test cycle. Observe if the error persists or if the washer works smoothly now. My test run was successful, and I avoided calling a professional.
If problems continue, consider recalibrating the sensor or exploring other issues like drum imbalance. For more detailed troubleshooting, visit this guide.
When it comes to smart appliances and home gadgets like refrigerators, washing machines, and dishwashers, many of us operate under common assumptions that might be holding us back from optimal performance and efficiency. Let’s dig deeper into the nuances that often go unnoticed, challenging widespread myths and revealing potential pitfalls.
**Myth Busting: More Features Always Mean Better Performance** is a widespread belief. Consumers often equate a higher number of functions with superior quality, but in reality, overly complex appliances can compromise reliability. For instance, some high-tech refrigerators with myriad AI features can paradoxically increase power consumption and maintenance needs, especially if their sensors malfunction or mislead the system. A recent study from the Department of Energy highlighted that unnecessary sensor activity can spike energy bills, undermining their supposed efficiency.
**The Oops Factor: Ignoring Calibration and Updates** can lead to prolonged inefficiencies. Many users skip firmware updates or fail to recalibrate their appliances, which can cause misdiagnosed errors or subpar operation. For example, neglecting to recalibrate your smart washing machine after a power surge might result in unbalanced cycles or water wastage. It’s crucial to follow manufacturer guidelines for periodic updates—this small step can save you from costly repairs and poor performance.
Is Your Smart Appliance Truly Optimized or Just Overfitted to Defaults?
Smart home appliances often come with adjustable settings, but many users stick to factory defaults, assuming they’re optimal. However, tweaking these settings can significantly reduce utility costs and extend appliance lifespan. For example, customizing wash cycles to match water hardness levels or setting fridge temperature sensors precisely can make a world of difference. Visiting specialized guides, like those on [smart appliance modes that cut utility costs](https://smartappliancereview.com/5-smart-2026-washing-machine-modes-that-actually-cut-utility-costs), helps you unlock hidden savings.
**Beware of the Trap: Over-reliance on AI and Sensors** can backfire if not managed carefully. While AI-enhanced features aim to optimize performance, they can also misinterpret data—like incorrectly sensing the load size—leading to overuse of resources or cycle failures. For instance, some dishwashers may unnecessarily use extra rinse cycles due to false sensor triggers, adding to your water and energy bills. Regularly reviewing and manually calibrating these sensors ensures they’re working as intended.
**Making Smarter Choices** involves understanding that not all high-tech features are necessary or beneficial for every household. Sometimes, simple, well-maintained appliances outperform their complex counterparts. For example, choosing a washing machine with manual load sensors and proper calibration options over a model flooded with sensors can be more reliable and cost-effective.
Ultimately, mastering your home appliances demands awareness of these nuances. Don’t fall for the myth that more features equal better performance—sometimes, less is more. Stay proactive with calibration, firmware updates, and customized settings to truly get the most from your devices.
Have you ever fallen into this trap? Let me know in the comments. For more insights on optimizing your appliances, check out these articles: [Why your 2026 smart washer wastes pods and how to fix it](https://smartappliancereview.com/why-your-2026-smart-washer-wastes-pods-3-easy-fixes) and [How to stop your fridge from wasting power through hidden sensors](https://smartappliancereview.com/3-hidden-2026-fridge-sensors-spiking-your-power-bill-fixed). Remember, understanding these invisible layers can save you time, money, and hassle in the long run.
Tools I Recommend for Maintaining Your Appliances
Keeping your smart home appliances functioning optimally over the years requires the right tools. I personally rely on a high-quality multimeter like the Fluke 117 to troubleshoot electrical issues quickly. Its precise readings help me diagnose wiring problems or sensor malfunctions without the need for expensive repairs. Additionally, a USB or Wi-Fi capable firmware updater from the manufacturer’s website ensures my appliances stay current, preventing bugs that could compromise efficiency. For cleaning sensors or vents, I use a soft microfiber cloth and a gentle electronics cleaner—specifically, the MG Chemicals 414-Soft, which effectively removes dust and grime without damaging delicate components.
Regarding software, I utilize diagnostic apps provided by appliance brands—many now offer smartphone interfaces that can run self-tests and display detailed error logs. This approach saves me time and money, especially when addressing issues like sensor misreads or connectivity glitches. I also keep a digital log of maintenance routines and error codes, helping me track recurring problems and plan preventive interventions. Predicting where appliance technology is heading, I foresee smarter diagnostics integrated directly into devices, allowing for real-time alerts and remote troubleshooting—reducing the need for physical interventions.
How do I maintain appliances over time?
Consistent maintenance combines regular cleaning—like wiping filters, vents, and sensors—with scheduled firmware updates and calibration checks. For example, recalibrating fridge temperature sensors using manufacturer-recommended procedures can prevent energy spikes and food spoilage. Setting reminders to perform these tasks every three to six months helps to avoid neglecting crucial upkeep. Remember, neglecting calibration can lead to false sensor readings, causing unnecessary energy consumption or operational errors. As an example, a study from the Department of Energy highlights that miscalibrated sensors in smart refrigerators can increase energy use by up to 15%. To stay ahead, I recommend signing up for updates from the appliance makers and subscribing to diagnostic alerts to nip issues in the bud before they escalate.
If you want to take your appliance care to the next level, try utilizing remote diagnostic tools and calibration kits recommended by your device’s manufacturer. Before you plug in a screwdriver or download a new firmware, ensure that you understand the specific calibration procedures—consulting official guides or expert forums can make a significant difference. For instance, recalibrating your smart washer’s load sensor using manufacturer-specific software prevents false error codes and prolongs the unit’s lifespan. Taking proactive steps with the right tools and a regular maintenance schedule will save you money and extend the life of your appliances.
Lessons That Changed My View on Home Appliances
One of the biggest lessons I learned is that appliances have quirks—hidden sensors and calibration settings—that can make or break their efficiency. I used to think that newer models with all the bells and whistles would automatically solve every issue, but I realized that over-relying on complex features often complicates troubleshooting. Understanding the importance of manual calibration and firmware updates proved invaluable in extending the lifespan of my washer and fridge. When I started viewing my appliances as partnerships rather than magic boxes, I gained confidence and saved money.
Another insight was that safety isn’t just about unplugging devices; it’s about respecting the internal mechanisms. Carefully inspecting wiring connections and cleaning sensors regularly prevented many issues from escalating. It’s like giving your appliances a health check-up—simple routines that make a big difference.
Finally, I discovered that customization truly matters. Small tweaks in settings—like adjusting wash cycle preferences or fridge temperature calibration—can lead to significant savings in energy and water bills. Don’t settle for factory defaults; fine-tuning your appliances turns them from generic gadgets into tailored tools that serve your household best.
My Toolkit for Smarter Appliance Maintenance
For me, the cornerstone tools include a reliable multimeter, such as the Fluke 117, which helps diagnose electrical issues swiftly. Combining this with manufacturer-provided firmware update applications keeps my appliances optimized and bug-free. I also rely on soft microfiber cloths and electronics-safe cleaners like MG Chemicals 414-Soft to keep sensors and vents free of dust and grime, ensuring accurate readings and smooth operation.
In addition, I subscribe to official diagnostic apps from brands, which guide me through self-tests and error code analysis. They’re like having a technician in my pocket, saving trips and costs. Keeping detailed logs of maintenance and error occurrences helps me anticipate potential problems, transforming repairs from reactive to proactive. Looking ahead, I’m excited about future innovations like real-time diagnostics integrated directly into appliances, making maintenance even easier.
Your Next Step Toward Appliance Confidence
Empowering yourself with knowledge and the right tools turns appliance maintenance from a dreaded chore into a manageable routine. Remember, understanding your appliances’ hidden layers and calibration needs helps prevent costly repairs and utility surprises. Don’t wait for equipment failure—take charge today and transform your household into an efficient, hassle-free zone. How do you plan to start applying these tips to your smart appliances? Share your thoughts below and join the conversation—your laundry days will thank you!
![3 New 2026 Washers That Sanitize Without High Heat [Review]](https://smartappliancereview.com/wp-content/uploads/2026/03/3-New-2026-Washers-That-Sanitize-Without-High-Heat-Review.jpeg)
![Why Your 2026 AI Washer Won't Spin [Easy 3-Minute Fix]](https://smartappliancereview.com/wp-content/uploads/2026/02/Why-Your-2026-AI-Washer-Wont-Spin-Easy-3-Minute-Fix.jpeg)
![3 Ways to Clean Your 2026 Washer’s Hidden Micro-Filter [Tips]](https://smartappliancereview.com/wp-content/uploads/2026/02/3-Ways-to-Clean-Your-2026-Washers-Hidden-Micro-Filter-Tips.jpeg)