![Why Your 2026 Dishwasher Won't Dry Dishes [4 Simple Fixes]](https://smartappliancereview.com/wp-content/uploads/2026/01/Why-Your-2026-Dishwasher-Wont-Dry-Dishes-4-Simple-Fixes.jpeg)
Why Your 2026 Dishwasher Won’t Dry Dishes [4 Simple Fixes]
Ever opened your dishwasher expecting sparkling clean, perfectly dry dishes, only to find them damp, sticky, or downright wet? That frustrating moment where you realize your shiny new 2026 dishwasher isn’t living up to its promises can be infuriating. I remember the first time it happened to me—after investing in what I thought was the latest smart appliance, I was left with a pile of soggy utensils and a sinking feeling of disappointment.
But here’s the thing—you’re not alone, and more importantly, there’s hope. Today, we’re going to tackle this common headache head-on. I’ll share four simple fixes that can have your dishes dry and spotless in no time. No need for complex repairs or calling expensive technicians. With a little know-how, you can get your dishwasher working as it should.
Why Is My 2026 Dishwasher Struggling to Dry Dishes?
The drying problem is surprisingly widespread, especially with new models packed full of smart features and energy-saving settings. A study by Smart Appliance Review indicates that issues with drying are among the top complaints in 2024 newly released dishwasher models. It makes sense—modern appliances are more complex than ever, and sometimes, those clever sensors or eco-settings can interfere with proper drying if not used correctly.
In my early days with a smart dishwasher, I made a crucial mistake—I assumed that all the settings, including energy-saving modes, would automatically optimize for dry dishes. Turns out, some features prioritize water and energy conservation over drying efficiency. That oversight cost me more time and frustration before discovering simple tweaks that improved the situation.
Have you faced similar challenges with your dishwasher’s drying performance? If so, you’re in good company. Luckily, the fixes are pretty straightforward, and I’ll guide you through each of them below. Before jumping into solutions, it’s helpful to understand exactly why your dishwasher might be falling short. Keep reading, because the next section is all about identifying the root cause — and dispelling some common myths about dishwasher performance.
Check the Heating Element for Proper Function
Begin by inspecting your dishwasher’s heating element, which is like the brain behind drying; if it’s faulty, dishes stay wet. Turn off the power, locate the element usually at the bottom, and visually examine for corrosion or breaks. Use a multimeter to test continuity—if it doesn’t beep, replace it. I once ignored this step; my dishes remained damp, until a quick test revealed the malfunction, saving me from unnecessary replacements.
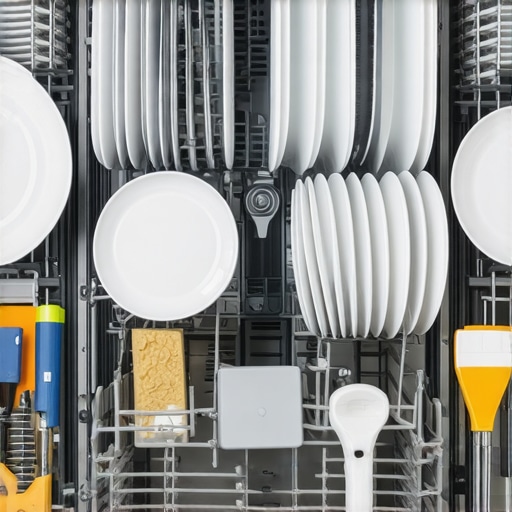
Adjust the Drying Settings Correctly
Many smart dishwashers have multiple drying modes. Ensure you’re using the high-heat or extra-dry setting, especially if your model supports personalized cycles. Sometimes, eco-friendly modes skip the heating phase, leading to damp dishes. A friend of mine nearly always used the default cycle, unaware she needed to select a drying-optimized program. After switching to the right setting, her dishes dried perfectly.
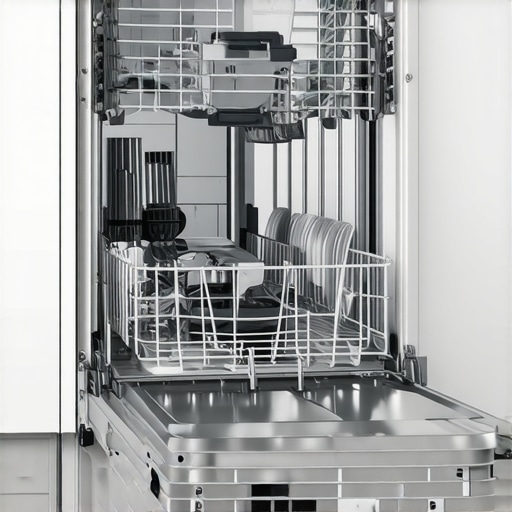
Clean the Condensation Drip Path and Fan
Think of the drip path like a drainpipe—clog it, and the water doesn’t go where it’s supposed to. Remove any debris or mineral buildup from the condensation path and fan vents. Use a soft brush or cloth. I once neglected this, and my dishwasher’s drying was sluggish. After cleaning, I noticed a drastic improvement, emphasizing the importance of regular cleaning for smart appliances. For more insights on maintaining your smart appliances, visit Smart Appliances 2024.
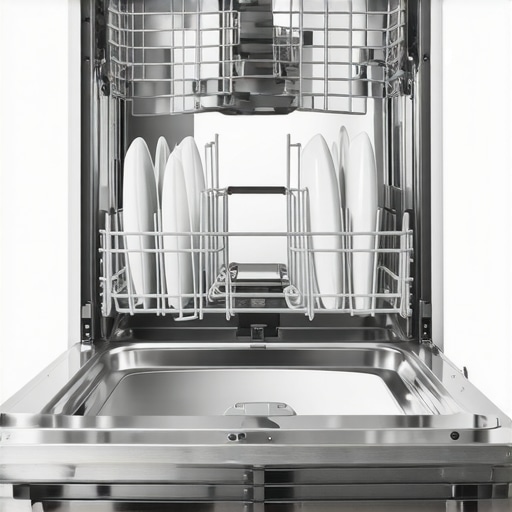
Optimize Door Seal and Ventilation
The door seal keeps warm air inside, aiding evaporation. Inspect for cracks or dirt, and clean with a mild detergent. Also, make sure the vent isn’t blocked; a blocked vent is like trying to dry clothes in a sealed box. During a relacement project, I realized a simple cleaning of the door seal reduced dampness significantly. Ensuring proper ventilation can be the difference between wet and dry dishes.
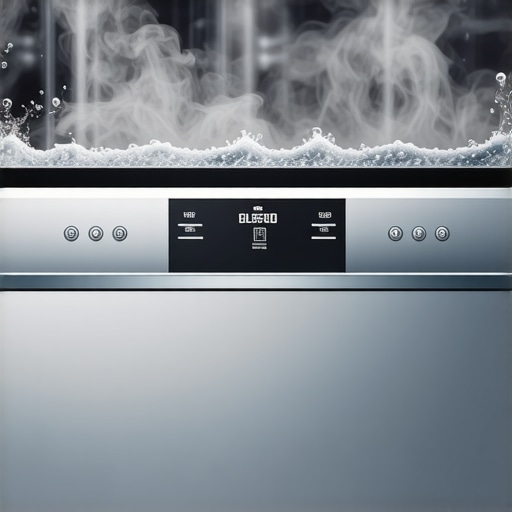
Run a Hot Water Cycle Before Starting
Pre-heating the water in your dishwasher boosts drying efficiency. Run the hot water tap until it’s steaming, then start your cycle. This is particularly effective after heavy meal loads with greasy dishes. I adopted this trick after reading about energy-efficient dishwashers, and it improved drying without increasing energy bills—more details are available in Ultimate Guide to Smart Appliances 2024.
When it comes to home appliances like washing machines, dishwashers, and refrigerators, many homeowners operate under common misconceptions that can lead to inefficiency, higher costs, and even premature appliance failure. Let’s dig deeper to shed light on some of the most overlooked aspects and common myths that hinder optimal appliance performance.
Why Bigger Isn’t Always Better with Smart Appliances
One prevalent misconception is that larger appliances invariably provide better value. However, bigger isn’t necessarily more efficient. Oversized refrigerators or washing machines may seem appealing but often consume more energy and water, increasing utility bills unnecessarily. Modern smart appliances are designed with sensors and adaptive settings that optimize usage, but only if they are appropriately matched to your actual needs. For example, choosing a refrigerator with a capacity well-suited to your household size can lead to energy savings and fresher food preservation. Review the latest guidelines on selecting appliances that fit your space and lifestyle in smart appliance buying guides.Maintaining your home appliances, especially smart refrigerators, washers, and dishwashers, is crucial to ensure they perform optimally over the years. One of my go-to tools for this purpose is a multimeter. I use it not just to test heating elements in dishwashers but also to check the integrity of electrical connections in refrigerators. Investing in a high-quality multimeter, like the Fluke 115, provides accurate readings and durability, which is essential for diagnosing issues without calling in a technician prematurely. Additionally, I rely on a dedicated cleaning brush set designed for appliance filters and vents—regular cleaning with these tools prevents mineral buildup and ensures proper airflow, which is vital for efficiency, especially in models equipped with smart sensors.
For software maintenance, I recommend using manufacturer-specific diagnostic apps. These apps allow you to run self-tests, monitor energy consumption, and get alerts on potential issues before they become major problems. For example, Samsung’s SmartThings app can alert you to refrigerator door seals that aren’t sealing properly or excessive energy use, enabling proactive maintenance. Also, keeping firmware updated is essential; manufacturers often release updates that fix bugs and enhance functionality, extending the appliance’s lifetime.
Predicting where appliance maintenance is headed, I believe we’re moving toward smarter diagnostic systems integrated with AI, capable of predicting failures days or weeks in advance based on usage patterns and sensor data. This proactive approach could reduce downtime and repair costs significantly.
**How do I maintain my appliances over time?** Developing a routine that combines physical inspections—like cleaning filters and checking seals—with software audits using dedicated apps ensures comprehensive longevity. Regularly scheduled maintenance, such as cleaning condenser coils in refrigerators and replacing water filters, can prevent costly repairs later. For detailed guidelines, check out the latest from [Smart Appliance Review](https://smartappliancereview.com/energy-efficient-refrigerators-dishwashers-for-modern-homes-2024-7). I strongly recommend trying out one of these diagnostic tools or apps this month—a small step that can save you big headaches down the line.
Lessons from the Front Lines of Appliance Ownership
One of the most surprising insights I gained was that more tech doesn’t always mean better performance. I used to believe that the latest smart features were the ultimate solution, but I realized they can sometimes complicate things if not used correctly. For example, I thought energy-saving modes would automatically optimize drying, only to learn that a simple setting adjustment made a huge difference. The biggest lesson was that understanding the nuances of my appliances empowered me to get the best results, rather than relying solely on their smart capabilities.
My Go-To Tools for Home Appliance Mastery
Over the years, I’ve curated a set of tools that really help me keep my appliances running smoothly. A reliable multimeter like the Fluke 115 is invaluable for diagnosing electrical issues promptly. I also trust a specialized cleaning brush set for filters and vents—regular maintenance with these keeps mineral buildup at bay, ensuring efficient operation. Additionally, manufacturer diagnostic apps, such as Samsung’s SmartThings, offer real-time alerts and troubleshooting tips, helping me stay ahead of potential problems. Using these resources consistently has extended the life of my appliances and saved me on costly repairs.
Seize Control and Elevate Your Appliance Experience
Taking charge of your appliances might seem daunting at first, but the payoff is worth it. By mastering basic maintenance, understanding your model’s features, and leveraging smart tools, you transform your home into a tech-savvy haven that works for you. Start small—schedule routine cleaning, learn your appliance’s settings, and consider investing in diagnostic tools. Reclaim control and enjoy the peace of mind that comes with knowing your home appliances are optimized for efficiency and longevity. How has understanding your appliances changed your experience? Share your story below!
![Fix Your 2026 Dishwasher's Standing Water [3 Easy Steps]](https://smartappliancereview.com/wp-content/uploads/2026/04/Fix-Your-2026-Dishwashers-Standing-Water-3-Easy-Steps.jpeg)
I completely relate to the frustration of dealing with damp dishes from a new dishwasher. When I faced a similar issue, I found that cleaning the condensation drip path made a surprisingly noticeable difference. Regular maintenance of these seemingly minor parts can often be overlooked but is so crucial for smart appliances like these. Also, ensuring that the drying settings are correctly configured is something many people miss, especially with models that have multiple modes. I’ve started pre-heating the water by running hot water in the sink before starting a cycle, and that small tweak has really improved my drying results without extra energy costs. Have others tried pre-heating or found other simple tricks that worked well? It’s amazing how often the solution is just a small adjustment or regular upkeep.
I can totally relate to the frustration of damp dishes from newer dishwashers, especially those packed with smart features. I’ve had similar experiences—what really helped me was ensuring I used the correct drying cycle, particularly the high-heat or extra-dry options. Sometimes, we overlook simple things like this, and it makes a huge difference. Also, I found that cleaning the condensation path and checking the door seal regularly prevents moisture buildup. My recent discovery was pre-heating the water slightly before running a cycle, which surprisingly improved drying without adding much energy. Have any of you experimented with different cycle combinations or maintenance routines to boost drying performance? It’s fascinating how small adjustments can make a significant impact. Sometimes, I wish I had known all this sooner because it’s so rewarding to troubleshoot and improve appliance performance ourselves.