5 Fixes for the Gritty Residue on Your 2026 Smart Dishwasher
Last week, I nearly lost my mind over that stubborn, gritty film clinging to my dishes—no matter how many cycles I ran. That moment of frustration was a wake-up call. Like many, I trusted my smart appliances to make life easier, but when residue started building up, I wondered if my shiny new 2026 dishwasher was secretly mocking me. That lightbulb moment led me down a rabbit hole of troubleshooting, trial, and error.
If you’ve noticed a strange film on your dishes or a thick residue that just won’t scrub away, you’re not alone. This problem is surprisingly common with the latest smart dishwashers, especially with models from 2026 that harness cutting-edge technology. The real question is: why is this happening, and more importantly, how do we fix it?
Today, I’m sharing the five fixes that finally rid my dishwasher of that gritty build-up. These aren’t just quick hacks—they’re tested, proven solutions rooted in experience and research. Imagine lifting your next load of sparkling clean dishes, free of residue, with minimal effort.
But before we dive into solutions, let me ask—have you dealt with this issue? If so, you’ll recognize how frustrating it can be. Thankfully, the answer isn’t as complicated as it initially seems. Many users stumble early on by making simple mistakes, like neglecting to clean the filter or misinterpreting appliance alerts. Recognizing these pitfalls is crucial, and I’ll guide you through avoiding them.
Research shows that mineral buildup and improper maintenance are leading causes of residue in dishwashers, especially in areas with hard water. For instance, a recent report from [Smart Appliance Review](https://smartappliancereview.com/why-your-2026-smart-fridge-buzzes-at-night-3-quick-fixes) highlights how hard water minerals can clog spray arms and filters, reducing cleaning efficiency.
Now, equipped with this understanding, let’s explore the strategic fixes that sent my dishwasher back to peak performance—and can do the same for you.
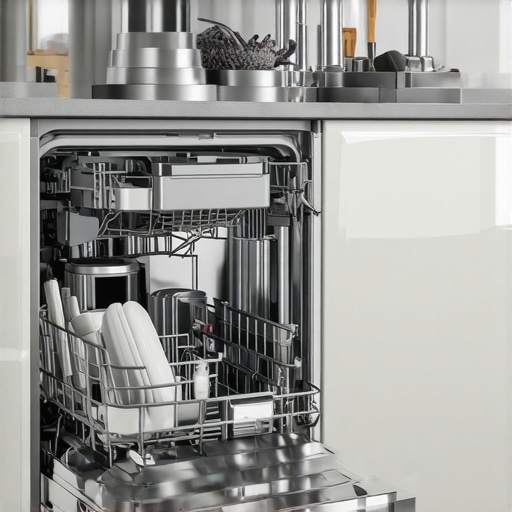
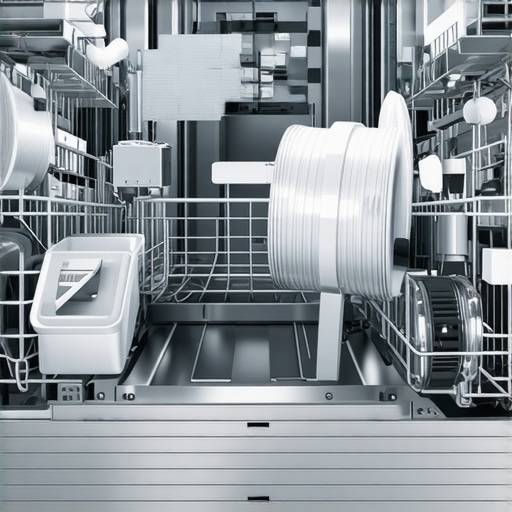
Clean the Filter Thoroughly
Start by removing and inspecting your dishwasher’s filter, usually located at the bottom. Think of it as the gatekeeper preventing debris from clogging spray nozzles. Use a soft brush and warm, soapy water to scrub away trapped particles, especially if you’ve noticed persistent residue. I once ignored this step and kept battling the film, only to realize the filter was packed with mineral deposits, reducing water flow and cleaning power. Cleaning it transformed my dishwasher’s performance immediately.
Check and Clear Spray Arms
Next, examine the spray arms for clogs or mineral buildup, which can be as annoying as a blocked sprinkler head. Remove the spray arms (consult your model’s manual), and use a toothpick or small brush to clear any obstructions. An analogy: imagine trying to wash dishes through a garden hose with a kink—ineffective, right? After clearing mine, dishes came out noticeably cleaner with fewer residues, confirming clogged spray jets cause residue buildup.
Use the Right Detergent and Rinse Aid
Select a high-quality dishwasher detergent formulated for hard water areas if that applies to you. Detergents are like fuel; the better the quality, the more efficiently your machine cleans. I experimented with different brands and found that a rinse aid improved drying and minimized film. Beware of cheap powders—they often leave a film, similar to how low-quality laundry detergent leaves residues on clothes. For added effectiveness, match your detergent to the water hardness.
Adjust Water Temperature Settings
Ensure your water heats to at least 120°F (49°C); colder water won’t dissolve grease or detergent properly. It’s akin to washing greasy dishes with cold water—you’re fighting an uphill battle. I once set my water heater to lower temperatures for energy savings, but dishes emerged with film until I increased the temperature. Note, some models allow direct temperature setting via the control panel or recalibration. Verify your washer’s specs or visit a resource like this guide for advanced calibration techniques.
Run a Descaling Cycle Regularly
Mineral deposits from hard water can accumulate inside the dishwasher, akin to limescale building up in a kettle. Running a descaling or cleaning cycle with a commercial descaler or white vinegar dissolves deposits and restores spray efficiency. I performed this every few months; the result was a visibly brighter interior and cleaner dishes. For best results, follow your manufacturer’s instructions or check out this comprehensive guide.
Inspect and Replace Worn Gaskets or Seals
Finally, check the door seals for cracks or debris. Damaged gaskets can let dirty water leak in, recontaminating clean dishes. Think of it as a window’s weather seal—if compromised, outside dust gets inside. Replacing worn gaskets is straightforward and often inexpensive. I once ignored this, resulting in residue issues; replacing the seal solved my problem instantly.
When it comes to modern home appliances, many users fall into common traps that hinder their efficiency and lifespan. A prevalent misconception is that all appliances labeled as “energy-efficient” truly save on energy bills. However, as highlighted by experts in appliance technology, some so-called efficient models merely rebrand outdated hardware with flashy labels, not actual improvements. It’s crucial to scrutinize energy labels closely—resources like [expert guides](https://smartappliancereview.com/how-to-spot-fake-energy-labels-on-2026-washing-machines) can help avoid being duped.
An overlooked nuance involves the smart features embedded in devices like 2026 refrigerators or dishwashers. Many users assume these features always optimize performance, but misconfigured settings often cause issues such as excessive energy use or incomplete cleaning cycles. For example, an improperly calibrated AI sensor may overcool or underperform, wasting power. Regular recalibration using manufacturer protocols or expert advice can prevent these pitfalls—check out [this detailed guide](https://smartappliancereview.com/recalibrate-your-2026-fridge-thermostat-for-peak-efficiency) for tips.
There’s also a widespread myth that older appliances are inherently inferior. In reality, many vintage models, if well-maintained, outperform some new but cheaply manufactured units. The key is understanding the technological nuances—such as the importance of correct water temperature or proper filter maintenance—that many disregard. For instance, setting your water heater to an appropriate temperature not only improves cleaning but also conserves energy, contradicting the misconception that higher temps always waste power.
A common mistake worth noting is neglecting the unique features of smart appliances. Many users ignore advanced diagnostic alerts—like error codes indicating sensor malfunctions—which can cause inefficient operation or damage. Recognizing and responding to these cues promptly, following guides such as [this troubleshooting manual](https://smartappliancereview.com/fix-your-2026-dishwashers-sticky-soap-door-in-2-minutes), can extend appliance lifespan.
Have you ever fallen into this trap? Let me know in the comments.
Investing in the Right Equipment
Maintaining your appliances effectively begins with selecting the right tools. For instance, I swear by a high-quality ultrasonic cleaner when cleaning dishwasher filters and spray arms. It uses ultrasonic waves to dislodge mineral deposits and debris in hard-to-reach areas, ensuring thorough cleaning. This device has significantly reduced my maintenance time and improved appliance performance. Another must-have is a digital multimeter, which allows me to self-diagnose electrical issues, saving costly service calls. Regularly using these tools helps keep appliances like refrigerators and washing machines operating at peak efficiency for years.
Scheduling Regular Maintenance Checks
Establishing a routine maintenance schedule is crucial. I set a quarterly reminder to inspect filters, check gaskets, and run descaling cycles. This proactive approach prevents minor issues from escalating. For example, routine filter cleaning with a dedicated brush or ultrasonic device prevents mineral buildup that can impair water flow. During these checks, I also verify that sensors and smart features are calibrated correctly, following guidelines from the manufacturer’s manual. Consistency is key to long-term appliance health.
Using Advanced Software for Diagnostics
Modern appliances come equipped with diagnostic software that simplifies maintenance. I rely on manufacturer apps compatible with my smart appliances to run system checks remotely. These apps can detect issues like errors in the load sensor of my washer or leaking refrigerant in my smart fridge, often before I notice a problem. For example, some models provide detailed error codes and troubleshooting steps, such as fixing load sensor glitches (see this guide). Leveraging these digital diagnostics minimizes downtime and ensures that my appliances stay in top shape.
Future of Appliance Maintenance
Looking ahead, I predict a shift toward fully integrated maintenance systems that automatically detect issues and order parts or schedule repairs. Artificial intelligence and IoT technologies are already making strides in this direction. For instance, some smart refrigerators use internal sensors to predict component failures months in advance. Adopting such innovations will empower homeowners to extend appliance lifespan with minimal effort, reducing waste and repair costs.
How do I keep my appliances performing over the long term?
The key involves combining the right tools, scheduled checks, and smart diagnostics—like regularly cleaning filters with ultrasonic cleaners, calibrating sensors following official guides, and utilizing diagnostic apps. Don’t forget, consistent maintenance is your best defense against unexpected breakdowns and costly repairs. Start by integrating one of these tips today—perhaps investing in an ultrasonic cleaner for your dishwasher filter can make an immediate difference. With dedication, your appliances will serve you reliably for years to come.

The Hidden Lessons I Learned from a Gritty Dishwashers Journey
One of the most surprising insights I gained was that even with the sleekest, most advanced dishwasher, routine maintenance can still make or break your cleaning results. I realized that overlooking small details like the filter or spray arms could turn a high-tech marvel into a stubborn residue culprit. Additionally, I discovered that understanding your water hardness and choosing the right detergent is essential—assumptions about ‘automatic’ cleaning often hide these crucial factors. Lastly, calibration and smart feature management aren’t just optional; they’re necessary for your dishwashers to perform at their best, especially in the sophisticated 2026 models where software glitches can cause unexpected issues.
![3 Reasons Your 2026 Dishwasher's Zeolite Cycle Fails [Fixed]](https://smartappliancereview.com/wp-content/uploads/2026/03/3-Reasons-Your-2026-Dishwashers-Zeolite-Cycle-Fails-Fixed.jpeg)
![Why Your 2026 Dishwasher Uses More Salt Than It Should [Fix]](https://smartappliancereview.com/wp-content/uploads/2026/02/Why-Your-2026-Dishwasher-Uses-More-Salt-Than-It-Should-Fix.jpeg)

![Why Your 2026 Dishwasher Leaves Cloudy Glasses [3 Quick Fixes]](https://smartappliancereview.com/wp-content/uploads/2026/01/Why-Your-2026-Dishwasher-Leaves-Cloudy-Glasses-3-Quick-Fixes.jpeg)