
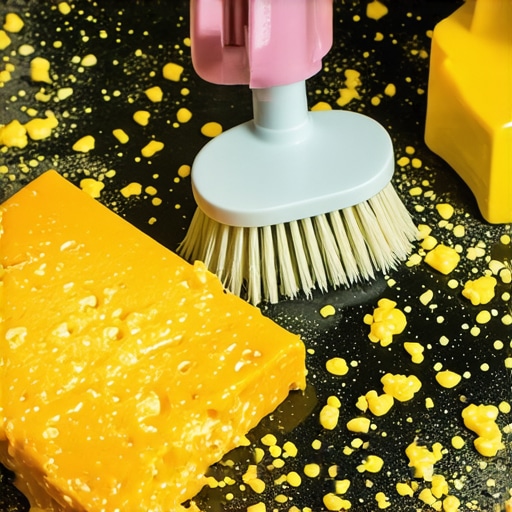
It happened during what should have been a cozy family dinner—an accidental spill of melted cheese that dripped and baked onto my oven floor. I stared at the sticky, charred mess, feeling that familiar rush of panic. I knew I had to clean it, but the thought of scrubbing that stubborn residue felt overwhelming. Sound familiar?
When Burnt Cheese Turns into a Home Cleaning Nightmare
We’ve all been there—wondering how to tackle that burnt cheese disaster without spending hours on your knees or resorting to harsh chemicals. Trust me, I’ve tried everything from brute force scrubbing to expensive oven cleaners, often ending with half-cleaned surfaces and irritated skin.
What I learned is that there’s a better way—one that’s effective, safe, and surprisingly simple. Today, I want to share my tried-and-true methods for removing burnt cheese from your oven floor, so you can restore your kitchen’s shine without the headache.
Is Heavy-Duty Scrubbing Actually Worth the Hype?
Early on, I made the mistake of thinking scrubbing fiercely with steel wool was the only option. Spoiler alert: it damaged my oven’s surface and left me exhausted. According to appliance experts, aggressive scrubbing can scratch or ruin the protective coating inside your oven, making future cleanings even more difficult. Instead, gentle methods combined with specific cleaning agents work wonders.
In fact, a recent study highlighted that proper cleaning techniques can extend the life of your appliances while maintaining their efficiency. So, before you get out the scratch pads, keep in mind: patience and the right tools are your best friends.
If you’re tired of battling burnt cheese residue that just won’t budge, stick around. I’ll walk you through step-by-step solutions that will make your oven floor look as good as new—and perhaps even save a little elbow grease in the process. Now, let’s dive into the most effective techniques I’ve discovered over years of home cooking mishaps and cleaning trials.
Prep the Area Before Cleaning
Start by ensuring your oven is cool to prevent burns. Remove loose debris with a plastic spatula or scraper, being careful not to scratch the surface. Wearing rubber gloves, wipe away any loose bits to prevent spreading the burnt cheese during cleaning.
Apply a Baking Soda Paste for Stubborn Residue
Mix half a cup of baking soda with a few tablespoons of water to create a thick paste. Spread this paste over the charred cheese, especially targeting heavily burnt areas. Let it sit for at least 15 minutes to loosen the residue. I remember once applying this during a busy weekend, and it made scrubbing much easier without harsh scrapers.
Use a Soft Scrubbing Tool
After the sitting period, use a soft-bristled brush or a nylon scrub pad to gently scrub the paste into the burnt cheese. Avoid steel wool, which can scratch your oven’s surface. The baking soda acts as a gentle abrasive, breaking down the burnt particles.
Utilize Vinegar for Grease and Residue Removal
Fill a spray bottle with equal parts white vinegar and water. Spray generously over the treated areas. The acidity helps dissolve any remaining grease and burnt cheese. Wipe clean with a damp microfiber cloth. I once sprayed vinegar on a stubborn spot, and the fizzing reaction really worked to lift out the burnt splotch.
Rinse and Wipe for a Sparkling Finish
Use a clean, damp cloth to wipe away any residual paste or vinegar. For stubborn spots, repeat the application of baking soda and vinegar. Ensure no residue is left behind to prevent future smoke or odors. Once dry, you’ll notice a significant difference—your oven floor will look almost new.
Tips for Preventing Burnt Cheese Stains
To avoid future mishaps, always cover baked cheese with a silicone mat or parchment paper when possible. After cooking, wipe down the oven floor regularly using a mild cleaner or a mixture of baking soda and water. Regular maintenance prolongs your appliance’s lifespan and keeps it looking pristine. For smart appliances, proper cleaning routine maintenance can even be tracked by their connected apps—check out this guide for tips on cleaning filters that can be adapted for oven care.Many homeowners operate under misconceptions about their appliances, often leading to premature wear or inefficient performance. Contrary to popular belief, not all smart appliances automatically make life easier; their true potential depends heavily on proper setup and understanding subtle features. For example, many users assume that a higher wattage microwave cooks faster, but in reality, wattage alone doesn’t guarantee speed—cavity design and power distribution play crucial roles.
Additionally, a common trap is neglecting regular maintenance: cleaning refrigerator coils, for instance, can significantly extend appliance lifespan and save energy, contrary to the misconception that only repairs matter. Recognizing these nuances can prevent costly mistakes and optimize your investment.
Ever fallen into this trap? Let me know in the comments.
Why Do So Many People Overlook the Limits of Smartphone Connectivity in Smart Appliances?
Many users assume that connecting their appliances to Wi-Fi is as simple as a quick setup. However, advanced smart appliances often require specific protocols, firmware updates, or optimal network conditions to function correctly. A study from the Consumer Technology Association highlights that nearly 30% of smart appliance issues stem from improper setup or outdated firmware rather than hardware faults. Failing to understand these technical nuances can lead to frustration and underperformance.
To avoid this, always ensure your smart kitchen devices are running the latest software and are within a strong Wi-Fi signal range. For detailed steps, check out [this guide on troubleshooting smart fridge connectivity](https://smartappliancereview.com/why-your-smart-fridge-app-keeps-crashing-on-your-phone).
Understanding the complexities behind seemingly simple features empowers you to maximize your appliances’ capabilities and longevity. Never underestimate the importance of reading the manufacturer’s instructions carefully and regularly updating your device software.
Keep Your Appliances Running Smoothly with the Right Tools
Ensuring your home appliances operate efficiently over the years requires more than just regular cleaning; it demands the proper use of specialized tools and software. For example, I personally swear by a digital appliance tester like the Fluke 177 True RMS Multimeter. It allows me to accurately measure voltage, current, and resistance, helping me identify electrical faults early before they lead to costly repairs. This proactive approach extends the lifespan of devices like refrigerators and washing machines, saving money and energy in the long run.
Another essential investment is a magnetic filter scraper, which I use when cleaning the coils of my fridge. This tool helps remove dust and debris without damaging delicate fins, improving airflow and energy efficiency. Regularly maintaining your appliances with these targeted tools ensures they perform optimally and prevents unexpected breakdowns.
Leveraging Smart Diagnostics and Maintenance Software
In the era of smart appliances, software plays a crucial role. I recommend installing manufacturer-specific apps that offer diagnostic reports and maintenance reminders. For instance, my smart washer’s app notifies me when it’s time to clean the filter or run a descaling cycle. These alerts are invaluable, as neglecting routine maintenance can reduce efficiency and damage the device.
Looking ahead, I predict that AI-driven diagnostic tools will become standard, allowing appliances to self-assess and even suggest maintenance actions via connected apps. Companies are already developing predictive analytics systems that detect potential failures before they happen, enabling preemptive repairs and avoiding inconvenience.
How Do I Maintain Appliances Over Time Effectively?
Consistent upkeep involves both routine cleaning and timely part replacements. For refrigerators, replacing door seals when they become worn prevents cold air leaks, which conserves energy and maintains proper cooling. I keep a set of replacement seals on hand, following guidance from appliance experts. Similarly, for washing machines, cleaning filters and inspecting hoses at regular intervals helps avoid leaks and mold buildup.
Adopting a maintenance schedule that incorporates specific tools, such as ultrasonic cleaners for small parts or Wi-Fi-enabled diagnostic systems, ensures your appliances remain in prime condition for years to come. Remember, investing in the right equipment and adopting proactive habits can significantly extend your appliances’ lifespan and boost their efficiency.
Scale with Confidence Using Expert-Recommended Techniques
If you’re considering upgrading or expanding your appliance collection, tools like load-balancing smart sensors and software-assisted calibration systems can be game changers. These technologies ensure even load distribution in washing machines or precise temperature calibration in smart fridges, leading to better performance and energy savings. As these innovations become more affordable, integrating them into your maintenance routine will become increasingly accessible.
Don’t forget, regularly referencing trusted guides—such as smart appliance maintenance resources—can provide tailored advice for your specific models and needs. Try incorporating a digital multimeter into your regular checkups today—it’s a small investment that pays off by preventing costly breakdowns and keeping your appliances humming through the years.
Lessons Only Experience Can Teach About Smart Appliances
One of the biggest surprises I encountered was realizing that seasoned appliance maintenance involves more than following a checklist; it’s about understanding your device’s quirks and needs. For example, I once ignored firmware updates on my smart fridge, which led to several glitches. Now, I see updates as essential as cleaning coils—crucial to longevity and performance.
Another lightbulb moment was discovering that not all cleaning agents are compatible with all appliances. I used harsh chemicals on my washer, which caused early wear. Since then, I’ve learned to research manufacturer-approved cleaners—saving me time and costly repairs.
The most profound lesson? That routine inspections and proactive troubleshooting can prevent small issues from snowballing. Setting reminders for filter changes or software checks keeps my appliances humming for years, much longer than I initially anticipated.
My Go-To Resources for Appliance Wisdom
First, Smart Appliance Review offers clear, comprehensive guides that resonate with my hands-on approach. Their detailed troubleshooting tips have saved me visits from technicians more than once.
Second, I trust the community-based discussions on Reddit’s appliance forums. Sharing real-world experiences helps me stay ahead of potential issues and discover innovative solutions I wouldn’t find in manuals.
Third, I rely on manufacturer websites for firmware updates and official maintenance videos. Knowing that I get the most accurate and up-to-date information gives me confidence in my DIY efforts.
Your Next Step in Appliance Mastery Starts Now
Empower yourself to transform appliance headaches into opportunities for mastery. With just a bit of knowledge and the right tools, you can extend the life of your smart appliances and enjoy a more efficient, hassle-free kitchen.
What’s one appliance tip you wish you had learned earlier? Share your experience below and let’s learn together!