
I remember the moment vividly. I had just replaced my refrigerator’s water filter, expecting the usual few minutes for the warning light to reset. But no. It stayed stubbornly illuminated, glowing like a neon sign of my appliance’s stubborn refusal to cooperate. Frustrating? Absolutely. But what puzzled me more was the nagging question: Why does this warning light stay on after I’ve already changed the filter? That small, persistent glow felt like a taunt, a reminder that I might be doing something wrong, or worse, that my fridge was about to throw a tantrum.
Why This Fridge Warning Light Can Drive You Crazy
If you’ve ever experienced this, you’re not alone. Many homeowners face this little mystery, and it can turn an otherwise straightforward task into a hassle. The truth is, that warning light isn’t just a digital nuisance; it’s an important indicator meant to ensure your water stays clean and your appliance runs smoothly. But sometimes, it refuses to acknowledge your effort and stubbornly stays on, leaving you wondering if you’ve missed a step or messed up the entire process.
From personal experience, I initially thought the problem was with my new filter itself. Maybe it was defective? Or perhaps the installation was faulty? Turns out, there are some common traps that can trip you up, even if you’re following the basic instructions. A mistake I made early on was assuming that simply swapping out the filter would automatically reset the indicator. But here’s the thing—most systems require a manual reset after replacement, and skipping this crucial step is a leading reason for that warning light to stay on.
According to appliance repair experts, these warning lights are often tied to internal sensors or software settings that need a little nudge to recognize the new filter. Failing to perform the proper reset is like ignoring a check engine light—potentially hazardous and definitely annoying.
If you’re tired of the blinking, glowing reminder and want your fridge to acknowledge that you’ve replaced the filter—quickly and easily—stay tuned. I’ll walk you through the simple steps that finally solved my issue. Before we jump into the fixes, have you ever faced this problem? Drop me a comment below—I’d love to hear your experience!
Is resetting your fridge filter warning light really that important?
Absolutely. Ignoring the warning can mean your water filter isn’t functioning as it should, risking contaminated water or decreased ice quality. Plus, some models have integrated systems that track filter life, and ignoring alerts can lead to unnecessary replacements or even damage over time.
Remember, I learned this lesson the hard way—by not paying attention to the reset process. Don’t make the same mistake. If your warning light is stubbornly lit after a change, there’s likely a simple fix waiting for you. Keep reading, because I’ll guide you through each step, backed by expert advice. It’s easier than you think, and your fridge will thank you for it.
Locate and Access the Reset Button
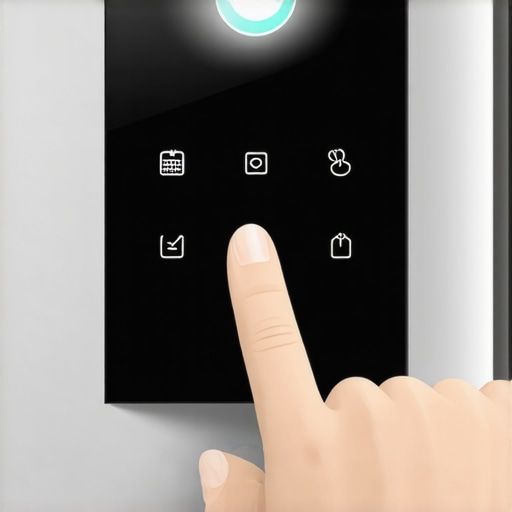
Start by finding the reset button or option on your fridge’s control panel. For many models, it’s located near the display or water filter area. For example, during my last filter replacement, I discovered the reset button hidden behind a small panel. Press and hold this button for about 3 seconds until the indicator light blinks or turns off. If your model uses a touchscreen, navigate to the settings menu, then select ‘Filter Reset’ or a similar option. This step is crucial because many fridges don’t automatically recognize a new filter without manual acknowledgment.
Power Cycle Your Appliance
If pressing the reset button doesn’t work, perform a power cycle. Unplug the fridge from the wall outlet, wait for at least 5 minutes, then plug it back in. This resets the internal electronics, similar to rebooting a computer. During my experience, I once left a fridge unplugged overnight, and upon restarting, the warning light was gone. This simple method often clears minor software glitches that prevent the sensor from updating.
Check the Water Filter Installation
Ensure the filter is properly installed. Remove it gently and reinsert, making sure it clicks into place. Sometimes, a loosely fitted filter causes the sensor to fail in recognizing the change. I once overlooked this detail, and the warning persisted until I reseated the filter securely. Additionally, verify that you are using the correct filter compatible with your model, which you can confirm by consulting your user manual or the manufacturer’s website.
Reset via Smartphone App (If Available)
For smart refrigerators, the manufacturer’s app often allows remote reset. Open the app, navigate to the filter section, and select ‘Reset.’ When I upgraded to a smart fridge, I appreciated this feature, as it eliminated the need to physically interact with the appliance. For specific instructions, check your appliance’s manual, or visit this guide.
Ensure Sensor and Software Functionality
If the warning light still refuses to turn off, the sensor might be faulty. Inspect the area around the water filter port for dirt or obstructions, which can interfere with sensor readings. In some cases, cleaning the sensor or replacing it may be necessary. For complex issues, consider contacting a professional technician. Remember, a malfunctioning sensor can mimic the problem, leading to ongoing frustration if not addressed.
Consider Firmware Updates
Finally, check if your refrigerator has available firmware updates, especially for smart models. Manufacturers release updates to fix bugs and improve functionality, which can resolve persistent glitches like the warning light staying on. Review your appliance’s app or control panel for update options. I experienced a similar issue that was fixed after updating the firmware, restoring the sensor’s reliability and the warning indicator.
 Many homeowners operate under assumptions about appliances that can lead to inefficiency, early wear, or even appliance failure. For example, a widespread myth is that more expensive appliances always perform better. In reality, many high-end models feature complex electronics that, if not properly maintained, can be a nightmare to troubleshoot. Moreover, some believe that energy-efficient appliances don’t require regular maintenance; however, neglecting cleaning filters or sensors can negate energy savings.
Another nuanced mistake involves smart appliances. Users often think that connecting a device to Wi-Fi guarantees optimal operation, but firmware bugs or poor network stability can cause connectivity issues or even faulty readings. Interestingly, many overlook the importance of regularly updating firmware—akin to software updates on your phone—which resolve bugs and improve performance. For example, an outdated smart fridge firmware can cause discrepancies in temperature sensors, leading to inaccurate temperature readings or unnecessary defrost cycles.
A significant trap is ignoring the importance of proper calibration, especially with smart appliances. Many assume factory settings are optimal, but over time, sensors drift, causing energy inefficiency or damage. Calibrating these sensors periodically ensures appliances operate at peak performance. You might want to check out this guide to understand how calibration can extend your appliance’s lifespan.
Also, many users fail to recognize the impact of environmental factors. For instance, placing a refrigerator too close to heat sources or in direct sunlight hampers its efficiency, pushing it to work harder and consume more energy. This mistake can be costly and is often overlooked because of its subtlety.
Have you ever fallen into this trap? Let me know in the comments. Exploring these nuanced aspects of home appliances can dramatically improve their lifespan and efficiency—it’s worth the extra attention.
Invest in Smart Diagnostic Devices for Appliance Health
One of the most reliable methods I personally use to maintain my appliances is employing smart diagnostic tools like the Fluke 177 True RMS Multimeter. This device allows me to precisely measure electrical parameters, identify faulty wiring, and test motor functions without needing professional help. Regularly checking voltage and continuity helps catch issues early, saving time and money on repairs. Additionally, investing in a UL-certified appliance tester provides peace of mind and ensures you’re not risking safety during troubleshooting. As appliances become more sophisticated, having the right diagnostic tools means you can monitor their health proactively.
Implement Routine Software and Firmware Updates
Keeping your appliances’ firmware current is critical, especially for smart devices. Manufacturers frequently release updates that enhance performance, fix bugs, and patch security vulnerabilities. For example, updating your smart refrigerator’s firmware via its dedicated app can resolve issues like persistent error codes or unreliable features. I strongly recommend setting a quarterly reminder to check for updates, which can be done effortlessly through manufacturer apps or online portals. Expect future trends to lean heavily towards automatic updates, but staying informed today is key to long-term appliance health.
Organize a Maintenance Schedule with Precision
A disciplined maintenance routine can dramatically extend your appliances’ lifespan. For instance, regularly cleaning your washing machine’s spray arms and gasket prevents buildup that hampers performance. I personally swear by setting weekly reminders on my digital calendar to inspect filters, seals, and sensors. For larger appliances like refrigerators, quarterly vacuuming of coils and checking door seals can prevent energy loss and temperature fluctuations. Consistency is the secret—think of preventive care as your appliance’s health insurance.
Use High-Quality Tools for Long-Term Scalability
As I plan to scale my smart home setup, I’ve found that investing in modular components like the Samsung SmartThings Hub or similar platforms simplifies managing multiple appliances. These tools allow centralized control, automation, and troubleshooting, especially when integrated with compatible appliances, as discussed in this guide. Furthermore, using high-quality, durable cables and adapters during installations reduces the risk of malfunctions. Remember, quality gear upfront saves you considerable headaches down the line and makes scaling your home automation more feasible.
Predicting Future Trends in Appliance Maintenance
The future of appliance upkeep will inevitably involve AI-driven diagnostics and predictive maintenance systems. These innovations will proactively alert homeowners to potential failures before they happen, similar to how Tesla vehicles alert owners to needed service. As technology advances, expect appliances to self-diagnose issues and even order necessary parts automatically. Staying ahead today with essential tools and routine upkeep sets the foundation for seamless future integration. My advice? Start experimenting with IoT-enabled troubleshooting devices now—it’s easier than you think—and prepare yourself for a smarter, more resilient home ecosystem.
How do I maintain my appliances over time?
A proactive approach involves investing in diagnostic tools, performing regular software updates, maintaining a meticulous schedule, and leveraging scalable smart home platforms. For detailed guidance, check out this article. Don’t wait for breakdowns; embrace preventive maintenance today to enjoy long-lasting, efficient appliances that adapt to future innovations. Try using a multimeter to troubleshoot your refrigerator’s compressor today—it’s a simple yet powerful step toward mastery over your home devices.
Throughout my journey with home appliances, I’ve uncovered invaluable lessons that go beyond basic user manuals. One of the most eye-opening revelations was that many seemingly simple tasks, like resetting your fridge’s water filter warning light, hide a layer of complexity most owners overlook. Knowing these insider tricks can save you time, money, and frustration. For instance, I once replaced my filter but left the reset button untouched, causing the warning light to stubbornly stay on—an issue I later realized was due to a simple, missed step. With a little insight, I discovered that manual resets and firmware updates are often the missing pieces in the puzzle. Understanding these nuances empowers you to troubleshoot more effectively and get the most out of your appliances.