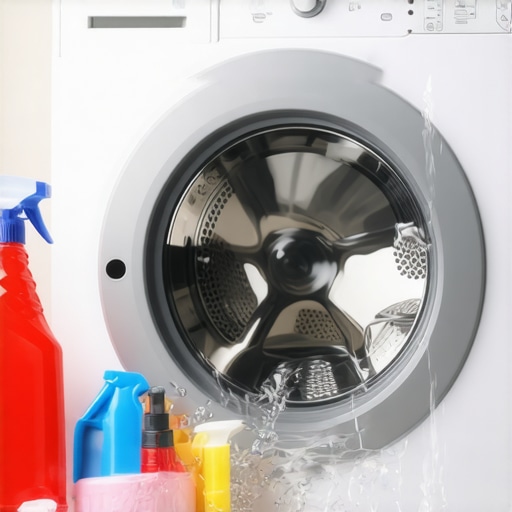
It hit me one morning as I reached into my laundry room: that stubborn white film building up inside my washing machine was not only unsightly but also reducing its efficiency. I had ignored it for too long, believing it was just a minor nuisance. Little did I know, those hard water stains could silently damage my appliance over time. If you’ve ever opened your washer and been greeted by a cloudy, crusty buildup, you’re not alone—it’s a common frustration for homeowners in areas with hard water. But here’s the good news: there’s an effective, straightforward way to remove those stains and keep your washing machine running smoothly.
Why Cleaning Hard Water Stains Matters More Than You Think
Hard water contains minerals like calcium and magnesium that leave residue on appliances, leading to stubborn deposits known as limescale. Not only do these stains look unappealing, but they can also interfere with your appliance’s performance, causing issues like longer wash cycles, unpleasant odors, and even mechanical wear. In fact, a study highlighted that mineral buildup can increase energy consumption and decrease the lifespan of your washing machine (source). Ignoring these signs is like neglecting a small crack—eventually, it becomes a hefty problem.
I used to make the mistake of only rinsing my washer drum with water after noticing the buildup. Trust me, that’s not enough. Proper cleaning involves more than a quick wipe—it requires a targeted approach to dissolve and remove mineral deposits at their root. Today, I’m here to share the exact method I’ve perfected over years of trial, error, and finally, success. If your machine is starting to look like mine once did, stick around. We’re going to get those stains gone for good and restore your washer’s efficiency.
Is The Hype Around Home Appliance Cleaning Actually Worth It?
I used to think that regular cleaning products could handle mineral buildup, but I learned the hard way that cheap solutions only scratch the surface. The real trick is using a combination of natural descaling agents and specific techniques designed to target hard water residue. It’s a simple method, but one I wish I’d adopted sooner, saving me money and extending the life of my appliances. If you’re skeptical, I completely get it—sometimes these tips sound too good to be true. But I promise, with just a little effort, you’ll see remarkable results.
If you’ve ever faced the frustration of stubborn stains, you’re not alone. And don’t worry—help is just a few steps away. Ready to say goodbye to that unsightly buildup and keep your washer in top shape? Let’s dive into the proven process to banish hard water stains once and for all.
Empty and Prepare Your Washing Machine
Start by ensuring your washing machine is empty to allow full access to the drum and internal parts. Turn off the machine and unplug it to prevent any electrical hazards. Remove any soap dispensers or agitator parts if accessible; these can harbor mineral deposits. Think of your washing machine as a car engine—you need to clear the area to get a thorough clean.
Choose the Right Descaling Solution
Use natural descaling agents like white vinegar or commercial descalers designed for appliances. Personally, I prefer vinegar because it’s effective and eco-friendly. Fill the detergent compartment with two cups of white vinegar or pour it directly into the drum. For particularly stubborn stains, a commercial descaler with citric acid can provide a more powerful solution. Avoid using harsh chemicals that can damage rubber seals or plastic components.
Run a Hot Water Cycle with the Solution
Set your washing machine to the hottest cycle available—ideally around 90°C (194°F). Start the cycle and let it run its full duration. The hot water helps dissolve mineral deposits, while the vinegar or descaler breaks down hard water stains. During this process, the solution circulates through the internal components, loosening buildup much like a cleaning storm for your appliance. I once did this with a particularly crusty washer; the stains visibly loosened after just 10 minutes into the cycle.
Manually Scrub Remaining Deposits
If stains persist, pause the cycle after a few minutes and open the door. Dampen a soft cloth or sponge with vinegar and gently scrub the inside surfaces, focusing on the drum edges, rubber gasket, and door seal where mineral deposits cling. Use a toothbrush to reach tight spots. Think of this as giving your washer an ultrasonic cleaning—vital for removing stubborn residue. Be cautious not to damage seals, but a gentle scrub makes a significant difference.
Run an Additional Rinse Cycle
Once the initial cleaning is complete, run another hot water rinse without any detergent or cleaning agents. This flushes out any remaining descaling solution and dislodged minerals. It’s like rinsing your hair after a deep shampoo. I find that running this extra cycle ensures all residues are gone, leaving your washer fresh and stain-free.
Dealing with Persistent Buildup
If mineral deposits are exceptionally resistant, repeat the descaling process a second time or try a stronger commercial product. Regular maintenance—once a month—can prevent more severe buildup. For appliances in hard water zones, consider installing a water softener or using protective filters. These steps not only keep your washer cleaner longer but also extend its lifespan, much like regular oil changes preserve a vehicle’s engine.
As a Bonus, Clean the Dispenser and Filter
Remove and soak the soap dispenser in vinegar for 15 minutes, then scrub with an old toothbrush. Similarly, check the inlet filters for mineral clogging and clean them to ensure proper water flow. This holistic approach guarantees your washing machine stays efficient and stain-free, similar to how maintaining your home’s HVAC system ensures optimal performance.
If you’re interested in modernizing your laundry setup, check out the latest smart appliances for a seamless home experience. Staying updated can help maintain appliances like your washing machine with minimal effort and maximum efficiency.
Many homeowners operate under misconceptions about their appliances, often simplifying complex technology into oversimplified beliefs. For example, a widespread myth is that all washing machines are equally energy-efficient; however, expert insights reveal that inverter technology and load-sensing features significantly impact actual energy savings, which many consumers overlook. This misconception can lead to choosing models based solely on advertised capacity rather than true efficiency.
Another common mistake involves dishwashers—many think pre-rinsing dishes is necessary for optimal cleaning. In reality, modern dishwashers are designed to handle lightly soiled plates without rinsing, and doing so wastes water and energy. Manufacturers now recommend skipping the rinse cycle altogether to maximize efficiency, a fact that surprises many users and can lead to unnecessary utility bills.
In the realm of refrigerators, a frequent misconception is that a higher price guarantees better performance or longer lifespan. Yet, cutting-edge features like adaptive temperature control and smart diagnostics are more indicative of value than price alone. Consumers often miss these nuances, opting for cheap models that lack essential technology, which can lead to increased energy costs and frequent repairs.
Smart appliances promise to revolutionize home living, but many users remain unaware of their advanced capabilities. For instance, many forget to utilize features such as remote diagnostics or app-based maintenance alerts, which can preempt costly repairs and extend appliance lifespan. This oversight stems from a lack of understanding rather than technology limitations.
Now, let’s tackle an advanced question: How do inverter motors and variable-frequency drives influence the longevity and energy consumption of appliances? Contrary to the simplistic belief that these features only boost efficiency, industry experts argue they also reduce mechanical stress, leading to longer-lasting motors, provided the appliances are properly maintained.
The trap here is assuming that newer technology always equals durability. Reality shows that user habits significantly influence appliance lifespan, regardless of tech sophistication. Regular maintenance—like cleaning condenser coils or firmware updates—can prevent hidden degradations, which many homeowners neglect, thinking high tech will compensate for poor upkeep.
In conclusion, peeling back the layers of branding and marketing reveals many myths—from energy claims to maintenance tips—that can mislead consumers. Being aware of these nuances ensures smarter choices, better appliance lifespan, and genuine savings. Have you ever fallen into this trap? Let me know in the comments.When it comes to maintaining your household appliances, having the right tools and a solid routine can make all the difference. I personally rely on a few specific items that have proven invaluable in keeping my washers, dishwashers, and refrigerators in top condition. One essential tool is a **digital infrared thermometer**. I use this to quickly check the temperature of my refrigerator and freezer, ensuring they’re operating within optimal ranges and avoiding unnecessary energy consumption. For example, a thermometer like the **Habor Infrared Thermometer** allows me to spot cold spots or overheating components without opening the door excessively. Additionally, I keep a **small, flexible brush set** handy, which is perfect for cleaning the spray arms of dishwashers or the condenser coils of refrigerators. This ensures that debris and mineral deposits don’t hinder appliance performance.
Another routine I follow involves **software maintenance** for smart appliances. Regular firmware updates—often overlooked—are crucial for security and improved functionality. I make it a point to check the manufacturer’s app or website monthly for updates for my smart washing machine or refrigerator, which can include bug fixes, new features, or security patches. This practice extends the lifespan of your appliances and ensures you’re benefiting from the latest technology.
Looking ahead, I predict that as smart home appliances become more integrated, diagnostic tools will evolve to offer more proactive maintenance alerts. Future devices might self-report issues or even schedule service appointments automatically, reducing downtime and repair costs.
How do I maintain my appliances over time?
To keep your appliances functioning efficiently, I recommend establishing a monthly maintenance routine. This should include cleaning filters, inspecting seals and hoses for signs of wear, and running descaling cycles with natural solutions like white vinegar. For example, [industry experts](https://smartappliancereview.com/why-your-high-efficiency-washer-smells-like-rotten-eggs) suggest that preventative measures such as these can prevent costly repairs down the line. One advanced tip I encourage trying is setting a reminder to run an automated firmware check for your smart appliances every three months. This small step can catch potential issues early before they turn into major problems, ensuring longevity and optimal performance for years to come.
Investing in the right tools and establishing a consistent maintenance schedule can dramatically reduce the likelihood of unexpected breakdowns. Start with a simple infrared thermometer and a flexible cleaning brush, then explore the manufacturer’s software updates. Making these practices a habit will keep your appliances reliable and efficient long-term. If you need tailored advice on specific appliances, don’t hesitate to reach out through our [contact page](https://smartappliancereview.com/contact-us).
Behind the Curtain of Appliance Care: Personal Lessons Learned
One of the most eye-opening lessons I encountered was realizing that neglecting minor mineral buildup can silently sabotage your appliances over time, leading to costly repairs and inefficiencies. I used to dismiss those stubborn stains, thinking they were just cosmetic. But I discovered that maintaining a proactive cleaning routine not only extends the lifespan of your washing machine and dishwasher but also saves you money in the long run.
Another insight was understanding that natural descaling agents like vinegar are powerful allies in combating hard water deposits. Relying solely on commercial cleaners sometimes masks the underlying issue, and failing to address it can lead to persistent problems. Embracing simple, eco-friendly solutions transformed my approach to appliance upkeep and empowered me to troubleshoot issues with confidence.
The biggest lightbulb moment was realizing that regular maintenance—such as cleaning filters, descaling components, and inspecting seals—is crucial. It’s easy to assume appliances are self-sufficient, but diligent upkeep prevents minor issues from escalating. Investing a few minutes monthly has paid dividends through improved performance and peace of mind.
Lastly, I’ve learned that smart appliances equipped with firmware updates and diagnostic features can help catch problems early when combined with routine manual care. Staying informed about your specific model’s needs ensures you maximize functionality and longevity, making your household smarter and more efficient.