
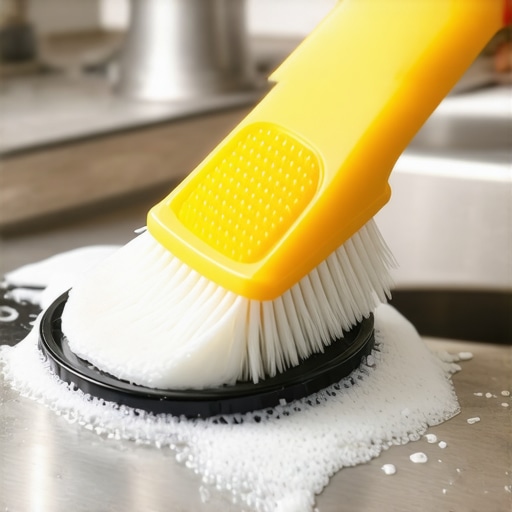
Ever had that moment when you open your washing machine and are hit with a whiff so foul it makes your eyes water? I’ve been there. It’s one of those sneaky household annoyances that you try to ignore but ends up dominating your laundry routine. The rubber gasket, the little seal around the door, is often the culprit behind that persistent, musty odor that refuses to go away no matter how many sprays or odors eliminators you try.
Why a Smelly Gasket Can Ruin Laundry Day (And Your Mood)
That bitter smell isn’t just annoying — it can signal mold, mildew, or bacteria lurking deep within the folds of your gasket. Not only does this compromise the fresh scent of your clean clothes, but it could also pose health risks, especially for allergy sufferers or those with respiratory issues. I learned this the hard way early on, when I ignored the buildup and kept washing with the same neglected gasket. My allergies worsened, and I wondered if my machine was slowly turning into a germ factory.
Here’s the thing: cleaning the gasket isn’t just about freshening up your laundry space. It’s about protecting your health and extending the life of your appliance. That’s why I’ve made it my mission to find the best method to banish that smell for good. After testing different techniques, I discovered a straightforward, effective way that’s easy to do on a weekend afternoon. And trust me, once you do it, you’ll wonder why you didn’t tackle this sooner.
In this post, I’ll share exactly how to eliminate that persistent, stinky gunk once and for all. No guesswork, no expensive cleaners, just a simple routine that can save you hours of frustration down the line. Ready to breathe easily again? Let’s dive into the solution that finally sorted my laundry woes.
Is cleaning your gasket worth all the fuss? You might be surprised.
Early on, I thought scrubbing was enough, but I made a mistake of using harsh chemicals that damaged the rubber over time. Now, I prefer gentle, natural solutions that preserve the gasket’s elasticity and prevent future mold growth. Want tips on choosing the right cleaning products? Check out my guide on how to pick the best cleaning agents for your appliances.
So, if you’ve faced the same swampy smell, know that a good cleaning routine can make all the difference. Up next, I’ll walk you through the exact steps to keep that gasket fresh and odor-free, so your laundry—and mood—stay bright and clean.
Start with a thorough inspection of the gasket
Open your washing machine door and carefully examine the rubber seal. Look for visible mold, soap scum, lint, or discoloration. I once ignored this step and ended up spreading dirt during cleaning, which made the odor worse. Check the folds and crevices where gunk hides.
Gather your cleaning supplies and prepare a cleaning solution
Use a mixture of equal parts white vinegar and water, or opt for a gentle dish soap diluted in warm water. Avoid harsh chemicals that can degrade the rubber. I prefer vinegar because it naturally dissolves mold and mildew without harmful residues. Have a soft cloth, an old toothbrush, and a spray bottle ready.
Spray and wipe the gasket effectively
Spritz the cleaning solution generously around the gasket, paying close attention to the folds. Use the toothbrush to scrub stubborn spots, dislodging soap scum and mold. Remember, don’t be tempted to use steel wool or abrasive pads—they can scratch and damage the rubber over time. I learned this by accidentally scratching my gasket during an aggressive scrub.
Remove accumulated debris and mold
After scrubbing, wipe the gasket thoroughly with a damp cloth. For stubborn mold or residue, dip the cloth into the vinegar solution and repeat. Make sure to clean all crevices because mold thrives in hidden spots. I once missed a fold, and my smell persisted until I gave it a second, detailed clean.
Dry the gasket and prevent future odor
Use a dry towel or paper towels to thoroughly dry the gasket. Moisture promotes mold growth, so eliminating water left behind is crucial. To keep your gasket fresh longer, leave the washing machine door slightly ajar after each wash, allowing air circulation. I adopted this habit and noticed a significant reduction in mold buildup.
Run an extra rinse cycle for final sanitation
Set your washing machine to perform an empty hot wash or rinse cycle. This helps flush out any remaining soap, mold spores, or residues. I recommend doing this monthly. It’s like giving your machine a shower—refreshing and preventing that musty smell from returning.
Adopt a cleaning routine to maintain freshness
Schedule monthly gasket checks and cleanings. Keep the door open when the machine is idle to promote airflow. Consider using natural anti-mold sprays for added protection. Remember, a routine prevents buildup rather than trying to clean a severely contaminated gasket later. My experience shows that consistency beats reactive cleaning every time.
Even seasoned homeowners often assume that appliances like washing machines and refrigerators are straightforward to operate and maintain, but in reality, there are subtle complexities many overlook. One common misconception is that all cycles or settings are created equal; however, choosing the wrong wash cycle or temperature can significantly impact both appliance longevity and cleaning efficiency. For instance, using standard settings for delicate fabrics can cause wear, while overly aggressive cycles may damage your machine or waste energy. Exploring expert advice, you might find that selecting specific cycles based on laundry type extends your appliance’s life and saves money, a nuance many miss. Additionally, a frequent trap is neglecting routine maintenance; many assume that only major repairs demand attention, but simple tasks like clearing drainage filters or inspecting door seals prevent costly issues. In fact, ignoring these minor steps can accelerate wear and lead to mold or odors, as seen with refrigerator drip trays or washer gaskets. Make no mistake: understanding these micro-optimizations is essential for maximizing appliance performance.
How can advanced washing machine technologies truly optimize your laundry routine?’
Modern smart appliances incorporate features like adaptive wash cycles, load sensors, and moisture detection to tailor operation precisely, but their effectiveness depends on correct usage. A study by the National Association of Home Builders highlights that users unfamiliar with these features often disable or ignore them, nullifying their benefits. For example, overloading a smart washer with too many items can prevent sensors from accurately gauging load size, leading to inefficient cycles or incomplete cleaning. Likewise, relying solely on default settings without customizing according to fabric and soil level diminishes potential savings in water, energy, and wear. To truly leverage these innovations, homeowners need to educate themselves on optimal operation and calibration, rather than assuming ‘set and forget.’ For further insights into future technological enhancements, check out the evolving trends in home appliance innovations for 2025. Mastering the micro-details can transform routine chores into energy-efficient, cost-effective tasks that preserve your appliances longer. Have you ever fallen into this trap? Let me know in the comments.
Invest in Quality Maintenance Tools for Longevity
Keeping your appliances in top shape requires the right instruments. I personally swear by a reliable digital multimeter, which aids me in diagnosing electrical issues quickly. For example, when my smart refrigerator started acting up, testing the voltage at various connectors helped pinpoint a faulty sensor—saving me from costly repairs. Investing in a set of precision screwdrivers and a nylon brush complements these diagnostics, allowing thorough cleaning of critical components without risking damage.
Why I Recommend a Digital Multimeter
This compact device provides real-time voltage, current, and resistance readings, essential for troubleshooting complex appliance systems. I use mine regularly to verify connections, test sensors, and ensure wiring integrity. As appliance electronics become more sophisticated, having a multimeter becomes even more crucial to prevent minor issues from escalating.
Embrace Smart Diagnostics and Monitoring Software
Modern appliances often feature built-in diagnostics or can connect to dedicated apps. I’ve found that regularly monitoring usage stats and error codes through manufacturer apps or third-party platforms helps catch problems early. For instance, my smart dishwasher’s app notified me of a slight decline in performance, prompting me to clean its filter before a full breakdown. Such proactive measures extend the lifespan of appliances and reduce unexpected downtimes.
Future Trends in Appliance Maintenance
Advancements point toward AI-powered diagnostics and predictive maintenance. Companies are developing systems that analyze usage patterns and sensor data to forecast failures before they happen. According to industry experts, integrating these tools will become standard in home appliances over the next few years, drastically reducing maintenance costs and downtime. To stay ahead, consider investing in appliances with these features or upgrading your current units accordingly.
Streamline Long-Term Care with Scheduled Checks and Calibration
Performing routine inspections, such as cleaning condenser coils or recalibrating temperature sensors, can be the difference between an appliance that lasts a decade and one that fails prematurely. For example, regularly cleaning refrigerator coils with a specialized brush improves efficiency and prevents overheating, which is vital given the trend toward more energy-efficient models. I recommend setting reminders for these tasks, integrating them into your cleaning schedule to maintain peak performance.
How do I maintain my appliances over time?
Consistent monitoring combined with the right tools makes all the difference. Use diagnostic devices, keep firmware updated, and follow manufacturer maintenance guides. Staying informed through resources like this comprehensive guide will help you anticipate future needs and adapt your maintenance routines accordingly. My tip? Start with a quality multimeter and set a quarterly schedule to check critical components—it’s a game-changer for appliance longevity. Ready to give it a try? Incorporate these practices today and enjoy appliances that perform flawlessly for years to come.
What I Wish I Knew About Maintenance When I Started
One overlooked truth is that regular small checks can prevent costly repairs. I initially thought cleaning was enough, but learned that calibrating sensors and inspecting filters is just as vital. Small habits like these save time and money in the long run.
Another lesson is that understanding your appliance’s unique features, like smart diagnostics, turns routine maintenance into a proactive strategy. Ignoring them meant missing early signs of trouble, which could’ve been avoided with a bit of research.
Lastly, patience and consistency are crucial. I used to wait until problems escalated, but now I see that weekly quick checks dramatically extend appliance lifespan and keep things running smoothly.