
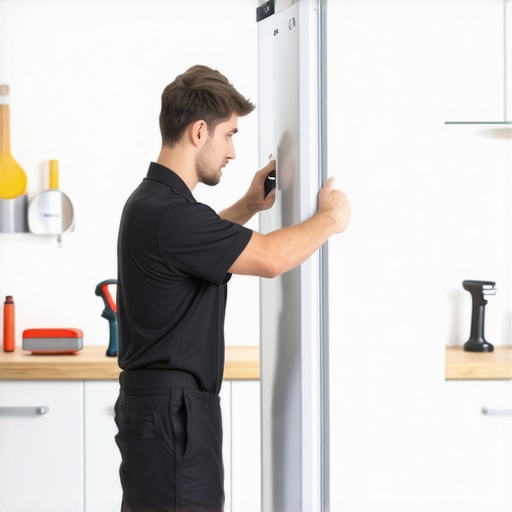
It was a morning just like any other when I finally realized my refrigerator door was facing the worst possible way for my kitchen layout. Every time I reached for that cold bottle or grabbed some leftovers, I’d bump into the island or strain to open it fully. That lightbulb moment hit hard—why hadn’t I fixed this simple issue before? That frustration spurred me to learn how to change the door swing on my own, and let me tell you, it’s a game-changer. Many homeowners don’t realize that adjusting the door direction is often easier than they fear, and it can dramatically improve your kitchen’s efficiency.
Your Home Should Fit Your Life, Not the Other Way Around
Many of us accept our kitchen layouts as is, even when they don’t quite suit our needs. A door that swings awkwardly can turn routine tasks into daily annoyances. When I first encountered this problem, I thought I needed to replace my refrigerator or hire a costly professional. Spoiler alert: a lot of the time, DIY fixes like reversing your fridge door are straightforward and budget-friendly. Making this change can give your space a fresh feel and make daily use more convenient. Plus, understanding how it’s done empowers you to tackle small home upgrades independently. For those considering a major appliance upgrade, check out the latest trends in refrigerators in 2025. But first, let’s focus on the simple steps to change your refrigerator door swing and reclaim your kitchen’s harmony.
Gather Your Tools and Prepare the Space
Before starting, unplug your refrigerator to ensure safety, and clear ample space around it to access all sides. Gather a Phillips-head screwdriver, a wrench, and possibly a putty knife or flat-head screwdriver for prying. Remember, safety first — avoid working on the appliance while it’s connected to power.
Locate the Door Hinge Components
Identify the upper and lower door hinges and note how they are attached. Typically, the hinges are secured with screws or bolts. Take a few photos for reference or organize the screws in separate containers to avoid confusion during reassembly. I once skipped this step and spent extra time figuring out which screw went where, causing a delay.
Remove the Refrigerator Door
Carefully unscrew the hinge screws using your screwdriver. Support the door with your hand to prevent it from falling once the hinge is loosened. Gently lift the door away from the appliance, noting how it sits on the hinge pins. This process is similar to removing a lid from a container — firm but gentle pressure prevents damage.
Reposition the Hinge Components
This is where the magic happens. Switch the hinge plates to the opposite side of the refrigerator. You might need to transfer certain components or swap their positions, depending on your model. Refer to your manufacturer’s manual or the photos you took earlier. During my DIY attempt, I lost a small screw — always double-check all parts before proceeding.
Attach the Door on the New Side
Align the door with the new hinge position, ensuring the hinge pins fit securely into the door’s hinge holes. Insert and tighten the hinge screws methodically, tightening all screws evenly to prevent misalignment. Test the door’s swing and adjust the hinge screws if necessary. I found that tightening one screw more than the others caused uneven rubbing against the frame, so go slow and check frequently.
Final Checks and Reassembly
Verify that the door swings smoothly without obstruction. Close and open it several times to confirm proper alignment. Reattach any additional components or trim panels. Plug your refrigerator back in and observe its operation. If you notice any strange noises or misalignments, revisit the hinge screws to fine-tune the position.
Doing this yourself not only saves money but also gives you a sense of accomplishment. Plus, it can improve your kitchen’s functionality, especially if the new door swing better suits your daily routine. For more tips on optimizing your appliances, explore the latest refrigerator features for 2025.
Many homeowners operate under popular myths about appliances, especially smart ones, which can lead to suboptimal performance and even increased costs. Let’s explore some of these misconceptions and reveal the nuanced truths that can save you time, money, and frustration.
Why Believing Bigger Is Always Better Could Hurt Your Efficiency
One widespread assumption is that larger appliances automatically translate to better performance. In reality, overestimating capacity often results in unnecessary energy consumption and clutter. Experts from the Home Appliance Research Institute suggest choosing appliances that match your actual needs rather than the largest size available, ensuring optimal efficiency and cost savings. For instance, a compact fridge might be more suitable for small households, reducing energy usage and freeing up space. Curious about space-saving options? Check out space-efficient appliances for small kitchens.
Common Pitfall: Overlooking Compatibility and Integration
Many people assume that new appliances will seamlessly integrate with their existing smart home systems. However, compatibility issues often occur, especially with different brands or outdated firmware. This mismatch can cause connectivity problems or limit automation features. To avoid this, always verify the appliance’s compatibility with your hub or ecosystem before purchasing. For advanced users, understanding the communication protocols—like Zigbee or Z-Wave—can be crucial for smooth integration. For insights on making your smart appliances work harmoniously, visit ultimate smart home appliance guide.
Avoid These Home Appliance Troubles: The Hidden Traps
One trap many overlook is neglecting regular maintenance, which is critical for longevity and optimal function. For example, failing to clean filters in dishwashers or ice makers can impair efficiency and cause breakdowns. Additionally, improper installation—such as incorrect door reversals or misaligned seals—can diminish performance and lead to costly repairs. Always follow manufacturer guidelines and schedule routine check-ups. Further, beware of the myth that all smart appliances are immune to hacking; ensuring your network security and updating firmware are vital, as emphasized by cybersecurity experts. For more on keeping your smart appliances secure, see privacy and security for smart devices. “Have you ever fallen into this trap? Let me know in the comments.” Maintaining your home appliances over time requires the right tools and consistent routines to ensure longevity and optimal performance. I personally swear by a few specialized instruments that make routine checks quick and effective. For instance, a digital multimeter is indispensable for diagnosing electrical issues in refrigerators and washing machines, allowing you to measure voltage levels precisely. I use a Fluke 115 multimeter because of its reliability and ease of use, which helps me quickly identify whether a appliance’s power supply is functioning correctly. Additionally, a microfiber cloth combined with a gentle cleaning solution is my go-to for maintaining touchscreen panels on smart appliances, preventing dirt buildup that can impair functionality.
Regularly inspecting door seals and gaskets can prevent energy loss and reduce strain on motors; for this, I recommend a plastic scraper to safely remove debris without damaging rubber components. When it comes to software maintenance, investing in a reputable appliance management app like Smart Home Manager allows me to set reminders for firmware updates and troubleshoot alerts directly from my phone, ensuring my appliances are always up-to-date.
Looking ahead, I believe the trend towards integrated diagnostic tools within appliances will become more prevalent, enabling real-time health reports and predictive maintenance. This shift will empower homeowners to catch issues early, saving money and avoiding inconvenient breakdowns.
**How do I keep my appliances in top shape over the long term?** Consistent cleaning, routine part checks, and embracing smart diagnostics are key. For example, regularly cleaning the dishwasher’s filter with a specialized cleaner can prevent odors and improve cleaning performance. I suggest trying out a cleaning cycle with a commercial appliance cleaner every few months to maintain peak efficiency; it’s a small step that pays off big in appliance lifespan.
If you want to streamline your maintenance routine further, I highly recommend integrating smart appliance apps, which can alert you to potential issues before they become costly repairs. For instance, many modern refrigerators now notify you via email or app when certain components need attention, such as compressor issues or filter replacements. Exploring these tools on sites like [smartappliancereview.com](https://smartappliancereview.com/ultimate-guide-to-smart-home-appliances-for-a-modern-living) can provide tailored advice.
To get started, try scheduling a firmware update on your smart refrigerator this weekend. It’s a straightforward step that ensures your appliance benefits from the latest features and security patches, as recommended by industry standards and expert reviews. Regular maintenance with the right tools and digital support will keep your appliances running smoothly for years to come. For more advanced tips, check out how smart washing machines simplify laundry and elevate your home efficiency.
The Hardest Lesson I Learned About Smart Appliances
One glaring misconception I held was that all adjustments, like reversing a fridge door, required professional help or costly replacements. I discovered that many home appliance tweaks are straightforward, saving time and money. Initially, I underestimated the importance of understanding your appliance’s design; taking the time to read the manual or consult manufacturer resources can prevent frustration and damage. This realization pushed me to become more proactive in my appliance maintenance, turning small fixes into opportunities for learning and empowerment.
Tools and Tricks That Transformed My Approach
Over the years, I curated a toolkit that significantly improved my DIY repairs, including a sturdy Phillips-head screwdriver, a multimeter I trust for electrical checks, and a soft microfiber cloth for delicate surfaces. These tools, coupled with reliable sources like comprehensive guides, have empowered me to tackle issues confidently. They’ve also helped me stay ahead of potential problems, rather than reacting to appliance failures.
Built Confidence Through Routine Care and Smart Tech
Regular maintenance, such as cleaning filters and recalibrating sensors, became less daunting when I integrated smart diagnostics and routine schedules via apps. The peace of mind knowing my appliances proactively alert me to issues has been invaluable. For example, firmware updates aren’t just tech upgrades—they’re essential home maintenance for smart appliances, ensuring security and performance. Investing in these habits has not only extended appliance lifespan but also enhanced my satisfaction in my home’s functionality.
Share Your Small Wins in Appliance Perfection
Have you ever fixed or improved an appliance on your own, surprising yourself with your resourcefulness? I’d love to hear your stories. These small victories build confidence and make home management a more rewarding experience. Comment below with your experiences or questions—together, we can make our smart kitchens even better!