
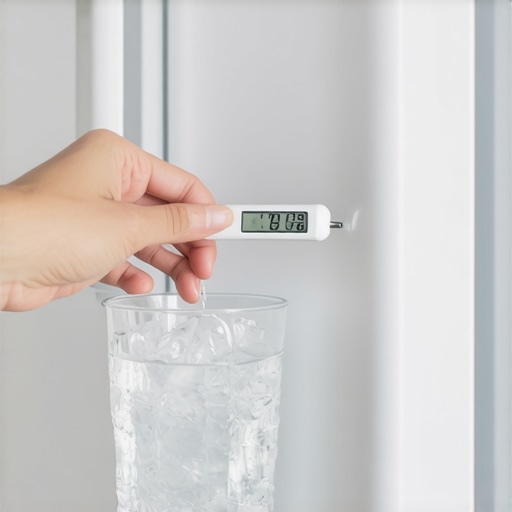
It happened on a Tuesday morning. I reached for my coffee, poured in a splash of milk, and watched in horror as white, chunky clumps floated to the surface. My high-end refrigerator insisted it was a crisp 37 degrees, but the curdled mess in my mug told a much grosser story. I felt totally betrayed by a machine that cost more than my first car. This wasn’t just about a ruined latte; it was about the realization that I had no idea if the expensive groceries I’d just bought were actually safe to eat. Most of us just trust the little digital number on the door, but after that morning, I learned the hard way that those sensors can drift, get blocked by a stray bag of spinach, or just plain fail. Today, I’m going to show you how to take control of your kitchen’s climate and ensure your food stays fresh without spending $150 on a professional service call.
Your Fridge Display Might Be Lying to You
The truth is, even the most expensive units on the market can have calibration issues. I’ve seen cases where a fridge freezes everything on the top shelf while the bottom drawers stay at a temperature that’s more ‘room temp’ than ‘cold storage.’ Early on, I made the mistake of assuming the factory settings were gospel, leading to weeks of wilted lettuce and questionable deli meat. According to the FDA, keeping your refrigerator at or below 40°F (4°C) is absolutely critical for slowing the growth of pathogenic bacteria like Salmonella and E. coli. If your thermometer is off by just a few degrees, you are essentially playing a risky game of ‘will I get sick today?’ Whether you are currently choosing the right refrigerator for a kitchen remodel or trying to keep an old relic alive, knowing the real internal temperature is the only way to be sure. I spent years trusting a $2 suction-cup thermometer that was actually 5 degrees off, which is a massive margin of error when it comes to food safety.
Is a DIY calibration actually worth the effort?
You might be wondering if you really need to go through the ‘hassle’ of an ice-bath test when you could just go buy a new thermometer and call it a day. I used to think the same thing—until I bought three different brands from a local hardware store and got three completely different readings. Skepticism is healthy, but trusting a faulty tool is just plain expensive. By the time we’re done here, you’ll know exactly how to verify your equipment using nothing more than a glass of ice water and a little bit of your time. Have you ever noticed your milk spoiling before the expiration date even though your settings say everything is fine? If that sounds familiar, you’re exactly where I was before I decided to stop guessing. Let’s get that fixed before your next trip to the grocery store. [image-placeholder]
Let’s Build a Bulletproof Calibration Tool
To get an honest reading, you need to create a ‘controlled environment’ inside your fridge. Think of it like a laboratory for your leftovers. You cannot just wave a thermometer in the air and hope for the best; air temperature fluctuates every single time the door swings open. You need to measure the temperature of a liquid that has been sitting in the environment long enough to stabilize. This mimics the actual internal temperature of your food, which is what matters for safety.
The Ice-Bath Test is Your Golden Standard
This is the most reliable way to verify any thermometer, whether it is a cheap analog dial or a high-tech digital probe. Fill a large glass with crushed ice—not just cubes, as you need maximum surface area contact—and add just enough cold water to fill the gaps. Stir it for a full minute. Your thermometer should read exactly 32°F (0°C). If it doesn’t, you’ve found your ‘offset.’ If your thermometer says 35°F in that ice bath, you know it is running 3 degrees high. I remember a particularly frustrating Sunday where I convinced myself my fridge was dying because the milk felt warm. I bought a laser thermometer and pointed it at the back wall, which read 28°F. I panicked and turned the temp up, only to have my vegetables turn into a block of ice by morning. Had I used the ice-bath method first, I would have realized the air sensor was just fine, but my shelving was blocked. 
Find the Dead Zones in Your Shelving
Once you know your thermometer is accurate, place that glass of water (without the ice now) in the center of the middle shelf. Leave it for 24 hours. This ‘thermal mass’ approach gives you a true average of your fridge’s performance. While you are waiting, check your airflow. If you have a habit of overstuffing your fridge, you are likely blocking the vents. Using the best refrigerator shelving hacks for more space isn’t just about aesthetics; it is about making sure cold air can actually reach every corner. If the air cannot circulate, your leafy greens will wilt on one side of the drawer while the other side stays perfectly crisp.
Recognizing When the Hardware is Failing
Sometimes, no amount of calibration can fix a deeper mechanical issue. If your readings are wildly inconsistent—say, 35°F one hour and 48°F the next—it might not be simple sensor drift. Listen to the machine. Is it making a loud whirring sound every hour? That could be a sign that the compressor is struggling to keep up with the demand. In other cases, you might find that your fridge fan motor is failing, which prevents the cold air from being distributed evenly regardless of what the digital display says. Before you start tearing panels off, check for the simple stuff: a clogged refrigerator drain line can lead to moisture buildup that messes with your internal humidity and temperature perception. If you see standing water under the crisper drawers, that is your first clue that the system is working against itself.
Calibrating a fridge is a great first step, but it is just the tip of the iceberg when it comes to mastering your kitchen and laundry room. If you think your high-tech gadgets are ‘set and forget,’ you are in for a frustrating—and potentially expensive—surprise. We often treat these machines as if they have human logic, but they are actually slaves to their sensors. I learned this the hard way when I upgraded to a full suite of connected devices, only to realize that my old habits were actually making my brand-new gear perform worse than the 20-year-old relics they replaced.
Stop Scouring Your Plates Before the Dishwasher Does It
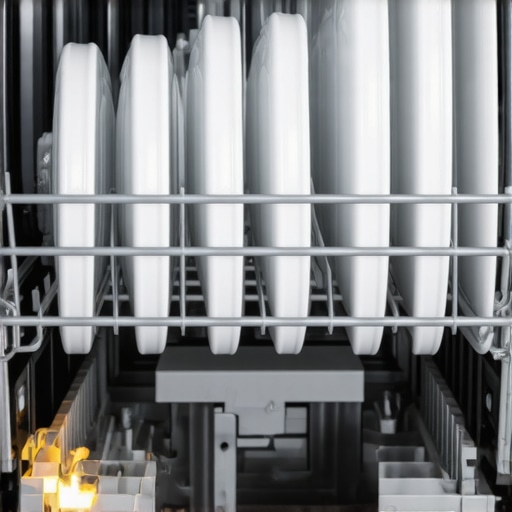
The most common mistake I see—and I’ve been guilty of it for a decade—is the ‘pre-rinse’ ritual. We’ve been conditioned to believe that a dishwasher can’t handle a stray piece of pasta or a smear of sauce. However, in the current smart appliances revolution, these machines rely on ‘turbidity sensors.’ These sensors measure how much gunk is floating in the water during the first few minutes of a cycle. If you load up perfectly clean, pre-rinsed plates, the sensor tells the computer the load is already clean, which triggers a shorter, cooler cycle. The result? Your dishes actually come out less sanitized than if you’d left the mess on. According to the Association of Home Appliance Manufacturers (AHAM), modern dishwashers are specifically engineered to tackle stuck-on food, and skipping the rinse can save up to 20 gallons of water per load. If you find your dishwasher detergent isn’t cleaning properly, it’s likely because the sensor didn’t think the water was dirty enough to fully activate the soap’s enzymes.
The Hidden Cost of Running Every Load on Eco-Mode
We all want to be environmentally conscious, but there is a nuance to ‘Eco-Mode’ that the manuals rarely explain in plain English. In my experience, using the eco-setting for every single load is a recipe for a service call. While these cycles are great for energy savings, they rely on lower water temperatures. Over time, these lukewarm washes allow fats and undissolved detergents to build up in the internal piping, creating a ‘biofilm.’ This is why so many high-efficiency washers smell like mold after just a few months of use. To keep your machine healthy, you have to break the cycle. I recommend running a ‘Heavy Duty’ or ‘Sanitize’ wash with hot water at least once a week. It clears out the gunk that the truth about eco mode on modern dishwashers often hides. If you ignore this, you’ll eventually find that your energy efficient washer smells like damp, and no amount of vinegar will fix it without a deep mechanical cleaning.
Will your smart home hub ever play nice with your laundry room?
One of the most advanced frustrations for the modern homeowner is the ‘silent disconnect.’ You buy innovative dishwashers with AI technology, expecting a seamless experience, only to find the app is constantly crashing. Most people blame the appliance, but the real nuance is often in your router’s frequency. Appliances don’t need high-speed 5GHz bands; they need the range of 2.4GHz. If your smart home hub keeps dropping the washer connection, it is likely because your mesh network is trying to force the machine onto a frequency it can’t handle. Understanding these technical overlaps is the difference between a truly automated home and a collection of expensive, blinking paperweights. Have you ever fallen into this trap of over-cleaning or over-teching your kitchen? Let me know in the comments!
While you are waiting for those comments to roll in, let’s talk about the one thing most ‘smart’ owners completely neglect: the physical hardware maintenance that no app can automate. Beyond the digital bugs, there is a physical reality we often ignore: dust is the silent killer of efficiency. I used to ignore the ‘guts’ of my machines until I noticed my electricity bill spiking and heard my refrigerator compressor cycling too often. Now, I swear by a $15 long-reach condenser coil brush and a narrow vacuum attachment. Every six months, I pull the unit out and clear the fur-like layer of dust off the coils. It is not glamorous, but according to technical guidelines from the Association of Home Appliance Manufacturers (AHAM), neglected coils are the leading cause of premature compressor failure. If you want to find the most reliable washing machine brands for durability, you have to treat them with the same respect you would give a high-performance engine.
Clean Your Coils or Prepare for a Breakout
Keeping the hardware pristine is about more than just aesthetics; it is about heat exchange. When your fridge coils are matted with pet hair and dust, the system cannot shed heat, forcing the motor to run twice as long to maintain that 37-degree interior. I have seen high-end units die in five years simply because they ‘suffocated.’ The same logic applies to your cleaning cycles. You absolutely must learn how to clean the hidden filter in your energy-efficient dishwasher. Most people do not even know it exists until the machine starts smelling like a swamp. If you find yourself constantly battling grit on your glassware, that manual filter is almost certainly the culprit. 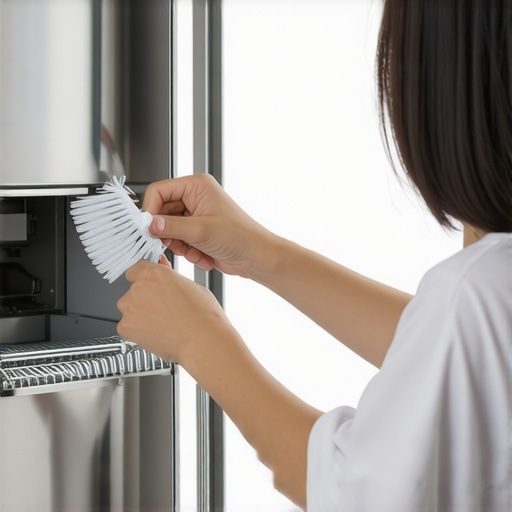
How do I keep my high-end appliances running like day one?
The secret lies in a hybrid approach: physical cleaning combined with digital oversight. I use the best smart plugs for monitoring appliance energy use for my non-connected secondary appliances. This lets me see if a freezer is drawing more power than usual, which is my early warning sign that a seal is leaking or a motor is struggling. For your primary smart gear, do not ignore those pesky notification badges. Learning how to update the firmware on your smart kitchen appliances is just as important as changing a water filter. Manufacturers frequently release patches that optimize sensor sensitivity and energy consumption profiles.
Updates Are Not Just for Your Smartphone
Looking ahead, the future of home appliances trends to watch in 2025 point toward truly predictive maintenance. We are moving away from simple ‘broken/not broken’ alerts and toward AI that analyzes vibration patterns and cycle durations to tell you exactly when a bearing is starting to wear out. Until that tech is perfected, you are the primary defense. My challenge for you tonight: pull off the base kickplate of your refrigerator and shine a flashlight inside. If you see a wall of dust, get that vacuum out. Taking twenty minutes today can save you a $2,000 replacement bill next year.
Hard Truths I Learned from My Own Kitchen Meltdowns
After years of tinkering, I’ve realized that smart sensors are not psychics. They are reactive, not proactive. If you place a warm leftovers container right next to the internal thermostat, the whole system will overcompensate. My biggest ‘lightbulb moment’ was discovering that wrong notifications are usually caused by environmental factors like vent blockages, not software bugs. Also, don’t ignore the importance of physical seals; a tiny tear in a gasket can make the most expensive fridge on earth run like a budget model from the 90s. Finally, remember that your dishwasher’s ‘brain’ is actually in its filter—if it’s clogged, the machine is flying blind.
#IMAGE_PLACEHOLDER_E#
The Essential Toolkit for Every Appliance Owner
If you want to move from ‘frustrated owner’ to ‘appliance master,’ there are a few things you need in your utility drawer. First, grab a dedicated long-reach coil brush; it’s the only way to prevent your compressor from cycling too often and burning out early. For the digital side, I highly recommend checking out this ultimate guide to smart home appliances to understand the ecosystem you’re building. I also rely heavily on the AHAM technical database for real-world reliability ratings rather than just marketing fluff. Lastly, keep a simple analog thermometer on hand to double-check those digital displays once a month during your ice-bath tests.
Take Back Control of Your Household Tech
Owning modern home appliances shouldn’t feel like a part-time job. While the future of home appliances in 2025 promises more automation, the real power still sits with the person holding the manual and a vacuum attachment. You now have the tools to calibrate, clean, and troubleshoot like a pro. Don’t wait for a breakdown to start caring for your gear. A little maintenance today means your milk stays cold, your clothes stay fresh, and your sanity stays intact. Have you ever found a ‘dead zone’ in your fridge that ruined your groceries or had a sensor give you a completely wrong reading? Let me know in the comments below!