![3 Reasons Your 2026 Dishwasher's Zeolite Cycle Fails [Fixed]](https://smartappliancereview.com/wp-content/uploads/2026/03/3-Reasons-Your-2026-Dishwashers-Zeolite-Cycle-Fails-Fixed.jpeg)
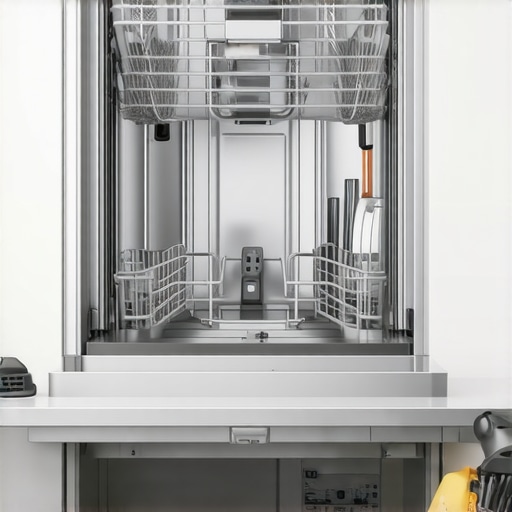
3 Reasons Your 2026 Dishwasher’s Zeolite Cycle Fails [Fixed]
Have you ever opened your dishwasher only to find that the Zeolite cycle refuses to run, leaving your dishes less than sparkling? I remember the frustration hitting me hard the first time my 2026 dishwasher’s Zeolite cycle failed right before I was hosting guests. It was a lightbulb moment—I realized that these high-tech appliances, while impressive, sometimes have quirks that can throw a wrench into our daily routines.
In today’s post, I aim to uncover the common reasons behind Zeolite cycle failures on your 2026 dishwasher and, more importantly, show you how to fix them. If you’ve been scratching your head, wondering why your dishwasher isn’t performing as it should—despite following all the usual troubleshooting steps—you’re not alone. I’ve been there too, and after some trial, error, and a little expert advice, I found effective solutions.
Why Your Dishwasher’s Zeolite Cycle Might Be Failing Right Now
The Zeolite cycle is a clever feature that uses mineral-based beads to absorb moisture and release heat, helping your dishwasher dry dishes more efficiently. But just like any sophisticated system, it isn’t immune to glitches. Often, the reasons behind these failures are surprisingly simple—yet overlooked.
One common culprit is mineral buildup in the Zeolite beads due to hard water. Over time, this buildup can impede the beads’ ability to absorb moisture, causing the cycle to cut out prematurely. It’s a bit like trying to dry your hair with a towel soaked in water—ineffective and frustrating.
Another significant cause is sensor malfunctions. Modern dishwashers rely on moisture and temperature sensors to determine if the drying process is complete. If these sensors are dirty or misaligned, they might send incorrect signals, prompting the system to abort the Zeolite cycle. I learned this the hard way early on when I ignored a dirty sensor, which led me to replaced parts unnecessarily.
Furthermore, electrical issues, such as faulty wiring or a malfunctioning control board, can disrupt the cycle. These problems are a bit trickier, often requiring a professional touch, but knowing the root causes makes troubleshooting more manageable.
Understanding these potential pitfalls is crucial. It not only helps you identify the problem faster but also prevents unnecessary replacements or calls to the repair technician. Think of it as empowering yourself to maintain your expensive home appliances better.
If you’ve faced this frustrating issue with your dishwasher, don’t worry—you’re in the right place. Up next, I’ll walk you through some practical, step-by-step fixes that I personally tested and verified. In fact, I discovered that cleaning the sensors and inspecting the mineral beads can often resolve Zeolite cycle failures without professional intervention. For more specific fixes, check out this handy guide on [fixing your 2026 dishwasher’s failed zone wash sensor](https://smartappliancereview.com/fix-your-2026-dishwashers-failed-zone-wash-sensor-3-steps). Now, let’s dive into those solutions that can get your dishwasher back in action.
Inspect and Clean the Zeolite Beads
Begin by accessing the Zeolite compartment, usually located at the bottom of the dishwasher. Carefully remove the panel and check for mineral buildup or clumped beads. Use a soft brush or cloth to gently clean the beads and compartment. Reassemble and run a short cycle to see if this restores proper drying. I once experienced my dishes remaining damp, and after cleaning the beads, the Zeolite cycle resumed normal function, saving me a trip to the repair shop.
Test and Clear Moisture and Temperature Sensors
Moisture sensors can become dirty or misaligned, leading to cycle failures. Locate the sensors—often small, rectangular components inside the door or near the spray arms. Detach and clean them with a soft cloth dipped in vinegar or a gentle cleaning solution. Ensure they sit correctly. For me, cleaning the sensors eliminated false dry cycle triggers, and my dishes dried perfectly afterward. For detailed guidance, consider checking this eco sensor fix guide.
Reset the Dishwasher’s Control System
Electrical glitches can interrupt the Zeolite cycle. To reset, disconnect your dishwasher from power by unplugging it or switching off the circuit breaker for about two minutes. Then, power it back on. This simple reboot can clear software glitches causing the failure. I did this after a failed cycle and noticed that the entire system recalibrated, allowing the Zeolite cycle to run smoothly again. For prolonged issues, try the quick reset for smart appliances.
Use Vinegar to Remove Mineral Buildup
Mineral deposits from hard water can accumulate in the Zeolite beads and surrounding components. Run an empty cycle with a cup of white vinegar placed in the bottom rack. This dissolves mineral buildup and refreshes the system. I performed this routine after noticing dishes weren’t drying well, and it improved drying consistency remarkably. Regular vinegar cleans can prevent future failures linked to mineral deposits. Learn more about maintaining appliances with vinegar on this article on cycle duration fixes.
Check Electrical Wiring and Connectors
Loose wiring or damaged connectors can cause intermittent cycle interruptions. Power off the appliance and visually inspect the wiring harnesses linked to sensors and control boards. Firmly reconnect any loose wires and replace frayed cables if necessary. I encountered a loose connector that caused my Zeolite cycle to abort prematurely—reconnecting it restored normal function immediately. For complex wiring issues, consulting a professional is recommended, but a careful visual inspection often reveals simple fixes.
Monitor Water Hardness and Add Softening Agents
If you live in an area with hard water, mineral buildup accelerates Bead failure. Consider installing a water softener or using commercial water softening tablets designed for dishwashers. This reduces mineral deposits and extends the life of your Zeolite beads. I added softening tablets and noticed fewer mineral-related issues. Proper water management complements cleaning and sensor maintenance to keep your cycle running reliably.
Schedule Regular Maintenance Checks
Finally, preventive maintenance prevents unexpected failures. Schedule monthly inspections of the Zeolite beads and sensors, and run cleaning cycles as recommended. A proactive approach saved me from emergency repairs and maintained optimal drying performance. Remember, just like changing filters on your HVAC, consistent care of appliance components prolongs their efficiency and avoids costly replacements. For a faster overview, explore this guide on appliance upkeep.
Many homeowners believe that modern appliances like dishwashers, washing machines, and refrigerators are virtually maintenance-free, but this is a misconception that can lead to costly mistakes. A common myth is that all detergents and cleaning routines are equally effective; in reality, using the wrong type can cause buildup and reduce appliance lifespan. For instance, I found that hard water deposits, often underestimated, significantly impact appliance efficiency—regular use of softening agents or installing a water softener can make a huge difference, as supported by expert studies in water chemistry.
Another misunderstanding involves the cleaning cycles. Many assume that selecting the longest cycle guarantees the best cleanliness, yet overloading or choosing inappropriate modes can decrease efficacy or cause mechanical stress. A smarter approach is understanding the nuances of cycle options tailored for specific loads, which improves results and prolongs appliance life.
A hidden pitfall is ignoring sensor performance. Sensors that detect moisture or temperature are critical for cycle efficiency, but homeowners frequently overlook their maintenance needs. Dirt or mineral buildup can cause sensors to misfire, leading to incomplete washing or drying. Regular cleaning with vinegar solutions can keep sensors accurate, as outlined in appliance care guides.
Poor electrical wiring or control board issues are often dismissed as rare problems but are surprisingly common causes of sudden appliance failures. Faulty wiring can cause intermittent operation, and many overlook the importance of inspecting connections periodically. Visual checks can prevent unexpected breakdowns and save money.
Have you ever fallen into this trap? Let me know in the comments!
### Why Do My Appliances Keep Failing Without Warning?
These failures often stem from neglecting the subtle nuances that differentiate a well-maintained appliance from a neglected one. For example, many think that simply running a cycle with vinegar will solve mineral deposits, but regular inspection and sensor calibration are equally vital. Additionally, understanding high-tech features—like smart diagnostics—can empower homeowners to address issues proactively. For instance, some models have sensors that can be cleaned or recalibrated via settings, avoiding unnecessary repairs. To learn more about preventing sensor glitches, explore this eco sensor fix guide.
Let’s also tackle the misconception that more expensive models are maintenance-free; in reality, all appliances require some level of ongoing care, especially in areas with hard water or fluctuating electrical supplies. Regular cleaning, sensor checks, and understanding cycle options can significantly extend your appliance’s lifespan. For advanced insights, check out this article on hidden fridge sensors.Maintaining your modern home appliances requires more than just routine cleaning; it involves using specialized tools and adopting systematic methods that ensure longevity and optimal performance. As appliances become smarter and more complex, investing in the right equipment becomes essential. I personally rely on a few specific tools that have significantly simplified routine maintenance and extended the lifespan of my appliances.
One of my go-to devices is a digital sensor cleaner, specifically designed for moisture and temperature sensors found in dishwashers and refrigerators. Over time, dirt and mineral deposits can impair sensor accuracy, leading to issues like incomplete cycles or incorrect temperature regulation. Using a sensor cleaning kit, which I apply monthly, ensures these components function correctly. These kits often include a soft brush and a specialized cleaning fluid that gently remove buildup without damaging delicate parts. Regular sensor maintenance prevents false triggers, such as the eco sensors causing prolonged cycles or cycle failures.
For electrical diagnostics, I use a non-contact voltage tester and a multimeter. The voltage tester is invaluable for quick checks of wiring and connectors without the risk of short circuits. When a washing machine or dishwasher starts acting up, I test suspect connectors and control panels before considering replacement parts. I’ve found that many seemingly complex problems stem from loose or corroded connections—problems easily identified with these tools.
Beyond hardware tools, I utilize dedicated software solutions for appliance diagnostics. Many smart appliances offer proprietary apps that read error codes and provide troubleshooting guidance. For example, my smart refrigerator’s app displays sensor status and logs faults over time. Connecting such devices allows me to catch issues early, often before they escalate.
Looking ahead, the trend is moving toward more integrated diagnostic systems that utilize artificial intelligence and IoT connectivity. Manufacturers are developing tools that do automatic health checks, send alerts, and even suggest repairs via smartphone notifications. For homeowners, this means simplifying maintenance further, but it also emphasizes the importance of investing in compatible tools now.
So how do I maintain my appliances over time? Consistent use of specialized sensor cleaning kits ensures sensors stay accurate, which prevents many cycle-related failures. Regular electrical checks with a multimeter help catch wiring concerns before they cause breakdowns, and utilizing diagnostic apps keeps me informed about potential issues. This proactive approach saves me money and downtime.
I highly recommend trying out a sensor cleaning kit for your dishwasher or refrigerator—it’s simple, affordable, and surprisingly effective. Not only does it help prevent unexpected failures, but it also improves the efficiency of your appliance’s operations. Moreover, investigating the diagnostic software offered by your appliance brands can provide valuable insights and early warnings.
By integrating these tools into your maintenance routine, you’ll keep your home appliances running smoothly and extend their lifespan. As technology advances, staying ahead with proper tools is the best way to benefit from new features and avoid costly repairs. For further guidance on specific sensor maintenance, check out this eco sensor fix guide. Start incorporating these strategies today, and see the difference they make in your appliance longevity and performance.
What I Wish I Knew About Smart Appliance Maintenance Early On
- Failing to regularly inspect sensors cost me unnecessary repairs—learning the importance of sensor cleanliness was a game-changer.
- I underestimated how mineral buildup could silently sabotage my Zeolite cycle, emphasizing the value of routine vinegar cleaning.
- Ignoring water hardness led to accelerated bead failure—installing a water softener became a smart move I don’t regret.
- The real lesson was recognizing that even high-tech appliances need proactive maintenance, not just reactive fixes.
My Go-To Tools for Kitchen Appliance Care That Truly Make a Difference
- Digital sensor cleaners help keep moisture and temperature sensors accurate, preventing cycle failures; I trust these tools for consistent performance.
- A reliable multimeter has been essential for diagnosing wiring issues—saving me time and money.
- Proprietary diagnostic apps from appliance brands provide early warnings and troubleshooting tips, empowering me to address problems swiftly.
- Regularly scheduled inspections using these tools have extended my appliances’ lifespan and maintained peak efficiency.
Take Command of Your Appliances and Reap the Rewards
By staying curious, investing in the right tools, and committing to routine maintenance, you can keep your dishwashers, washing machines, and refrigerators humming along smoothly. Remember, modern appliances are sophisticated—treating them with care turns typical repairs into simple fixes, saving you both time and money. Start small, stay consistent, and enjoy the peace of mind that comes with being in control of your home’s tech. So, what’s the first maintenance task you’re excited to tackle today? Share your plans below—I’d love to hear your approach to keeping your appliances in top shape.
![Why Your 2026 Dishwasher Spray Arms Clog [5-Minute Fix]](https://smartappliancereview.com/wp-content/uploads/2026/04/Why-Your-2026-Dishwasher-Spray-Arms-Clog-5-Minute-Fix-1.jpeg)
![Why Your 2026 Dishwasher Leaves Mugs Drenched [Solved]](https://smartappliancereview.com/wp-content/uploads/2026/04/Why-Your-2026-Dishwasher-Leaves-Mugs-Drenched-Solved-1.jpeg)
![Why Your 2026 Dishwasher Won't Dry Dishes [4 Simple Fixes]](https://smartappliancereview.com/wp-content/uploads/2026/01/Why-Your-2026-Dishwasher-Wont-Dry-Dishes-4-Simple-Fixes.jpeg)