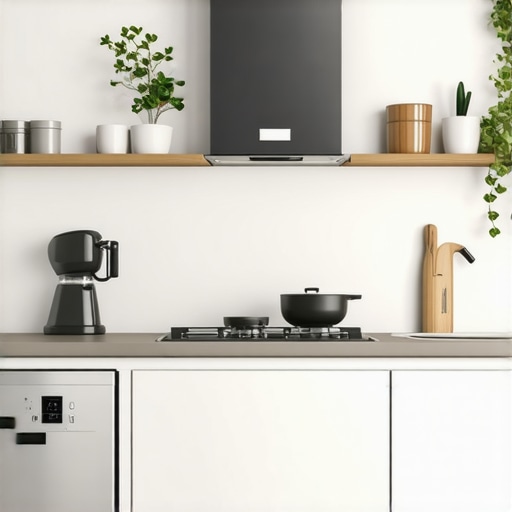
![Fix Your 2026 Dishwasher's Standing Water [3 Easy Steps]](https://smartappliancereview.com/wp-content/uploads/2026/04/Fix-Your-2026-Dishwashers-Standing-Water-3-Easy-Steps.jpeg)
Fix Your 2026 Dishwasher’s Standing Water [3 Easy Steps]
Have you ever opened your dishwasher, only to be greeted by a pool of water at the bottom—again? That frustrating feeling of wondering whether your appliance is working properly or just wasting water and energy. I remember the first time I encountered this problem; I was convinced my dishwasher had given up on me, and I spent hours trying to diagnose the issue, only to find out I was missing a simple fix.
Why Standing Water in Your 2026 Dishwasher Is a Bigger Deal Than You Think
This seemingly minor problem can lead to mold growth, foul odors, and even increased utility bills. A study by the Department of Energy highlights that inefficient dishwashers can waste up to 4,000 gallons of water annually—definitely not something we want in our eco-conscious homes. Ensuring your dishwasher drains properly isn’t just about convenience; it’s about protecting your health, saving money, and extending the life of your appliance.
Is It Really Worth the Hassle? My Early Mistake That Almost Cost Me
Early on, I thought simply running a cleaning cycle would resolve the water pooling issue. Turns out, I was overlooking one crucial component—something as simple as a clogged filter or drain hose that blocked water flow. A bit of research and patience revealed that many problems stem from basic blockages or sensor misfires. Trust me, addressing these common culprits can save you a trip to the repair shop and a lot of frustration.
Ready to dive into the straightforward steps that finally fixed my dishwasher? If you’re tired of waking up to a flooded kitchen or dealing with persistent odors, keep reading. We’ll walk through the exact, easy-to-implement solutions that can resolve your standing water dilemma—without the need for costly repairs or professional help. And if you’ve faced this issue before, I’d love to hear your experience in the comments below!
,
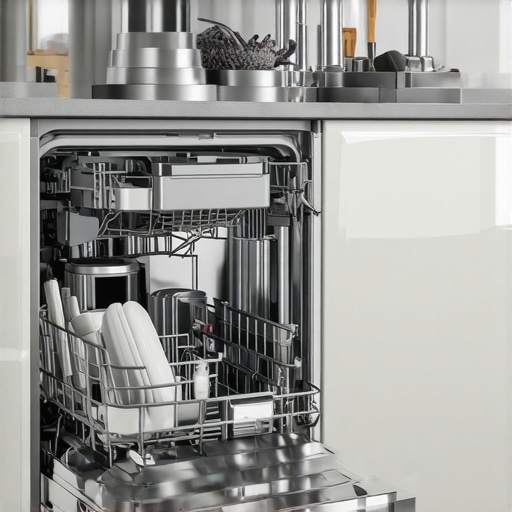
Check and Clear the Filter Regularly
My first move was to inspect the dishwasher’s filter, a simple mesh screen located at the bottom of the tub. I removed the bottom rack to access it, then gently pulled out the filter. It was clogged with food particles and grease, blocking water flow. Clean the filter thoroughly with warm water and a soft brush, ensuring no debris remains. This step often resolves common drainage problems and is akin to clearing a clogged drain in your sink, which instantly improves flow. Don’t forget to reassemble it securely afterward.
Identify and Clear the Drain Hose
The next critical step involved checking the drain hose. Located behind the dishwasher, it connects the appliance to the sink drain or garbage disposal. I disconnected it carefully—wearing gloves—and checked for kinks, blockages, or clogs. Inside, I found a buildup of soap scum and trapped debris. Use a long, flexible brush or pipe cleaner to scrub the hose interior. If you notice any cracks or damage, replacing the hose prevents future leaks. Imagine the hose as a highway for water: if blocked, traffic backs up, causing pooling inside.
Test the Drain Pump Functionality
With the filter and hose cleared, I moved to inspect the drain pump, which pushes water out during cycles. Listening for the pump’s humming sound during drain cycles helps determine if it’s working. To test it, I manually activated the drain cycle and observed whether water was expelled. If there’s no sound or water remains, the pump may be faulty or jammed with debris. Clearing any obstructions or replacing a malfunctioning pump restores proper drainage, much like clearing a clogged pump on a washing machine to ensure it drains correctly.
Examine and Reset Sensors or Electronic Components
Modern dishwashers rely heavily on sensors and electronic controls. A misreading sensor can prevent proper draining, causing standing water. I examined accessible sensors for visible damage or dirt. For example, a tilted or dirty float switch can mislead the system. Cleaning components with a soft, damp cloth often helps. If this doesn’t work, performing a complete reset by unplugging the dishwasher for a few minutes can recalibrate the electronics, similar to rebooting a computer. For persistent issues, consulting the manufacturer’s troubleshooting guide or a professional might be necessary.
Run a Test Cycle and Observe
After completing these steps, I ran an empty wash cycle to verify the fix. Watching the cycle closely allowed me to confirm that water was draining properly, avoiding the previous pooling. If water remains, re-inspect the filter, hose, or pump. Sometimes, residues or minor misalignments cause ongoing blockages, and a second cleaning or adjustment is needed. This step ensures you’ve addressed all potential issues comprehensively and restores your dishwasher’s efficiency.
Prevent Future Drainage Problems
To keep your dishwasher functioning optimally, regularly clean filters, run maintenance cycles with dishwasher cleaner, and avoid overloading the machine. If you’re interested in upgrading or modernizing your appliance, check out the latest models at this guide. Remember, small routine checks can save you from messy repairs and extend the lifespan of your appliance, making your kitchen life smoother and more efficient.
Many homeowners operate under a series of misconceptions about their appliances that can hinder proper maintenance and lead to costly mistakes. One prevalent myth is that all smart appliances automatically optimize their performance without user intervention. In reality, many advanced features require deliberate recalibration—like thermostat recalibration—to truly function as intended. Relying solely on automatic settings can cause inefficiencies, such as a refrigerator unnecessarily overcooling, wasting energy and increasing utility bills.
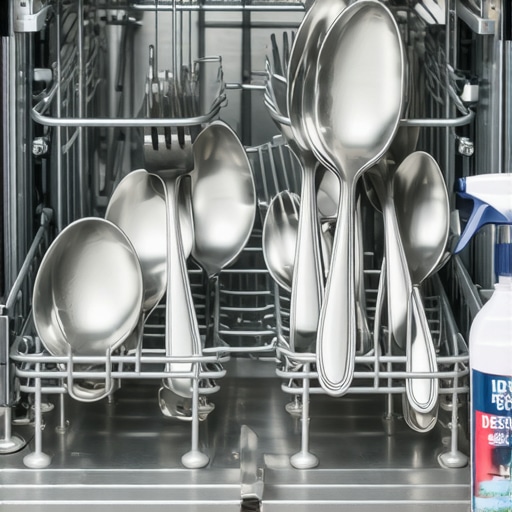
Another common misconception involves cleaning routines, where homeowners believe frequent detergent use keeps dishwashers spotless. Contrarily, overusing detergent can lead to soap residue buildup, impairing sensors and reducing cleaning effectiveness. Regularly deep cleaning and sensor checks are often overlooked but are crucial for sustained performance.
Can AI Make Appliances Do the Wrong Job?
Many assume that AI integration in appliances guarantees flawless operation, but this isn’t always the case. AI systems can misinterpret data, leading to unnecessary energy consumption or improper cycle choices—like an AI refrigerator cooling excessively due to faulty humidity sensors, which can spoil produce. Experts warn that sensor misjudgments are a significant source of inefficiency. Regular calibration and understanding AI’s limitations are essential to avoid these pitfalls. Have you ever fallen into this trap? Let me know in the comments.
Understanding these nuances helps you avoid the trap of complacency that can lead to appliance failure or increased costs. Stay vigilant with preventive maintenance and be cautious of assumptions that technology will always perform perfectly without occasional user oversight. For instance, minor issues like beeping noises often stem from simple misconfigurations or sensor errors that can be fixed with proper troubleshooting, saving hefty repair bills.
Being aware of these hidden nuances empowers you to manage your appliances proactively. Remember, respecting the complexity of modern tech—such as the internal mechanisms and smart sensor systems—is key to long-term reliability. Take control, perform regular checks, and don’t hesitate to consult expert guides or resources for troubleshooting. Your appliances, after all, are sophisticated tools that deserve your attention and understanding.
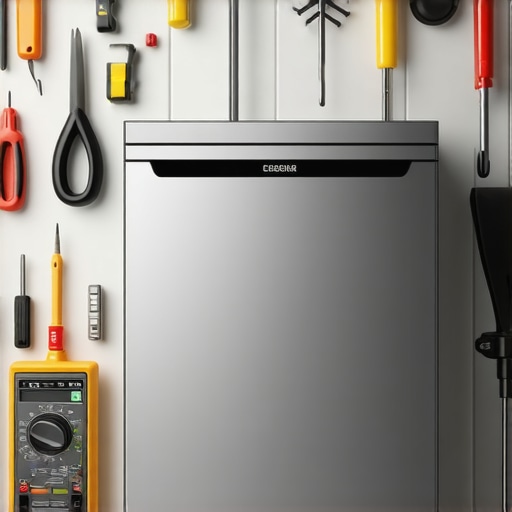
Gear Up for Longevity: Tools I Recommend for Home Appliance Maintenance
Maintaining your appliances over time requires more than just basic knowledge; it demands the right tools to perform precise diagnostics and repairs. Personally, I swear by a few key pieces of equipment that have saved me countless trips to the repair shop and extended the life of my home appliances. Investing in quality tools can seem daunting initially, but their durability and reliability make the cost worthwhile in the long run.
High-Quality Multimeter
A reliable multimeter is indispensable for troubleshooting electrical issues in smart appliances like refrigerators and dishwashers. I prefer the Fluke 115; its accuracy and durability allow me to check voltage, continuity, and resistance without hassle. Constantly monitoring electrical components helps catch issues early, such as failing sensors or faulty wiring, before they escalate into costly repairs. Using a multimeter becomes especially crucial when recalibrating or testing sensors, like those discussed here.
Flexible Inspection Camera
Getting a clear view of hard-to-reach parts inside appliances can be challenging. My favorite is the Teslong Inspection Camera, which features a flexible, waterproof probe and a bright, adjustable LED. This tool has allowed me to examine hidden areas inside washing machines or behind refrigerators without disassembling entire units. Spotting mold buildup or loose connections early can prevent long-term damage, and this camera makes inspection quick and effortless.
Specialized Screwdriver Set and Torx Bits
Dealing with appliances involves various fasteners that standard screwdrivers can’t handle. I invested in a set of insulated screwdrivers with interchangeable bits, including Torx sizes. This equipment enables me to access difficult components in modern appliances without risking damage or injury. When replacing a sensor or cleaning out clogged drainage pathways, having the right screwdriver is vital to avoid stripping screws and ensuring a secure fit upon reassembly.
Advanced Software and App Integration
Smart appliances are increasingly connected and often require dedicated diagnostic apps. For example, some models allow firmware updates, sensor recalibration, or error code interpretation through manufacturer-specific apps. I recommend downloading the official app for your appliance—like the ones linked here. These tools enable you to perform maintenance tasks remotely and diagnose issues faster, saving time and money.
Maintaining Efficiency Through Regular Checks and Software Updates
Routine maintenance can resonate far beyond simple cleaning. Firmware updates, for instance, often fix bugs and improve performance, much like recalibrating your fridge’s thermostat to ensure optimal cooling here. Making these updates a habit guarantees your smart appliances operate at peak efficiency, reducing energy waste and preventing sudden failures.
How do I maintain my appliances over time?
Developing a consistent maintenance routine is key. Regularly inspect sensors with your multimeter, clear filters and drainage paths, and keep firmware updated via manufacturer apps. Additionally, investing in tools like inspection cameras and specialized screwdrivers streamlines repair work, making troubleshooting less daunting. Trends suggest that future appliances will become even more connected, with AI-driven diagnostics predicting issues before they happen—so staying proactive now prepares you for smarter, more self-sufficient devices in the years ahead. For example, regularly calibrating your refrigerator’s AI sensors ensures accurate temperature control and energy efficiency—learn more about this process here. I encourage you to try calibrating one of your appliances today and observe how performance improves, saving you money and hassle in the long run.
What I Wish I Knew Before Dealing with Modern Appliances
- Overconfidence Can Backfire: Relying solely on smart features without routine checks led me to overlook simple issues like clogged filters, bringing costly repairs. Regular manual inspections are still essential, even with high-tech appliances.
- Firmware Updates Are a Double-Edged Sword: While updates can fix bugs, sometimes they introduce new glitches. Staying informed through official resources ensures you’re prepared for changes that might affect your appliance’s performance.
- Sensor Calibration Is More Than a Reset: Newly calibrated sensors improved efficiency, but neglecting periodic re-calibration led to misreading times and energy waste. Embracing proactive maintenance saves money long-term.
- The Hidden Power of Proper Tools: Investing in the right diagnostic gadgets, like inspection cameras and multimeters, made me realize many issues are just accessible via the right equipment, avoiding unnecessary replacements.
- Understanding AI Limits Prevents Frustration: Being aware that AI sensors can misinterpret data, especially in fluctuating environments, helped me prevent needless adjustments and downtime.
Top Resources That Changed How I Care for My Appliances
- Official calibration guides: Trustworthy step-by-step instructions from manufacturers ensure accurate sensor calibration.
- Expert product reviews: In-depth comparisons of tools help me pick reliable diagnostic equipment suited for home repairs.
- Maintenance blogs: Regularly updated blogs provide valuable tips and troubleshooting tricks shared by fellow enthusiasts and professionals.
- Manufacturer’s tech support: Direct access to official support channels ensures I follow best practices and avoid voiding warranties.
Take Action and Keep Your Appliances Happy
Every appliance has a story, and your proactive care can turn its narrative into one of longevity and reliability. Whether it’s regular sensor recalibration, cleaning filters, or just keeping an eye on firmware updates, small efforts make a big difference. Remember, the more you understand how your smart appliances tick, the better equipped you’ll be to keep them running smoothly for years to come.
Now it’s your turn—have you discovered a tip or trick that saved your appliance? Share your experience below and help others master their home tech!

![Fix Your 2026 Dishwasher's Failed Zone-Wash Sensor [3 Steps]](https://smartappliancereview.com/wp-content/uploads/2026/03/Fix-Your-2026-Dishwashers-Failed-Zone-Wash-Sensor-3-Steps.jpeg)