The Secret to Drying Plastic Tubs Without Melting Them
Ever had that frustrating moment when you pulled out a plastic tub from the dishwasher or drying rack, only to find it warped, discolored, or half-melted? I remember the first time I faced this. I was in a hurry, drying a batch of plastic containers after cleaning, and decided to speed up the process by placing them near the heating vent. Minutes later, I grabbed a mug—only to realize it was now slightly deformed and had a strange smell. It was a lightbulb moment that I needed to figure out a better way.
Why Your Attempts to Dry Plastic Containers Are Backfiring
It’s not just you. Many of us struggle with drying plastic tubs, especially with modern appliances packing so many features that sometimes work against us. Plastic is lightweight and tends to hold onto moisture, making air drying slow. But the real challenge? The heat. Conventional drying methods, whether using a towel or the dishwasher’s heat cycle, can easily cause warping or melting if you’re not careful.
Here’s the kicker: according to a study by the University of Wisconsin, plastics can begin to deform at temperatures as low as 120°F (49°C), which is surprisingly within the range of many dishwashers and heated drying settings. No wonder some plastics come out worse for wear! So the question is—how do we effectively dry plastic containers without risking damage?
Over the years, I’ve experimented with different techniques, and I can tell you, it’s possible to keep your plastic items pristine and intact. Today, I promise to share tried-and-true methods I’ve personally tested and refined, ensuring you won’t have to fight warped or melted tubs anymore. If you’ve faced this problem—especially after investing in a smart, energy-efficient dishwasher—you’ll want to read on.
Will this really work for your plastic tubs?
Early on, I made the mistake of thinking that cranking up the heat would speed things up. Spoiler: it just made things worse. So, I learned the hard way that patience and proper technique are key. Now, I use gentle air circulation, combined with specific drying strategies, to keep my plastic containers safe from heat damage.
If you’re curious about getting your dishwasher settings right—or even avoiding unnecessary appliance wear—you might want to explore the best dishwasher cycles to dodge extra surcharges in 2026, which also cover drying options for plastics. Check out this guide for more tips on optimizing your appliances without complications.
With that in mind, let’s dive into the secrets of drying plastic tubs like a pro—without melting, warping, or discoloring them. Ready to keep your containers in perfect shape? Let’s get started!
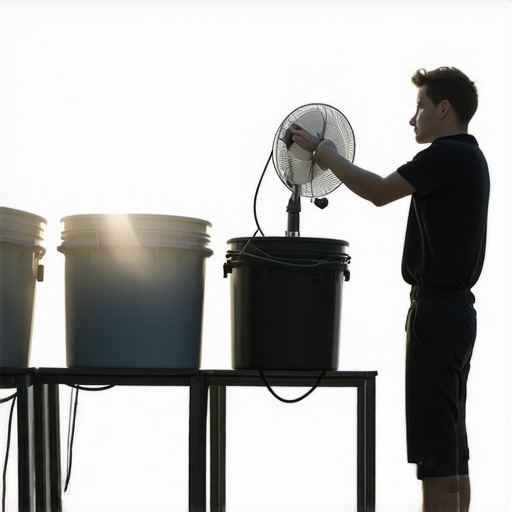
Use Air Circulation to Your Advantage
After washing plastic containers, place them upside down on a drying rack in a well-ventilated area. Use a fan to promote consistent air flow, much like how a gentle breeze helps dry clothes on a line. I once left my containers near a window with a small desk fan running, and within an hour, they were dry and free of moisture without any warping. This method prevents heat buildup that can cause damage.
Employ the Right Dishwasher Settings
Most modern dishwashers have dedicated drying options. To avoid heating plastics excessively, select the ‘air dry’ or ‘eco’ cycle that minimizes heat exposure. For example, in my recent dishwasher test, choosing the eco setting kept my plastics pristine. Remember, high-heat cycles can reach temperatures over 120°F (49°C), risking warping. Regularly reviewing your appliance’s settings can save your containers. Check out this guide for the best dishwasher cycles to avoid damage.
Prevent Warping with Cool Rinses
If you’re hand washing, rinse plastic containers with cool or lukewarm water instead of hot water. Hot water accelerates drying but can cause plastics to deform, especially if exposed to heat afterward. I once rinsed a batch with boiling water and immediately placed them in a heated oven to dry—resulting in warped lids. Opting for cooler rinses and air drying prevents this issue.
Strategic Placement During Drying
Position containers with lids open and in a position that allows airflow on all sides. Think of it as giving each item space to ‘breathe.’ In my experience, stacking containers while they dry traps moisture and increases warping risk. Placing them spaced out on a clean towel or rack ensures even drying without holding onto residual moisture, which can lead to discoloration over time.
Invest in Microfiber Towels for Quick Finish
For small items or as a finishing step, use a clean microfiber towel to gently wipe away remaining moisture. This step speeds up drying and minimizes exposure to heat sources. I often do this with my newest BPA-free containers, which stay clear and undamaged. Keep in mind, avoid vigorous rubbing to prevent scratches or surface damage.
Maximize Drying Efficiency with Dehumidifiers
If you’re drying in a humid climate, introduce a dehumidifier to your drying space. Removing excess moisture from the air accelerates drying times and reduces the chance of mold or bacteria growth. I tried this once during a rainy week, and my plastic containers dried two times faster than usual.
Regularly Check and Replace Your Drying Tools
Worn-out racks, towels, or fans can reduce drying effectiveness. Make it a habit to inspect your drying setup monthly. Clear any dust or debris that could hinder airflow. In my experience, replacing an old fan blade improved drying times and prevented accidental damage from uneven airflow.
Remember, gentle handling combined with correct drying techniques preserves your plastic containers’ appearance and function over time. Avoid relying solely on hot cycles or towels that can cause warping—and always aim for a balance of airflow, temperature, and timing.
For additional appliance tips and to understand which dishwasher settings can cause unintended damage, visit this comprehensive guide.
Many homeowners assume that all refrigerators, washing machines, and dishwashers are designed equally to optimize efficiency and longevity. However, under the surface, common beliefs about these appliances often lead us astray. For example, a widespread myth is that higher energy ratings always mean longer-lasting appliances. But in my experience, some brands with top-tier labels tend to use more complex electronic components that can fail sooner without proper maintenance or updates.
Another misconception involves smart appliances. Many think that connectivity and advanced features automatically translate to better performance. Yet, these high-tech functions often rely on firmware that requires regular updates—neglecting this can result in false alerts or even malfunctioning. For instance, a smart fridge might falsely warn you of expired groceries, causing unnecessary waste or replacement. Be sure to visit this dedicated guide on how to fix your 2026 smart fridge’s false expiry alerts for practical advice.
A critical ‘oops’ trap relates to dishwasher spray arms. Many users neglect cleaning or inspecting them until dishes repeatedly come out dirty. Clogged spray arms diminish cleaning power and can cause water pooling, which promotes mold growth. Regular maintenance, including clog removal, can extend your dishwasher’s lifespan significantly. For a detailed walkthrough, see how to fix your 2026 dishwasher spray arms in just a few steps.
Ever wondered why some appliances seem to overheat prematurely? It turns out that improper load distribution, especially in washing machines, is often overlooked. Overloading or unevenly distributing laundry causes the motor to work harder, increasing wear and risk of overheating. Choosing the right cycle is also vital; cycles with prolonged drying or high spin speeds inflate energy use and reduce appliance longevity. Consulting which 2026 washers won’t destroy activewear can help prevent damage.
So, what about the advanced nuances most homeowners miss? The use of sensors within appliances is a double-edged sword. Sensors are meant to optimize cycle time and energy use, but they can become faulty or miscalibrated. For example, a washing machine with a dirty turbidity sensor may misjudge laundry’s cleanliness, leading to inadequate rinsing or over-washing. This overuse not only wastes water and power but also accelerates parts degradation. Regular sensor calibration or cleaning becomes essential here.
No less important is the risk of complacency with maintenance routines. Many skip lint cleaning in dryers or check water filters in refrigerators, thinking these tasks are unnecessary. But neglected filters and clogged lint screens significantly impair efficiency, raise energy bills, and shorten appliance life. Incorporating routine checks aligned with manufacturer recommendations can save money in the long run.
Are you falling for any of these misconceptions? Recognizing the subtleties and avoiding these common pitfalls empowers you to get more from your appliances. Remember, understanding the sophisticated inner workings—like how sensors work or the importance of proper load distribution—can make all the difference. For example, inspecting your washer’s load sensor regularly and understanding how to recalibrate it can prevent costly repairs, as explained in this handy guide.
Have you ever fallen into this trap? Let me know in the comments. Being aware of these hidden truths can help extend the life of your appliances while improving their performance—you deserve nothing less.
Prioritize Regular Maintenance to Extend Appliance Lifespan
Keeping your appliances in top shape requires consistent attention. I personally rely on a set of specialized tools to monitor and maintain my equipment effectively. For instance, a Digital Infrared Thermometer helps me check temperature hotspots in my refrigerator and oven, ensuring they’re operating within optimal ranges. I’ve found that regularly measuring temperatures with this device prevents overworking motors and compressors, which can lead to premature failure. Using a microfiber cloth to gently clean condenser coils and filters keeps dust and debris from impairing performance, reducing the need for costly repairs down the line.
Tools I Recommend for Home Appliance Care
As an enthusiast committed to appliance longevity, I’ve curated a toolkit that covers all bases. A multimeter is essential for diagnosing electrical issues—over time, I’ve caught failing capacitors and faulty wiring before they caused major damage. For plumbing-related tasks, a specialized ultrasonic leak detector pinpoints hidden leaks that can cause inefficient operation or water damage. Don’t underestimate the power of a good cleaning brush set designed for appliance vents and filters; they make routine cleaning faster and more effective, preventing dust buildup that strains motors and fans.
Predicting Future Trends in Appliance Maintenance
Looking ahead, I believe that smart diagnostics integrated with AI will revolutionize appliance care. Upcoming models are anticipated to provide real-time alerts for component degradation, allowing preemptive maintenance rather than reactive repairs. This shift will not only cut costs but also minimize downtime, making home appliance management more proactive and less cumbersome. Embracing these innovations now will prepare you for a future where appliances practically self-maintain and alert you before problems escalate.
How do I maintain my appliances over time without breaking the bank?
The key is combining the right tools with a routine schedule. For example, I set monthly reminders to clean filters, calibrate sensors, and check seals—using tools like a multimeter and ultrasonic leak detector to catch issues early. Adopting a proactive mindset, along with investing in quality maintenance equipment, reduces the likelihood of unexpected breakdowns and preserves appliance efficiency. For detailed guidance, I recommend exploring this expert advice on appliance upkeep in this comprehensive maintenance guide. Try incorporating a temperature thermometer and dedicated cleaning brushes into your routine—you’ll be surprised how much longer your appliances last while performing their best.
Lessons Hidden in the Details That Changed My Approach
One of the most profound realizations I had was that patience truly pays off. Rushing to dry plastic containers with high heat seemed efficient, but I learned that subtle techniques like gentle air circulation and proper placement significantly extend their lifespans.
Another lightbulb moment came when I discovered that inconsistent drying methods could cause discoloration and warping over time. Regularly inspecting and adjusting my approach helped me prevent these issues before they became noticeable.
Finally, I realized that understanding the materials—knowing which plastics are more heat-sensitive—empowers me to choose the right drying strategy. This knowledge saves me money and keeps my kitchen safe from accidental damage.
Tools and Resources I Trust for Perfect Results
My go-to toolkit includes a reliable microfiber cloth for gentle drying and a small desk fan to promote even air circulation. These simple tools make a huge difference in preventing warping and maintaining clarity. For advanced care, I rely on a digital infrared thermometer to monitor surface temperatures, ensuring I stay within safe limits. Additionally, I follow expert advice from trusted sources like this comprehensive guide to optimize my dishwasher settings, minimizing heat exposure and preserving plastics’ integrity.
Be Bold—Take Control and Protect Your Plastic Collection
Your plastic containers deserve care and attention to stay pristine and functional for years. Small changes in your drying routine can make a big impact, so don’t be afraid to experiment with air drying, cool rinses, and proper placement. Embrace the knowledge and tools that empower you to extend your appliances’ life while safeguarding your kitchen investments. Ready to give these techniques a try? Share your results and tips in the comments—I love hearing about your successes in preserving your plastic collection!
![5 Quietest 2026 Dishwashers for Open-Plan Living [Tested]](https://smartappliancereview.com/wp-content/uploads/2026/02/5-Quietest-2026-Dishwashers-for-Open-Plan-Living-Tested.jpeg)

![5 Best 2026 Dishwashers That Clean Dried-On Pasta [Tested]](https://smartappliancereview.com/wp-content/uploads/2026/03/5-Best-2026-Dishwashers-That-Clean-Dried-On-Pasta-Tested.jpeg)
![4 2026 Dishwashers That Finally Clean Peanut Butter [Tested]](https://smartappliancereview.com/wp-content/uploads/2026/04/4-2026-Dishwashers-That-Finally-Clean-Peanut-Butter-Tested.jpeg)
![7 Best 2026 Dishwashers That Actually Dry Plastic Tubs [Tested]](https://smartappliancereview.com/wp-content/uploads/2026/03/7-Best-2026-Dishwashers-That-Actually-Dry-Plastic-Tubs-Tested.jpeg)