![Why Your 2026 Dishwasher Spray Arms Clog [5-Minute Fix]](https://smartappliancereview.com/wp-content/uploads/2026/04/Why-Your-2026-Dishwasher-Spray-Arms-Clog-5-Minute-Fix.jpeg)
Why Your 2026 Dishwasher Spray Arms Clog [5-Minute Fix]
Ever opened your dishwasher only to find water pooling at the bottom or dishes not coming out as clean as they used to? I went through this frustration myself a few months back, and it was quite the eye-opener. One morning, I expected my dishes to sparkle, but instead, I was staring at a sluggish machine that refused to do its job properly. That lightbulb moment led me down the rabbit hole of dishwasher maintenance, especially focusing on those tiny but mighty spray arms.
Dealing with the Frustration of Clogged Spray Arms
Dishwashers are supposed to make our lives easier. Yet, when spray arms clog, they become the source of endless headaches. I’ve learned that these small components are critical for circulating water effectively. When they clog, not only do your dishes suffer, but your water and energy bills might skyrocket too. This problem tends to sneak up unexpectedly, often after a few months of neglect, especially if your water has a lot of mineral content.
Have you ever noticed grease or hard water deposits on your spray arms? Or maybe your dishes come out streaky and still need fixing? If yes, you’re not alone. I used to ignore the signs and thought regularly cleaning was enough. But I made a crucial mistake early on — I didn’t realize that even a tiny clog could severely impact performance, leading to unnecessary repairs or replacements.
Surprisingly, the fix is simple and quick — a five-minute routine is often all it takes to restore your dishwasher’s efficiency. Interested? Let’s dive into how you can clear those spray arm clogs and keep your dishwasher running smoothly.
Is Fixing Clogged Spray Arms Really Worth the Effort?
I understand the skepticism. Some might think, “Is this really that simple?” or worry about damaging their appliance. Trust me, I had the same doubts until I tried it myself. The key is to be gentle but thorough — a process I detail further in my step-by-step guide. Remember, neglecting these clogs can lead to more costly issues down the line, like pump failures or mold buildup, which experts warn can compromise your home’s hygiene (source: [Smart Appliance Review](https://smartappliancereview.com/3-fixes-for-your-2026-compact-washers-drainage-failure-2)).
So, if you’ve been wondering whether that strange noise or poor cleaning quality is worth investigating, I can tell you from experience: It absolutely is. Fixing your spray arms isn’t just about saving money; it’s about ensuring your dishes are truly clean and your dishwasher stays happy for years to come.
Ready to get your hands dirty? Let’s explore how to diagnose and fix clogged spray arms quickly and safely.
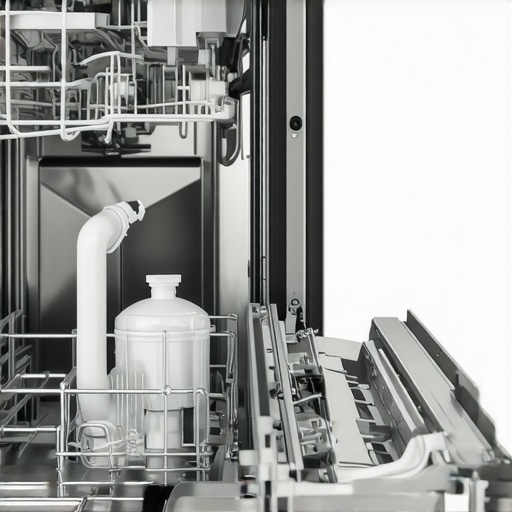
Remove and Inspect the Spray Arms
Start by pulling out your dishwasher and locating the spray arms, typically at the bottom and sometimes at the top. Unscrew or unclip them carefully, just like removing the blades of a blender. I once neglected this step and ended up forcing the arm, causing damage. Once removed, examine the small holes for debris or mineral buildup. If water isn’t spraying out evenly, a clog is likely the culprit.
Prepare a Vinegar and Toothbrush Solution
Fill a bowl with warm water mixed with white vinegar—about one part vinegar to three parts water. Dip an old toothbrush into this solution. Think of it as a mini spa day for your spray arms, loosening grime and deposits. The vinegar dissolves hard water deposits effectively, making cleaning easier. I recall scrubbing a particularly stubborn spray arm, and the difference was immediate—water sprayed freely after just a few minutes of brushing.
Scrub and Flush the Nozzles
Use the toothbrush to scrub each hole and the surface of the spray arm thoroughly. Pay special attention to clogged nozzles, gently poking with a toothpick or pin if necessary. After scrubbing, rinse the spray arm under running water to wash away loosened debris. This step is crucial; skipping it is like cleaning a filter but ignoring the pipes in your home—they’ll clog again faster. I once forgot this rinse, and residue reaccumulated within a week.
Soak Problematic Parts in Vinegar
If deposits persist, submerge the spray arms in the vinegar solution for about 30 minutes. This long soak breaks down stubborn mineral buildup, similar to how descaling coffee machines works. After soaking, repeat the scrubbing process for best results. I had a particularly clogged spray arm that cleared up completely after a good soak and scrub—dishes came out spotless afterward.
Reassemble and Test Your Dishwasher
Once clean, reattach the spray arms securely. Run a short cycle with an empty dishwasher and observe the spray patterns. Even water distribution indicates success. If splashing is uneven, double-check that the arms are correctly attached and rotating freely. Remember, regular maintenance—every few months—prevents clogs from forming again, saving you from future headaches. For more tips on maintaining your dishwasher and cutting down utility bills, visit this guide to efficient cycles.When it comes to home appliances like washing machines, dishwashers, or refrigerators, many homeowners operate under misconceptions that can lead to inefficiency or even damage. A common myth is that newer models require less maintenance, but in reality, smart appliances often have more complex systems that demand a nuanced understanding. For example, users frequently assume that running eco or quick cycles minimizes wear, yet these modes can sometimes cause buildup or incomplete cleaning if not used correctly, as highlighted in recent expert reviews. Another subtle mistake is neglecting regular calibration; a miscalibrated refrigerator thermostat might save energy initially but can compromise food preservation over time. Are you aware of the advanced features that could be wasting your energy instead of saving it? Understanding how smart sensors and AI-driven adjustments operate is crucial—overlooking these can mean missing out on potential savings or inadvertently forcing your appliance into faulty states, which may require costly repairs. For instance, many fail to realize that high-efficiency washers may tangle delicate fabrics unless specific cycle settings are chosen, increasing wear and tear. To avoid falling for these pitfalls, regularly consult your appliance’s manual and stay updated with expert advice, like the detailed guides available at this resource. Have you ever fallen into this trap? Let me know in the comments.Maintaining your home appliances requires the right approach and reliable tools to ensure long-term performance. Over the years, I’ve found that investing in specific equipment makes a noticeable difference in extending appliance lifespan and simplifying troubleshooting. One essential item I rely on is a **magnetic leak detector** for refrigerators. This compact device helps me swiftly identify refrigerant leaks without dismantling the unit, saving time and preventing costly repairs, especially important as newer models incorporate complex cooling systems. For dishwashers and washing machines, a high-quality **ultrasonic sensor** has become indispensable. It allows me to assess water flow and detect blockages in spray arms or drain filters accurately, as outlined in detailed guides like this [smart appliance review](https://smartappliancereview.com/3-fixes-for-your-2026-compact-washers-drainage-failure-2). I prefer models that connect to my smartphone via Bluetooth, enabling real-time diagnostics and maintenance reminders.\n\nIn my experience, a **digital multimeter** also proves invaluable for diagnosing electrical issues—whether a malfunctioning control panel or a faulty sensor. I always keep a **precision multimeter** on hand because it provides the detailed readings needed to pinpoint subtle electrical faults, reducing unnecessary part replacements.\n\nWhen it comes to software, I utilize diagnostic apps tailored for smart appliances. These apps often come with the manufacturer’s firmware updates, troubleshooting guides, and performance logs. Regularly updating your appliance firmware through official apps ensures that your device benefits from security patches and optimized algorithms, which are critical as appliances become more AI-driven.\n\nLooking ahead, I predict that the integration of AI and IoT in home appliances will drive a shift toward self-maintaining units. Appliances may soon offer predictive diagnostics, notifying homeowners via apps about potential issues before they escalate. To prepare, I recommend familiarizing yourself with the latest diagnostic tools and embracing smart maintenance routines. For example, trying out smart diagnostic features on your refrigerator or dishwasher—such as running calibration tests via the manufacturer’s app—can preempt failures and save money.\n\n**How do I maintain appliances over time?** Consistency is key. Set monthly check-ins to clean filters, inspect hoses, and update software. Investing in these specialized tools and following manufacturer-recommended maintenance schedules ensures your appliances remain efficient and reliable for years. Don’t hesitate to explore advanced tips like using ultrasonic sensors or firmware updates—taking proactive steps now can prevent major breakdowns later. For detailed strategies, check out this guide on fixing your refrigerators’ frozen humidity drawer, and see how regular maintenance saves headaches in the long run.
Lessons Learned from My Fumbling Attempts
One of the most eye-opening moments was realizing that the small spray arms, often overlooked, hold the key to spotless dishes and efficient performance. I used to think that once cleaned, they would stay clear, but mineral deposits and grease can silently clog them over time—something I only discovered after a series of subpar washes.
Getting hands-on and inspecting these tiny components taught me that investing a few minutes upfront can save hours and money later. It’s a simple step many skip but one that can dramatically improve your dishwasher’s lifespan and cleaning power.
The biggest lesson? Never ignore the early signs of poor performance—streaky dishes or unusual noises—because they often point straight to clogged spray nozzles. Proactive maintenance turns a frustrating chore into a quick, satisfying fix that keeps your appliances running smoothly.
My Trusted Tools for a Troublesome Issue
Over the years, I’ve curated a set of tools that make dishwasher upkeep straightforward. A high-quality **magnetic leak detector** helps me catch refrigerant issues early, but for spray arm cleaning, I rely on a simple **toothbrush and vinegar solution**. This combo effectively dissolves hard water deposits without harsh chemicals. For stubborn mineral buildup, soaking the spray arms in vinegar for about 30 minutes works wonders, much like descaling appliances, as I learned from online guides. Maintaining a **pin or needle** handy allows me to clear tiny nozzles with precision, preventing future clogs. These tools have proven invaluable, not just for cleaning but for understanding my appliances better. If you want to streamline your maintenance routine, I recommend exploring these essentials and reading expert articles on smart appliance care to stay ahead of issues before they become costly repairs.
![Why Your 2026 Dishwasher Leaves Plastic Tubs Greasy [3 Fixes]](https://smartappliancereview.com/wp-content/uploads/2026/04/Why-Your-2026-Dishwasher-Leaves-Plastic-Tubs-Greasy-3-Fixes.jpeg)
![Stop Your 2026 AI Dishwasher Leaving Film [Solved]](https://smartappliancereview.com/wp-content/uploads/2026/02/Stop-Your-2026-AI-Dishwasher-Leaving-Film-Solved.jpeg)
![Stop Your 2026 Dishwasher Leaving Food in Bowls [3 Fixes]](https://smartappliancereview.com/wp-content/uploads/2026/04/Stop-Your-2026-Dishwasher-Leaving-Food-in-Bowls-3-Fixes.jpeg)