
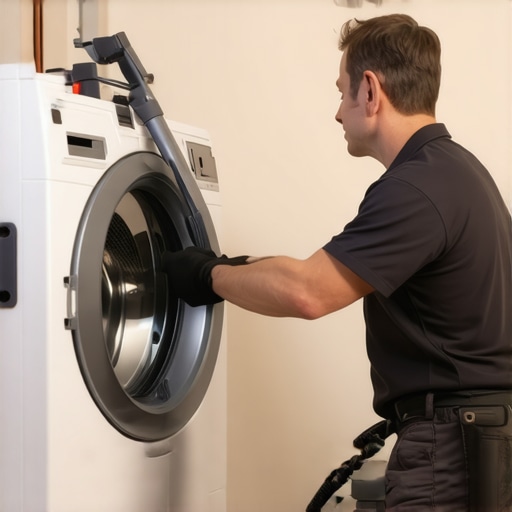
I remember the moment vividly—standing in my laundry room, fighting to get my dryer to breathe. The stubborn smell of lint and the occasional squeal from the vent made me realize I was neglecting one of the most critical parts of my home’s ventilation system. It hit me hard that I’d been ignoring this sneaky culprit for too long, thinking I needed some fancy, expensive tool to fix it. But the truth is, quite often, the solution is right in front of us—simple, accessible, and no special gadgets required.
Why Your Dryer Vent Deserves More Attention Than You Think
Your dryer vent isn’t just about keeping your laundry room tidy; it’s a safety and efficiency concern that many homeowners overlook. Every time you run the dryer, lint and dust accumulate in the vent, which, if ignored, can lead to decreased performance or, worse, a fire hazard. According to the National Fire Protection Association, failure to clean clothes dryers is the leading cause of residential dryer fires, accounting for hundreds of incidents annually. That should give you pause. But here’s the kicker—most folks, myself included initially, believe you need to buy some special, costly tool to keep the vent clear. I was wrong, and after some experimentation, I discovered that cleaning it effectively doesn’t require a buying spree.
Facing the Fear of the DIY Job
Early on, my biggest mistake was assuming that a quick brush or a simple vacuum would suffice—only to realize I wasn’t getting rid of all the accumulated lint. I struggled with poking around in tight spaces without proper equipment and nearly gave up. That’s when I learned that with a little patience and some common household items, you can manage this task yourself—and save a good chunk of change. Curious? Keep reading to find out how I tackled this problem head-on, without breaking the bank or risking life and limb.
Ready to breathe new life into your dryer and improve safety? Let’s dive into the practical, no-cost methods I used to get that vent squeaky clean—and keep it that way.
Pull Out the Dryer for Better Access
Begin by unplugging the dryer and pulling it away from the wall. Use a furniture dolly or two strong people if it’s heavy. Carefully tilt the dryer forward to access the vent duct behind. This step reminds me of moving a refrigerator—mindful of the weight and wiring—ensuring you don’t damage anything during the process.
Disconnect and Prepare
Loosen the clamp securing the vent hose to the dryer and vent outlet. Disconnect the hose gently, inspecting it for tears or blockages. Take a moment to peel back any tape or clips holding the vent in place. This preparation is crucial, much like cleaning the filter in your high-efficiency washer—small details save big headaches.
Clean the Vent Duct and Lint Trap
Insert a long-handled brush or a flexible accordion brush into the duct to loosen lint buildup. Rotate and push forward to dislodge accumulated lint. Pair this with a vacuum cleaner with a hose attachment to suck out debris. Think of it as giving your home appliances a deep massage, restoring their original performance. When dealing with stubborn lint, don’t hesitate to use extension tools or even a leaf blower outside (be cautious with this method to prevent blowing lint into your house).
Clear the Vent Outlet Outside
Head outside to the vent cap. Remove the cover if needed—often, it’s just a screw away. Use the brush and vacuum to clean out the exterior vent, removing any nests or debris. If you see any blockages that don’t loosen easily, a foam brush or a small hook can help extract them. This step is similar to clearing slimy gunk from dishwasher spray arms—attention to detail makes all the difference. For stubborn blockages, consider checking out this detailed fix on cleaning spray arms.
Reassemble and Test
Reconnect the vent hose securely, ensuring there are no kinks or crushed areas that restrict airflow. Push the dryer back into position carefully, checking that the vent connections stay tight. Before plugging in, double-check that the vent path is clear and unobstructed—this reduces fire risk and improves drying speed. Switch on the dryer for a test run, listening for unusual noises or blockages. When I did this, I noticed my clothes dried faster, and the dryer ran quieter, confirming I’d done a good job. Proper maintenance like this not only extends appliance lifespan but also enhances safety—never underestimate the importance of a clean vent. For more tips on maintaining appliances, read about cleaning your dishwasher spray arms here.
Schedule Regular Maintenance
Mark your calendar to repeat this cleaning every 6 to 12 months. Regular checks prevent lint buildup, much like cleaning filters in your washing machine or refrigerator drip traps—simple routines that save money and prevent hazards. Staying proactive is key, and I found that setting reminders on my phone ensures I don’t forget. By keeping your vent clean, you’ll notice better performance, lower energy bills, and peace of mind. Remember, safety starts with paying attention to the small things, like the hidden lint inside your vents and filters, which can make a big difference in appliance safety and efficiency.
Many homeowners believe that modern appliances like dishwashers, refrigerators, and washing machines are virtually maintenance-free or that following the basic user manual keeps them in perfect shape. However, the truth is, there’s a lot more complexity beneath the surface. For example, common misconceptions include overestimating the effectiveness of cleaning cycles without understanding the importance of specialized components like drain traps or filters. Believe it or not, overlooking small parts such as tiny holes in dishwashers or moisture buildup in fridge seals can lead to costly repairs down the line.
What Advanced Techniques Can Prevent Hidden Appliance Failures?
Tackling these issues proactively involves more than just routine cleaning; it requires understanding hidden traps like the drain trap in washing machines, which, if clogged, can cause unpleasant odors and even mold growth. Experts emphasize that regular inspection and cleaning of these concealed parts are crucial for appliance longevity. For instance, deep-cleaning the filter in your high-efficiency washer or checking the tiny holes that prevent leaks can save you headaches and money. Studies have shown that neglecting such nuances shortens the lifespan of home appliances significantly. Don’t get caught in the trap of superficial maintenance—delving into these details ensures your appliances operate smoothly and safely. For more insights on detecting subtle failures, check out how to clean the hidden filter in your high-efficiency washer. Have you ever fallen into this trap? Let me know in the comments.
Tools I Recommend for Long-Term Appliance Care
Maintaining appliances like dishwashers, refrigerators, and washing machines isn’t solely about routine cleaning; it requires specific tools that make the job safer and more effective. One indispensable tool I’ve found is a flexible, long-handled brush designed for cleaning narrow spaces, particularly useful for cleaning dishwasher spray arms or refrigerator coils. I personally use a model with a swivel head, allowing me to reach stubborn grime without contorting into awkward positions, which reduces strain and injury risk. Pair this with a high-powered, lightweight vacuum with a crevice attachment—this combo ensures lint, dust, and debris don’t compromise your appliance’s performance over time.
Additionally, I recommend investing in a digital infrared thermometer. This device helps me monitor temperature fluctuations in refrigerators and freezers, ensuring settings stay optimal. Small temperature drifts can cause freezing issues or spoilage, so proactive adjustments save money and extend appliance life. For deeper internal cleanings, I use a specialized filter cleaning solution compatible with high-efficiency washers. Regularly applying this prevents mineral deposits that can clog internal components, which studies show significantly enhances longevity (see this guide).
Forecasting Where Appliance Technologies Are Heading
As smart appliances evolve, I predict an increasing shift towards self-diagnostic features that alert homeowners about potential issues before they become costly repairs. Integration with home automation systems will enable real-time monitoring and maintenance reminders, reducing guesswork and downtime. This trend aligns with broader smart home developments, making maintenance more intuitive and less burdensome for users.
How do I maintain appliances like dishwashers over time?
One effective way is to regularly inspect and clean the tiny holes in dishwasher spray arms, which often clog with mineral buildup or debris—this simple step can dramatically improve cleaning performance. For nuanced maintenance tips, I refer to detailed guides such as this article on tiny holes in dishwashers. I also recommend using a cleaning cycle with a vinegar-based solution every few months to prevent odor-causing mold or soap scum, saving you from unexpected repairs.
Trying out a long-handled, flexible brush to clear stubborn lint in your dryer vent is a game-changer—make sure to complete this task annually. Remember, consistent, targeted maintenance not only prolongs appliance life but can also enhance safety and efficiency. Don’t hesitate—take a dedicated weekend to implement one of these advanced tips, like inspecting the spray arms or calibrating your fridge’s temperature sensors, and notice the difference.
For example, regularly cleaning the filter in your high-efficiency washer can prevent breakdowns; see this step-by-step guide. Keep a maintenance calendar, and set reminders to perform these tasks—you’ll thank yourself later. With the right tools and routine, your appliances will keep performing at their best for years to come.
Over time, I learned that the key to a home’s smooth operation isn’t just about buying the latest gadget but understanding the hidden complexities within our appliances. This revelation came after countless frustrating moments trying to troubleshoot issues that seemed minor but turned out to be significant problems caused by overlooking simple maintenance tasks. Once I started digging deeper—reading manuals, listening to experts, and experimenting—I discovered a wealth of knowledge that transformed my approach to home upkeep. The real game-changer was realizing that proactive, informed care can prevent costly repairs and extend the lifespan of our essential appliances.
Lessons I Wish I Learned Before Swapping Parts
- Small parts matter more than you think: Many failures originate from tiny, easily overlooked components like filters or gaskets. Neglecting these can lead to bigger issues down the line.
- Routine checks beat reactive fixes: Regular inspection and cleaning, such as checking the tiny holes in your dishwasher spray arms, can save you from emergency repairs and poor performance.
- Expert advice is invaluable: Resources like detailed guides on [cleaning the hidden filter in high-efficiency washers](https://smartappliancereview.com/how-to-clean-the-hidden-filter-in-your-high-efficiency-washer) have helped me identify issues before they escalate.
- Technology isn’t infallible: Modern appliances with smart features need periodic software updates and calibration to keep them functioning optimally—don’t just set and forget.
- Patience pays off: DIY fixes might take longer initially but reward you with a deeper understanding and genuine satisfaction—plus, savings.
Tools That Became My Home Appliance Lifesavers
- Flexible long-handled brushes: Perfect for cleaning narrow passages like dryer vents or dishwasher spray arms. I’ve found this to be essential for deep cleaning without dismantling everything.
- Digital infrared thermometers: Monitoring temperature fluctuations in refrigerators ensures your food stays fresh while preventing energy waste. I trust my thermometer for quick checks instead of guesswork.
- Lightweight vacuums with crevice attachments: For sucking out lint in dryer vents or dust from fridge coils. These small additions make a big difference.
- Specialized cleaning solutions: Using products like appliance-specific spray or descaling agents keeps internal parts clean, reducing malfunctions. I’ve used this guide to pick the right solutions for my appliances.
Don’t Wait for Breakdowns—Take Charge Today
Your appliances are more complex than they appear, but with a little knowledge and proactive care, you can keep them running smoothly for years. Embrace the journey of learning about your home’s vital systems, and enjoy the peace of mind that comes with well-maintained appliances. Remember, the effort you invest today pays off in safety, efficiency, and savings tomorrow. So, why not start with that quick clean of your dishwasher spray arms or a check of your refrigerator’s temperature sensors?
What small maintenance task have you overlooked that might be saving you money or preventing a disaster? Share your experiences below—I’d love to hear your story!