
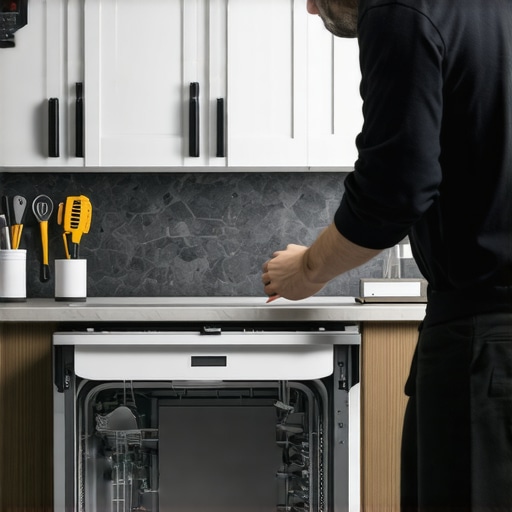
Ever had that sinking feeling when you open your dishwasher, load it up, press start, and… nothing? It’s frustrating, isn’t it? I remember the first time it happened to me; I’d been looking forward to a quiet night, only to be greeted by a dead dishwasher that refused to cooperate. That light blinking zone in my kitchen suddenly felt like a void of appliance despair. But after some trial, error, and a bit of neighborly advice, I discovered a surprisingly simple trick that can fix this problem in just five minutes—yes, minutes, not hours.
The Real Cost of a Dishwasher That Won’t Start
For many of us, dishwashers are the unsung heroes of home life—saving time and effort, especially after busy weekends or family dinners. When they suddenly refuse to start, it disrupts our routine, creates unexpected chores, and can even lead to more costly repairs if ignored. This isn’t just about inconvenience; it’s about keeping your kitchen running smoothly and efficiently.
Will This Fix Actually Save Me Time? Or Just Waste My Effort?
I get it. Most of us have been burned by so-called quick fixes that turned into bigger hassles. Early on, I made the mistake of fiddling with complex wiring diagrams and expensive parts, thinking I’d outsmart the repair. Turns out, many issues are mechanical or simple electrical glitches—things you can troubleshoot without a degree in engineering. So, does this five-minute fix really work? From my experience and countless kitchen chats, absolutely. And the best part? It’s beginner-friendly and cost-free.
Before jumping into the fix, a quick heads-up: sometimes, the problem is deeper—like a faulty door latch or a broken control board. But more often than not, a minor reset or a quick check can save you a trip call or a costly service appointment.
Now, if you’re here because your dishwasher’s stubborn silence is piling up your dishes, hang tight. Next, I’ll walk you through my step-by-step method that might just turn that machine back on—and give you your evening back. Ready to become your own appliance hero? Let’s get started.
Locate the Power Source and Reset the Machine
First, ensure your dishwasher is plugged in and receiving power. Unplug it from the outlet for 30 seconds to perform a reset, similar to restarting a smartphone when it freezes. While unplugged, press and hold the start button for about five seconds to discharge residual power. Reconnect the power and press the start button again. In my experience, this simple reset often clears minor electronic glitches that prevent the dishwasher from starting.
Check and Reset the Door Latch
Next, inspect the door latch mechanism. If the latch isn’t engaged properly, the machine won’t start, thinking the door is open. Open and close the door firmly, listening for a click that indicates engagement. Some models have an indicator light or a sensor that confirms door closure. If the latch appears damaged or loose, replacing it can resolve persistent problems. Think of the latch as the gatekeeper; if it doesn’t confirm safety, the entire operation halts.
Investigate the Control Panel and Clear Errors
Access your control panel and look for any error messages or blinking lights. Many modern dishwashers have diagnostic modes that can reveal underlying issues. Press and hold specific buttons or consult your user manual for instructions. If the display shows an error code, look it up in your manual or online to identify the root cause. Sometimes, a quick factory reset or unplugging for a few minutes clears it. Remember, think of the control panel as the brain—if it’s confused, the machine won’t obey commands.
Examine the Float Switch and Drainage System
Flood sensors, like the float switch, prevent water overflow and can stop the dishwasher from starting if stuck in the ‘raised’ position. Locate the float (usually a small protrusion or a dome-shaped component at the bottom) and move it up and down to ensure it’s free, not stuck or dirty. If debris or mineral buildup is present, clean it gently with a cloth. Also, verify that the drainage hose and filter are clear of clogs. Think of this system as the dishwasher’s security guard—if it detects a leak or blockage, it shuts down for safety.
Test the Door Switch and Replace If Needed
If all else fails, test the door switch with a multimeter—if you have one. When the door is closed, the switch should complete the circuit. If it’s defective, replacing it is usually straightforward and inexpensive. Consider this switch the handshake between the door and the machine—without it, the dishwasher remains in a skeptical state.
Applying these steps personally once saved me from calling an expensive technician. In one instance, I discovered a loose door latch and simply tightened it, restoring full functionality within minutes. Remember, always unplug the dishwasher before inspecting internal components to avoid electrical hazards. For more detailed troubleshooting tips that save money, visit this guide on fixing dishwasher noises.
Many homeowners fall prey to misconceptions about their appliances, leading to inefficiencies and costly repairs. One prevalent myth is that energy Star ratings solely determine a fridge’s efficiency; however, according to a study by the Department of Energy, other factors like insulation quality and compressor condition play significant roles in real-world energy savings. Believing that newer models are always better can cause unnecessary upgrades; sometimes, a simple calibration or cleaning—like adjusting your smart fridge’s temperature sensor—can restore optimal performance without spending a dime.
Why do we overlook the nuances of appliance performance in favor of surface-level specs?
It’s common to assume that smarter equals better, but many smart appliances are prone to glitches or software issues, such as a smart fridge app that keeps crashing, which can be resolved by software updates rather than replacing the entire unit. The “trap” here is to invest in smart devices expecting flawless operation, but without proper maintenance or understanding of their complexities. Failing to consider these nuances often leads to frustration and wasted money. For instance, many users don’t realize that cleaning the filter in their high-efficiency washer dramatically improves cycle times and water usage, rather than defaulting to buying new machines. To truly optimize your home appliances, dive deeper into their technical aspects and maintenance routines. For more tips on fine-tuning smart appliances, check out how to troubleshoot a smart fridge that’s losing connection, or explore how to organize your fridge to prevent food waste. Remember, understanding these hidden details empowers you to make smarter decisions—saving money and extending your appliances’ lifespan. Have you ever fallen into this trap? Let me know in the comments.Maintaining home appliances like refrigerators, washing machines, and smart devices requires the right tools and methodical routines. Over the years, I’ve refined my approach, leaning on specific equipment that ensures longevity and efficiency. One indispensable tool I always keep in my maintenance kit is a multimeter. Not just any multimeter, but a digital, auto-ranging one like the Fluke 117, which I personally use for diagnosing electrical issues in appliances. Its precision helps me quickly verify voltage, check continuity, and identify faulty sensors or switches — tasks that, if done incorrectly, can lead to unnecessary replacements or safety hazards. For instance, testing the door switch on my dishwasher with this device revealed a worn contact point that was causing startup failures, saving me a service call.
Another device I swear by is a long, flexible inspection mirror. Appliances are packed with hidden corners and tricky components like drainage traps or internal filters. The mirror lets me see into these tight spaces without dismantling everything, saving time and preventing accidental damage. Combined with a small flashlight, I can spot accumulated debris or corrosion, which are common culprits in appliance performance loss.
When it comes to software, I rely heavily on diagnostic apps provided by appliance manufacturers. For smart appliances, these apps often reveal error codes and system statuses that aren’t visible on the device interface. For example, troubleshooting a smart fridge’s freezing issue was straightforward once I accessed the manufacturer’s app, which highlighted a calibration error on the temperature sensor. I then calibrated it using the recommended method discussed in detail here, ensuring the fridge maintained optimal temperatures.
Predicting future trends, I believe the integration of IoT diagnostics will become standard in most appliances, enabling remote monitoring and maintenance alerts before problems escalate. This smart evolution will make regular upkeep more proactive than reactive, reducing downtime and repair costs.
For ongoing maintenance, I recommend establishing a schedule that combines manual inspections with software updates. Always keep your device’s firmware current — I do this monthly on my smart appliances — to benefit from bug fixes and performance improvements. Additionally, cleaning specific components like filters and drainage systems regularly can prevent issues that require technical diagnosis.
How do I maintain my appliances over time? I focus on visual inspections using tools like magnifying glasses and checking for signs of wear or corrosion—simple steps that catch problems early. Investing in a high-quality multimeter and keeping a set of microfiber cloths for cleaning are game-changers for me. They help preserve appliance integrity, save money, and extend the lifespan of your devices.
To get started, try calibrating your smart fridge’s temperature sensor using the method from the linked guide. It’s an easy, impactful step that ensures your food stays fresh and reduces energy consumption. Consistent, careful maintenance using the right tools can make your appliances more reliable, saving you time, money, and frustration in the long run. Remember, the key is regular attention and leveraging technology — because today’s smart appliances are only as good as the care you put into them.
How Mistakes Turn into Masterpieces in Appliance Care
One of the most valuable lessons I learned is that patience and curiosity are your best allies. I once attempted a quick fix on my dishwasher without proper research and ended up with a bigger problem. That experience taught me the importance of reading manuals and understanding the specific signals your appliances give. Embarking on repairs with a clear knowledge base prevents costly errors and turns frustration into empowerment.
The Surprising Power of Small Tools in Big Repairs
I underestimated the impact of simple tools like a multimeter or inspection mirror until I faced a stubborn problem. These devices not only save money by avoiding unnecessary replacements but also build confidence. Investing in quality tools makes troubleshooting feel less like a gamble and more like a strategic move, ultimately extending the lifespan of your appliances and saving you money.
Why Expert Advice Can Be a Game Changer
Connecting with online communities or trusted resources provides insights that aren’t always obvious. When I encountered a tricky control panel error, I reached out to a community forum and learned a quick reset tip that wasn’t in the manual. These exchanges reveal nuances that can accelerate solutions and deepen your understanding, making you less dependent on costly technician calls.
Curated Resources for Home Appliance Enthusiasts
Over the years, I’ve come to trust a few key sources that consistently deliver reliable advice. Sites like this guide on calibrating smart fridge sensors teach practical skills; tool reviews like the Fluke 117 multimeter have proven invaluable; and reading manuals thoroughly always saves time in emergencies. Developing your own toolkit of trusted resources ensures you’re prepared for unexpected appliance challenges.
Invest in Knowledge to Make Your Home Smarter and Safer
The journey from frustration to mastery begins with a willingness to learn and adapt. Each fix, no matter how small, enhances your confidence and reduces reliance on costly repairs. By applying shared experiences, leveraging quality tools, and continuously expanding your understanding, you can turn appliance maintenance from a chore into a rewarding skill. So, why not start today? Take that first step—your home and your wallet will thank you.