
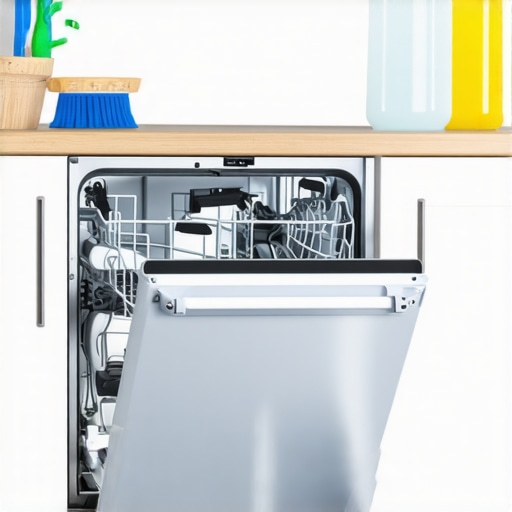
Ever noticed your dishwasher leave spots on your glasses or not quite getting your dishes as spotless as they used to? I’ve been there, countless times. One morning I opened the dishwasher to find my once-shiny plates streaked and stained, and I had this sinking feeling that my trusty kitchen helper might be giving me the silent treatment. That was my lightbulb moment—realizing that the problem wasn’t the detergent or the water temperature but something much simpler: clogged spray arms.
In this post, I promise to walk you through a straightforward, plumber-free way to clear out those stubborn spray arm nozzles. No special tools, no costly repairs—just some common household items and my own tried-and-true tips.
Why Cleaning Your Dishwasher’s Spray Arms Matters
Dishwashers are incredible time-savers, but they do require a bit of TLC to keep performing at their best. Over time, mineral deposits, food particles, and soap scum can build up inside the spray nozzles, blocking water flow and drastically reducing cleaning power. When the spray arms can’t spin freely or spray effectively, your dishes end up less than sparkling—and that’s frustrating.
Honestly, I used to dismiss this problem until I started noticing my dishes looked dirtier after cycles. It wasn’t my detergent or my water heater—just some gunk clogging those tiny nozzles. Regularly cleaning the spray arms not only ensures your dishes come out spotless but can also extend the life of your appliance. Think of it as giving your dishwasher a much-needed spa day.
And here’s a surprising fact: According to the Association of Home Appliance Manufacturers, a dishwasher with clogged spray arms can use up to 20% more water and energy trying to compensate for poor spray coverage. So, a quick cleaning can save you money on utilities over time.
Have you ever faced this issue and wondered if there’s an easy fix? If so, you’re in the right place. Next, I’ll share a simple step-by-step process to clear out those nozzles—no plumber needed. Plus, I’ll include some common mistakes to avoid, so your cleaning is effective and safe. Let’s troubleshoot and restore your dishwasher’s sparkle, one spray arm at a time.
Prepare Your Workspace and Gather Tools
Start by unplugging the dishwasher to ensure safety, just like turning off your washing machine before cleaning its gasket. Grab a set of needle-nose pliers, a screwdriver (if needed to remove spray arms), an old toothbrush, and some white vinegar. Having everything handy prevents interruptions and keeps your cleaning efficient.
Remove the Spray Arms Carefully
Locate the spray arms at the bottom and possibly the top of your dishwasher. Use the screwdriver or follow your model’s specific instructions to detach them. Remember, I once struggled with a stubborn nozzle and snapped a tiny clip—so take your time to avoid damage. Once removed, set them aside to inspect thoroughly.
Disassemble and Inspect Nozzles
Carefully examine the spray arms for clogged or damaged nozzles. Use the needle-nose pliers or a small pin to gently poke through each hole. Think of the nozzles like tiny straws—over time, mineral deposits or food particles can clog them, similar to how a clogged straw prevents a good sip. Clear any debris you find, and if certain nozzles are broken, consider replacing the spray arm entirely.
Tip: Use vinegar to loosen mineral buildup
If deposits are stubborn, soak the spray arms in a bowl of white vinegar for about 15 minutes. This natural solution dissolves calcium and limescale, making it easier to clear blockages. I once soaked a spray arm overnight—mornings are perfect for a little DIY magic that saves costs on replacement parts.
Clean the Components Thoroughly
After clearing blockages, scrub the spray arms with an old toothbrush dipped in vinegar or warm soapy water. Pay close attention to the nozzles and the holes; ensure they’re free of gunk. Think of this step like cleaning out the nozzles of a garden watering can—clogged holes mean less water reaching your plants, just like in your dishwasher.
Reassemble and Reinstall
Once everything is spotless, reattach the spray arms securely to their original positions. Double-check that they spin freely—if they don’t, revisit the nozzles for remaining debris. If your dishwasher’s spray arm isn’t spinning properly, it’s akin to a ceiling fan that’s stuck—usually a small obstruction or misalignment is the culprit. For more troubleshooting tips, check out https://smartappliancereview.com/why-your-dishwasher-spray-arm-isnt-spinning-freely.
Run a Test Cycle with Vinegar
Place a cup of white vinegar in a dishwasher-safe container on the top rack and run a hot cycle. This cleans residual gunk inside the dishwasher and flushes out loosened debris from the spray arms. Expect your dishes to come out noticeably brighter and cleaner—like giving your appliance a fresh start. Regular maintenance using this method can prevent future clogs and save you a headache down the road.
Smart Appliances Aren’t Foolproof—Here’s Why
Many homeowners believe that upgrading to the latest smart appliances guarantees hassle-free operation. However, tech-savvy devices have their quirks, and overestimating their reliability can lead to overlooked issues. For instance, some assume that connecting a smart dishwasher to Alexa will eliminate the need for manual maintenance, but frequent updates and app glitches can complicate your experience. To ensure seamless operation, it’s essential to understand that smart devices still require regular software updates and occasional troubleshooting. For expert advice on connecting your smart dishwasher without headaches, check out this guide.
Ignoring the Importance of Regular Maintenance
It’s a widespread myth that modern appliances are maintenance-free. The truth is, neglecting routine care often leads to unexpected breakdowns and reduced lifespan. For example,cleaning your dishwasher’s spray arms regularly prevents clogs and ensures optimal cleaning performance. Overlooking simple tasks like checking door gaskets or cleaning filters can result in costly repairs down the line. Remember, a little maintenance goes a long way in keeping appliances running smoothly for years. Curious about deep cleaning your washing machine gasket? Here’s a step-by-step tutorial.
Why do some appliances seem to break down prematurely despite careful use?
This often comes down to misunderstanding user manuals and neglecting manufacturer-recommended maintenance schedules. Appliances are designed with specific requirements, and ignoring these can void warranties and accelerate wear. For example, using the wrong detergent in high-efficiency washers can cause excessive soap scum buildup, leading to frequent malfunctions. To avoid such pitfalls, always consult your appliance’s manual and adhere to recommended maintenance routines. For tips on maintaining your refrigerator’s efficiency, see this article.
Common Mistakes That Cost You Time and Money
One prevalent mistake is overloading appliances, which hampers their efficiency. For dishwashers, this can mean dishes aren’t cleaned properly; for washing machines, it can cause unbalanced loads and damage. Additionally, many ignore the importance of proper placement—placing a fridge too close to heat sources increases energy consumption and hampers performance. Another trap to avoid is using the wrong cleaning products, which can corrode components or leave residues. A prime example is employing abrasive cleaners on stainless steel appliances, leading to streaks or scratches. To prevent these issues, regularly servicing your appliances and following manufacturer guidelines is crucial. Want to improve your fridge’s organization? Check out this guide.
How can I optimize my smart home’s appliance setup for maximum efficiency?
Making your smart appliances work together seamlessly requires strategic setup. Start by ensuring all devices are connected to a stable Wi-Fi network, ideally with a dedicated hub or mesh system to prevent dropped connections. Proper grouping and automation routines enhance usability; for example, scheduling your smart dishwasher to run during off-peak hours reduces energy costs. Regularly updating firmware ensures compatibility and security. For a comprehensive walkthrough, visit this article.Maintaining your home appliances isn’t just about occasional cleaning—it’s about having the right tools, techniques, and knowledge to ensure they run efficiently and last longer. Over the years, I’ve honed my toolkit and methods to handle everything from stubborn grime to complex system bugs. One essential tool I rely on is a digital thermal camera, which helps me identify uneven cooling in refrigerators or overheating components in washing machines, preventing costly breakdowns before they happen. Additionally, using high-quality, appliance-specific cleaning solutions—like descaling agents for dishwashers—has made a significant difference in keeping parts free of mineral buildup.
Beyond physical tools, I leverage smart diagnostic apps that connect directly to appliances. These apps, such as the manufacturer-specific ones or universal solutions like Home Connect, provide real-time data and troubleshooting guides. For instance, I regularly check my smart dishwasher’s status remotely, ensuring it’s functioning optimally without waiting for error messages to escalate. These tools are especially invaluable as appliances age, offering insights that manual inspections might miss. As technology advances, I predict we’ll see even more integration of AI-driven diagnostics, making maintenance more predictive than reactive.
How do I maintain my appliances over time?
Consistency is key. I schedule monthly inspections—cleaning filters, checking door seals, and running diagnostic cycles—using dedicated tools. For refrigerators, I set up regular defrost cycles and calibrate temperature sensors annually to prevent spoilage and save energy. For washing machines, I run deep cleaning cycles with vinegar and baking soda every three months, leveraging insights from guides like this resource to prevent mold and odors. With smart appliances, I keep firmware updated and review app notifications for potential issues, ensuring that software glitches don’t compromise performance. Adopting these routines minimizes unexpected failures and prolongs the lifespan of my appliances.

Lessons I Learned from Overlooking Small Details in Appliance Care
- Ignoring tiny nozzles costs more than just dirty dishes—it’s a reminder that even the smallest parts need attention. My lightbulb moment was realizing that a simple spray arm clean-up could prevent expensive repairs down the line.
- Not regularly inspecting and soaking spray arms in vinegar was a missed opportunity. It’s amazing how natural solutions can prevent calcium build-up and extend your appliance’s lifespan.
- Overestimating the durability of smart features led me to forget manual maintenance routines. Remember, even the latest tech needs occasional TLC to stay effective.
- Thinking that a quick rinse was enough—deluded myself into believing high-end filters would do all the work. Reality is, thorough cleaning paired with proper care produces the best results.
My Go-To Arsenal for Dishwasher Brilliance
- White Vinegar: The unsung hero for dissolving mineral deposits. Proven to keep spray nozzles clear and dishwasher interiors fresh. I trust it because it’s affordable and eco-friendly.
- Needle-nose Pliers and Small Pins: Essential for poking through clogged nozzles. I keep a small set handy after experiencing the frustration of blocked spray holes during busy mornings.
- Smart Diagnostic Apps: Tools like manufacturer-specific apps or universal ones help me catch issues early. They provide reassurance that my appliances are in top shape without guesswork.
- Deep-Cleaning Cycles and Manual Inspections: Routine maintenance routines I swear by, preventing buildup and prolonging appliance life. They’ve saved me from costly repairs and replacements.
Taking Charge of Appliance Care Sparks Joy and Savings
“Getting your hands dirty with routine maintenance might seem daunting at first, but it’s an empowering step that pays off in performance and longevity. Every small fix—a quick spray arm clean, a vinegar soak—adds up to a more efficient, longer-lasting appliance. So, why not take action today? Regular checkups and simple maintenance routines could prevent a breakdown just when you need your dishwasher most. Remember, your appliances are tools that deserve your care, just like your car or garden. What small maintenance habit will you start this week to keep your dishwasher running smoothly? Share your plan below!”}#}#=function(){return {title: