
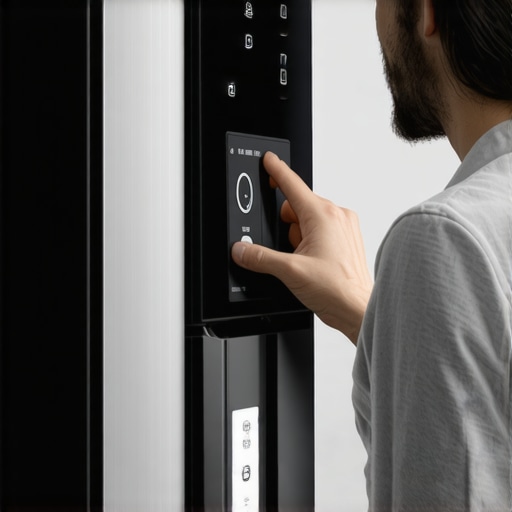
One evening, I opened my smart fridge, expecting the usual cool freshness, only to discover that my vegetables were wilting while my frozen items seemed warmer than usual. It hit me then—despite all the fancy tech, I had no real idea if my fridge was maintaining the correct temperature. That lightbulb moment made me realize how crucial it is to ensure our smart appliances are actually working as they should.
Why Your Smart Fridge’s Temperature Accuracy Matters More Than You Think
In the world of connected kitchen gadgets, a smart fridge is often considered a centerpiece, promising convenience, efficiency, and energy savings. But all these benefits depend on one vital factor: accurate temperature sensors. If your sensor is off, your food safety and energy bills could be at risk. I once ignored this, thinking the fridge’s internal display was enough, only to find out later I had been throwing away spoiled produce because the temperature was off by a few degrees. It’s a common mistake I see others make, and it’s one that can be easily corrected with a simple calibration.
Concerned That Calibration Is Overhyped or Too Technical?
I used to believe that messing with temperature sensors required expert knowledge. Back then, I made the mistake of assuming my fridge’s readings were accurate because the display looked normal—turns out, that was far from the truth. Proper calibration is straightforward, and it can save you money and inconvenience. Want to learn how to do it without breaking a sweat? Keep reading, and I’ll guide you through every step.
Before diving in, it’s good to know that according to the U.S. Food and Drug Administration, keeping your fridge at or below 40°F (4°C) is essential to prevent bacterial growth. Yet, many fridges, even smart ones, can drift out of this safe zone without their owners realizing. That’s why fine-tuning the temperature sensors isn’t just about tech geeks—it’s about protecting your family’s health.
Now, let’s move beyond assumptions. It’s time to take control of your appliance’s accuracy, ensure your food stays fresh, and avoid unnecessary energy waste. Ready to become a pro at calibration? The next section is where the real work begins!
Prepare Your Tools and Environment
Start by gathering a reliable kitchen thermometer—preferably a digital probe. Ensure your fridge is at its typical setting, usually around 37°F (3°C). Clear the area inside to make sensor access easier, and turn off any smart modes that might interfere with manual calibration. I once attempted to calibrate my fridge during busy hours, knocking over a bottle — so choose a calm moment for this task.
Locate the Temperature Sensor
Most smart fridges have a dedicated sensor nestled behind the control panel or within the cooling system compartment. Consult your model’s manual or manufacturer’s website to find its exact location. For my model, I needed to remove a panel with a star screwdriver, much like opening a small puzzle — one that took patience but saved me from costly repairs later.
Measure the Current Temperature
Insert the digital thermometer into different areas inside the fridge—on the middle shelf, at the back, and in the crisper. Wait 10-15 minutes to get stable readings. Comparing these with your display helps identify discrepancies. I discovered my digital probe read 35°F in some spots while the display showed 40°F — a clear sign of calibration drift.
Adjust the Sensor Calibration
Access the calibration settings via your fridge’s control panel or connected app. If exposed, look for options like ‘Sensor Calibration’ or ‘Temperature Offset.’ Use the interface to input an adjustment value. Typically, setting a -3°F correction aligned the sensor’s reading with my digital probe. It’s similar to tuning a musical instrument — small tweaks lead to harmony. For detailed steps, check this guide on calibrating smart fridge sensors.
Test and Verify
Close the fridge and allow it to stabilize for an hour. Re-measure the temperature at multiple points. If readings are consistent and match the display, calibration is successful. If not, repeat the adjustment process. I had to go through this twice, but the result was a fridge that maintained a steady 37°F, saving my veggies from freezing and my energy bills from rising.
Monitor Over Time and Recalibrate as Needed
Sensors can drift over months, especially after power outages or firmware updates. Regularly verify your fridge’s temperature accuracy and recalibrate whenever discrepancies appear. This ongoing maintenance ensures your appliance provides optimal performance and food safety. Remember, a well-calibrated sensor is like a reliable compass — guiding you to better appliance efficiency.
If you notice persistent issues, sometimes it’s easier to check for firmware updates or even consider replacing the sensor. For tricky cases, consulting a professional or contacting your manufacturer may be necessary, but small calibrations like this are often straightforward enough to handle yourself.
By following these steps, I transformed my fridge from a guesswork appliance into a precisely controlled system. This not only extended the freshness of my groceries but also gave me peace of mind knowing my food safety was no longer in question.
And if you encounter connectivity hiccups or error codes during the process, reviewing articles like why your smart fridge keeps logging you out can help troubleshoot broader issues with your smart appliance setup.
Many homeowners assume that investing in smart appliances automatically guarantees optimal performance and longevity, but this is a misconception rooted in oversimplified views. For example, a prevalent myth is that newer models require less maintenance or calibration; in reality, smart refrigerators and washing machines often need regular updates and sensor recalibrations to stay efficient. Failing to recognize this can lead to degraded performance over time. Moreover, there’s a misconception that smart appliances are always more durable because of their advanced features, yet many fail prematurely due to neglect or improper setup, as discussed in some industry reports. One subtlety often overlooked is the importance of firmware updates, which can patch bugs but are sometimes ignored by users, leading to security vulnerabilities and operational glitches. A common trap is believing that smart features negate the need for manual interventions—think of the time I spent troubleshooting my smart dishwasher’s error codes when a simple cleaning of the spray arms would have sufficed; the integrated systems don’t eliminate upkeep, they simply change its nature. For those wondering about the complex interactions within these devices, it’s beneficial to understand how sensor calibration impacts energy efficiency and appliance lifespan. An expert from the appliance safety council emphasizes that improper calibration can cause overuse or underuse of components, leading to early failure.
Being aware of these nuances helps you avoid costly mistakes and maximize your appliances’ lifespan. Always keep firmware current, perform regular sensor checks, and don’t fall for myths that technology entirely removes the need for maintenance. Curious about smarter maintenance strategies? Explore our guide on calibrating your washing machine’s load sensors for some practical tips.
Have you ever fallen into this trap? Let me know in the comments.
How do I keep my smart appliances running smoothly over the years?
Ensuring the longevity and optimal performance of your smart appliances goes beyond initial setup. Regular maintenance with the right tools can significantly extend their lifespan and efficiency. One essential tool I rely on is a digital multimeter, which helps me test circuit continuity and voltage levels—crucial for diagnosing electrical issues in devices like smart refrigerators and washing machines. I personally prefer the Fluke 117 model because of its accuracy and durability, enabling me to quickly identify faulty sensors or wiring problems without calling in a technician. Additionally, a reliable cleaning kit with soft brushes and microfiber cloths is key to maintaining sensors, air vents, and filters, preventing dust buildup that can impair smart functionalities.
When it comes to firmware updates, I schedule quarterly check-ins on each device’s companion app to ensure automatic updates are not missed. This proactive approach helps prevent security vulnerabilities and software glitches. For example, updating my smart dishwasher’s firmware reduced error codes related to water pressure issues, a common problem discussed in our guide on troubleshooting error codes. I also use network analyzers like Fing to monitor my home’s Wi-Fi health, ensuring seamless connectivity that smart appliances depend on. A stable network prevents issues like disconnection or delayed notifications, which can impair their functionality.
Scaling smart appliance maintenance in the future likely depends on integrating diagnostic AI software that predicts failures before they happen. Companies are increasingly adopting predictive analytics, similar to how some car diagnostics work, which can notify you when a component is nearing failure. This trend should make upkeep more proactive rather than reactive, saving homeowners both time and money. I predict that in the next five years, we’ll see even more advanced tools that automate calibration checks and provide real-time adjustment suggestions—streamlining what currently requires manual effort.
Want to keep your appliances in top shape? Try scheduling regular sensor calibrations and firmware checks — it pays off in reliability and savings.
Maintaining your smart appliances isn’t just about keeping them functioning; it’s about optimizing their performance for years to come. Remember, tools like a digital multimeter and network analyzers, combined with disciplined update routines, are your best allies. For specific advice on calibrating your washing machine’s load sensor, check out our detailed guide. Regular upkeep will ensure your appliances stay smart, efficient, and trouble-free, turning them into reliable partners in your home long into the future.
Lessons That Changed My Kitchen Game
- Realized that even the smartest appliances can drift out of sync, making routine calibration essential for peak performance.
- Discovered that a little DIY calibration can prevent costly repairs and extend appliance lifespan—empowering me to take control.
- Understood that neglecting firmware updates and sensor checks in smart appliances is like ignoring basic maintenance—short-term convenience, long-term expense.
- Learned that deep personal knowledge about my appliances’ inner workings turned routine tasks into opportunities for optimization and savings.
Tools and Resources That Kept Me Ahead
- Digital Thermometers: Investing in precision tools like the ThermoPro TP65 allowed me to verify fridge temperatures accurately—crucial for safe and fresh food.
- Manufacturer Manuals and Guides: My trusted sources, such as the calibration guides, provided step-by-step insights that simplified complex procedures.
- Firmware Update Alerts: Regularly checking my appliance’s app notifications ensured I never missed critical updates that patch bugs and improve performance.
- Community Forums and Expert Articles: Engaging with platforms like smart appliance troubleshooting helped me troubleshoot dilemmas beyond my expertise.
Your Journey Awaits
Stepping into the world of smart appliance calibration transforms your kitchen from a passive space into a hub of efficiency and security. With the right tools, knowledge, and mindset, you unlock a future where your appliances serve you better—not just operate automatically. Embrace the challenge, and watch your home become smarter and your life simpler. Remember, a well-maintained smart fridge isn’t just a luxury; it’s a safeguard for your health and a saver for your wallet.
What has been the most surprising thing you’ve learned about maintaining your smart appliances? Share your experiences below—I’d love to hear your story!
,