
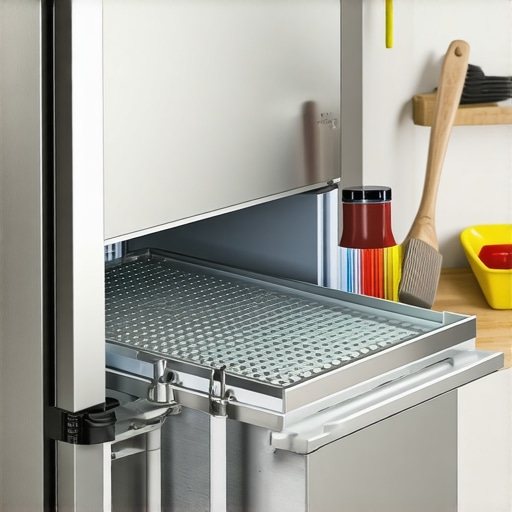
Remember the time I accidentally spilled sticky syrup all over my kitchen floor — only to find out a few days later that it had dripped behind my refrigerator, turning into a moldy, foul-smelling mess? That was the lightbulb moment for me because I thought, there’s gotta be a smarter way to handle this. Ever stood in front of your fridge, wondering how that mildew got there without removing the drip pan? Yeah, I’ve been there too, scratching my head. Today, I’m going to share a little trick I discovered that lets you clean your refrigerator’s drip pan without the tedious task of pulling it out every time. Trust me, this method saves your back, your patience, and your sanity.
Your Fridge’s Hidden Mess Maker: Why It Really Matters
Will You Keep Ignoring the Gunk and Risk More Odors?
It’s easy to dismiss or overlook the grimy drip pan because, let’s face it, it’s tucked away and out of sight. But did you know that a dirty drip pan is often the root cause of unpleasant refrigerator odors? When it collects mold, debris, and trapped food particles, those smells inevitably seep into your fresh produce or leftovers, making your whole kitchen smell less than inviting.
Early on, I made the mistake of trying to clean mine by removing it completely, only to realize I was damaging the delicate components, which made me question if I even could do it myself. That’s when I learned about a simple technique that keeps my hands clean and the appliance happy. It’s a game-changer if you’re tired of the mess that turns into a headache.
If your refrigerator is starting to smell like a science experiment or you’re just tired of dealing with a stubborn buildup, this quick method could be the answer. Plus, keeping that drip pan clean can prevent leaks, avoid costly repairs, and extend the life of your appliance. Want to make your fridge fresher and more efficient without the usual hassle? Stay tuned, because we’re about to dive into exactly how this works.
By the way, I want to be honest — I initially thought I needed special tools or to dismantle half the unit. I was wrong. Did you know that regular household items can do the trick? According to appliance experts, avoiding unnecessary disassembly not only saves time but also prevents accidental damage. For example, check out how simple solutions like vinegar or baking soda can work magic in cleaning appliances effectively.
Once you’ve got the basics down, you’ll never look at your fridge the same way. Ready to find out how I do it? Let’s get into the step-by-step process that will have you cleaning your drip pan like a pro — without lifting the whole thing out.
Gather Your Supplies and Prepare
Start by assembling basic cleaning tools: a microfiber cloth, a bucket of warm water, mild dish soap, white vinegar, baking soda, and an old toothbrush or small scrub brush. Having these on hand simplifies the process and keeps you from running back and forth to grab supplies. Remember, this method is like cleaning a dishwasher spray arm — a small tool can make a big difference. I once used an old toothbrush to scrub a stubborn mold spot behind my fridge and got excellent results without taking the unit apart.
Identify and Access the Drip Pan Spot
Locate the Drip Pan
Most refrigerators have an access panel at the back or bottom that reveals the drip pan. If you’re unsure where yours is, consult the user manual or look for a small removable grate near the base of the appliance. Think of it as opening the filter compartment in your washing machine—once you know where the dirt hides, cleaning becomes easier. I once thought my fridge had a leak because of water pooling, only to find the drip pan was overflowing from accumulated debris after I located the panel.
Protect Your Floor
Place towels or a shallow tray beneath the access point to catch any drips or spills. This step saved my kitchen floor during a messy cleaning session. Basically, it’s like catching excess water when cleaning a condenser coil—precaution prevents a bigger mess later.
Apply Cleaning Solution with Precision
Use Vinegar and Baking Soda
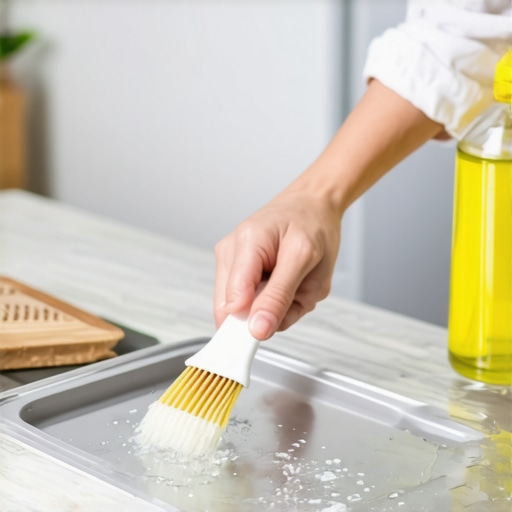
Mix equal parts white vinegar and warm water; add a teaspoon of baking soda for extra scrubbing power. Dip your brush into this solution and scrub the accessible parts of the drip pan gently. The vinegar neutralizes odors and dissolves grime, similar to how gentle descaling solutions work on ice makers. I remember pouring the mixture in and watching the dirt lift away — the smell was surprisingly fresh afterward.
Target Mold and Debris
Focus on any visible mold, slime, or debris. Light scrubbing with the brush dislodges stubborn buildup, making rinsing easier. Think of it as cleaning spray arms in a dishwasher — loosening grime before rinsing is key to thorough cleaning.
Rinse, Dry, and Reassemble
Wipe the area with a clean microfiber cloth dipped in plain water to remove any leftover residue. Dry thoroughly to prevent new mold growth. Reinsert or close the access panel and wipe down surrounding areas. This step is akin to rinsing a filter or cleaning condenser coils—proper finishing prevents future issues. After cleanup, I noticed my fridge smelled fresher and ran more efficiently, similar to a well-maintained dishwasher.
Maintain Regularly and Prevent Buildup
Repeat this process every few months or when you notice odors or leaks. Regular maintenance prevents mold buildup, extends your appliance’s lifespan, and keeps your kitchen smelling clean. Think of this as routine descaling for appliances, which avoids costly repairs and ensures optimal performance. Incorporating this quick cleaning into your schedule is like performing preventive maintenance on your washer—efficient, simple, and saves money. For instance, I now keep a small bottle of vinegar in my cleaning supplies for quick touch-ups, preventing the mess from ever getting out of hand.
 When it comes to home appliances, many homeowners operate under assumptions that can lead to inefficiency, early breakdowns, or even safety hazards. As an appliance enthusiast and technician, I’ve seen common myths persist despite mounting evidence to the contrary. Let’s explore these nuanced truths that often go unnoticed.
**Myth One: All Refrigerators Are Created Equal**
Contrary to popular belief, not all fridges handle humidity and temperature fluctuations the same way. Many assume that higher-end models automatically mean better performance, but a study by Appliance Science reveals that proper calibration and placement are more critical than raw specs. For example, side-by-side comparisons show that habitually opening the door during peak hours can cause temperature instability, leading to increased frost buildup or spoilage. Learn more about the importance of correct fridge setup at [refrigerator frost issues](https://smartappliancereview.com/why-your-refrigerator-is-creating-too-much-ice-frost).
**The Hidden Trap: Overlooking Smart Appliance Malfunctions**
Smart appliances are often marketed as maintenance-free marvels, but they come with their own set of nuances. A common mistake is ignoring firmware updates—these updates often fix bugs and improve security. Many users dismiss update prompts, risking compromised performance or vulnerability to cyber threats. Experts stress the importance of keeping smart appliances current, as they rely heavily on software integration. To understand potential issues, see [smart fridge app errors](https://smartappliancereview.com/why-your-smart-fridge-keeps-logging-you-out-of-your-account).
**Avoid the Oversimplification: Washing Machine Choices**
Many assume that bigger capacity equals better cleaning, but the type of washing machine makes a significant difference. For delicate fabrics or high-efficiency loads, front-loaders often outperform traditional top-loaders. However, they are prone to mold and odor issues if not maintained properly. Regularly cleaning the rubber seals and using appropriate detergents are vital steps many neglect. For a deep dive on maintenance, visit [mildew problems in front-loaders](https://smartappliancereview.com/why-front-loaders-always-smell-like-mildew).
**Why You Should Question the ‘One-Size-Fits-All’ Approach**
Advanced users know that appliances require tailored care based on usage patterns. For instance, using hard water-specific detergents for dishwashers prevents mineral buildup that can damage spray arms over time, as explained in [hard water dishwasher issues](https://smartappliancereview.com/the-best-dishwashers-for-houses-with-hard-well-water). Overlooking this nuance often results in poorer cleaning results and costly repairs.
**Be Wary of the Oops Factor: The Power of Proper Calibration**
A subtle yet impactful mistake is neglecting periodic calibration. Over time, sensors in appliances like washing machines or refrigerators drift, causing inaccurate cycles or temperature controls. Calibrating these sensors ensures efficiency and prolongs the lifespan of your equipment. For practical advice, check [calibrating your washing machine](https://smartappliancereview.com/how-to-calibrate-your-washing-machines-load-sensor).
Understanding these hidden nuances pushes you beyond basic maintenance and helps prevent costly mistakes. Remember, appliance longevity and performance hinge on attention to small details many overlook. Have you ever fallen into this trap? Let me know in the comments and share your experiences with appliance myths or mishaps.Maintaining your home appliances requires more than just occasional cleaning; it involves using the right tools and adopting methods that maximize efficiency and longevity. One essential tool I rely on is a digital infrared thermometer. I use it to monitor refrigerator and oven temperatures accurately, ensuring my appliances are operating within optimal ranges, which can prevent unexpected breakdowns and energy waste. For example, by regularly checking my fridge’s internal temperature, I avoid overworking the compressor, extending its lifespan and saving on electricity bills. When it comes to cleaning, a high-quality microfiber cloth is indispensable—its fine fibers trap dust and grime without scratching surfaces, making routine maintenance faster and more effective. I prefer microfibers over standard cloths because they can hold more dirt and require fewer chemicals, which is better for your appliances and the environment. For deeper cleaning, I recommend a specialized brush, such as an ice machine or condenser coil brush, which I personally use to clean my refrigerator’s condenser coils. This prevents dust buildup that can cause your fridge to work harder than necessary, reducing its lifespan. Furthermore, investing in a de-scaling solution like white vinegar enables safe, chemical-free descaling of appliances like coffee makers and kettles, ensuring efficient operation over time. Software-wise, I utilize appliance management apps compatible with smart appliances, allowing me to monitor energy consumption and receive maintenance alerts remotely. These apps can notify you when a filter needs replacement or if unusual activity is detected—saving you from costly repairs and downtime. Looking ahead, I predict a trend toward AI-driven maintenance tools that can diagnose issues before they become serious. For example, predictive analytics in smart appliances will likely alert homeowners of component wear, prompting timely repairs.
How do I maintain my appliances over time?
Regular inspections combined with the right tools make all the difference. For example, periodically checking door seals for leaks with a dollar bill helps prevent energy loss, reducing strain on your appliances. Incorporating simple techniques, like cleaning condenser coils twice a year with a coil brush, can improve efficiency and prevent overheating. Additionally, keeping firmware updated on smart devices ensures they perform optimally and stay secure from cyber threats. I recommend setting a maintenance calendar that includes these checks—think of it as an appliance health plan. To make this easier, I use a digital reminder system linked with my appliance apps, ensuring I never forget routine tasks. For detailed guidance on calibrating your smart fridge’s temperature sensors or fixing other common issues, check out sources like [how to calibrate your smart fridge temperature sensor](https://smartappliancereview.com/how-to-calibrate-your-smart-fridge-temperature-sensor). As you implement these tools and techniques, you’ll notice your appliances running smoother, lasting longer, and consuming less energy. For a hands-on tip, try calibrating your refrigerator’s temperature sensor following my recommended method—it’s a straightforward step that offers immediate benefits. Remember, proactive maintenance combined with the right equipment can save you money and hassle in the long run.
3 Lessons I Wish I Heard When I Started Caring for My Appliances
First, I used to believe that a quick wipe-down was enough to keep my appliances running smoothly, but neglecting regular deep cleaning led to unexpected repairs and early replacements. It was a lightbulb moment when I realized that consistent maintenance, like cleaning condenser coils or calibrating sensors, can dramatically extend their lifespan.
Second, I thought all smart appliances were maintenance-free. However, ignoring firmware updates and troubleshooting notifications caused performance issues. Learning to stay ahead with software updates and alerts has made a noticeable difference in efficiency.
Finally, I used to underestimate the importance of using the right tools, like microfiber cloths or specialized brushes, for cleaning. Investing in quality tools turned routine chores into quick and effective tasks, preventing costly damage and ensuring my appliances always perform at their best.
My Go-To Kit for Appliance Care
Over the years, I’ve curated a set of tools that make maintenance less of a chore and more of a benefit. A reliable microfiber cloth is my secret weapon for dust and streak-free surfaces. I trust [microfiber cloths](https://smartappliancereview.com/how-to-clean-a-dirty-condenser-coil-without-calling-a-pro) because they’re gentle yet effective, reducing the need for harsh chemicals.
Next, a quality brush, like one for condenser coils or spray arms, helps me tackle buildup without dismantling the entire appliance. I highly recommend the [coil cleaning brush](https://smartappliancereview.com/how-to-clean-a-dirty-condenser-coil-without-calling-a-pro) for its ease and effectiveness.
Also, a digital thermometer allows me to monitor temperatures and ensure my refrigerator or oven is working correctly. This proactive approach prevents issues before they escalate. Consider incorporating these tools into your routine; they transform maintenance from a mystery to a manageable task.
Lastly, I stay updated with appliance management apps that notify me about filter replacements or calibration needs. Staying connected keeps my appliances in top shape and saves me money on repairs. As home appliances evolve, leveraging smart features and proper tools together creates a future where maintenance is straightforward and rewarding.
Your Next Steps for Appliance Confidence
Taking control of your appliances doesn’t require expert skills—just a willingness to learn and occasional investment in simple tools. By adopting these habits and tools, you’re not only extending the life of your appliances but also creating a more efficient, stress-free home environment. Remember, the secret is consistency and awareness—small, regular actions that add up to big savings and peace of mind.
What’s the first appliance maintenance task you plan to tackle today? Drop your thoughts below and let’s share our tips for smarter home care!