I’ll never forget the moment I heard that unsettling thud from my laundry room—the sound of my washing machine rocking violently during the spin cycle. It was a frustrating wake-up call that my basement floor, with its uneven patches and sagging spots, was wreaking havoc on my appliance. That shaky feeling wasn’t just annoying; it threatened the longevity of my machine and even risked damaging my floors and walls. It was then I realized how crucial it is to ensure your washing machine sits level, especially on a floor that isn’t perfectly flat.
Why an Unlevel Basement Floor Can Cause More Than Just Noise
If you’ve ever experienced your washing machine moving or vibrating excessively, you’re not alone. An uneven floor can lead to unnecessary wear on the appliance, cause leaks, and create noise disturbances that disturb your entire household. According to appliance experts, even minor unevenness can amplify vibrations, leading to premature machine failure and costly repairs. Additionally, a tilted washer can make it difficult to open and close doors properly, and over time, may cause internal parts to wear unevenly, shortening their lifespan.
Is Leveling Your Washer Worth the Hassle?
It’s a common misconception that leveling a washing machine is a tedious chore best left for professionals. Early in my journey, I made the mistake of ignoring the unevenness, assuming it was just a minor issue. Naturally, that led to more vibrations, louder noise, and eventually a balance sensor warning on my machine. I learned the hard way that taking a few simple steps to level your washer can save you money and headaches down the line. For further insights on how smart appliances can simplify household maintenance, you might want to visit this guide.
Assess Your Floor’s Unevenness
Begin by visually inspecting your basement floor where the washer sits. Use a long level or a straightedge ruler to identify high and low spots. During my own project, I placed the level on each corner of the machine to gauge tilt—this step is crucial because it determines the amount of adjustment needed and helps prevent overcorrecting.
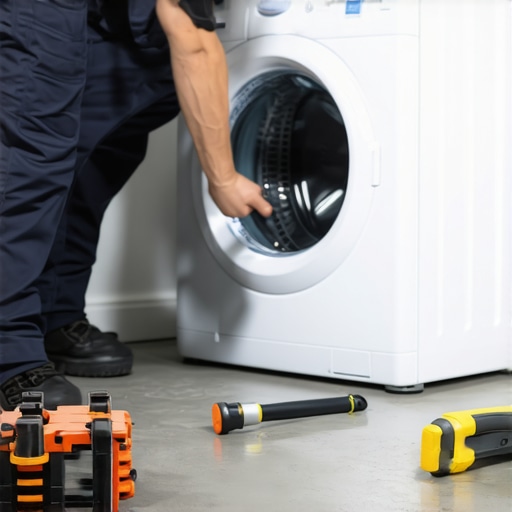
Gather Necessary Tools and Materials
Prepare a adjustable wrench, shims (wooden or plastic), a tape measure, and a rubber mallet. Think of shims as tiny house-leveling stilts for your washer; they fill gaps and stabilize uneven surfaces. I found that plastic shims offered better durability in a damp basement environment.
Adjust the Washer’s Feet
Loosen and Raise or Lower
Locate the locking nuts on each adjustable foot. Use your wrench to loosen these nuts, then turn the feet clockwise to raise or counterclockwise to lower until the machine is level. In my experience, turning each foot by about a quarter turn made noticeable progress, so work systematically to avoid over-adjusting.
Use a Level to Confirm
After adjusting each foot, place the level on the top edge of your machine again. Repeat until the bubble is centered in the vial, indicating a level position. I spent about 10 minutes fine-tuning, and the reduction in vibrations was immediately noticeable.
Add Shims for Persistent Unevenness
If the floor dips significantly, place shims under the adjustable feet or the base of the machine at the low spots. Secure shims with epoxy or construction adhesive to prevent displacement. When I did this, I also wrapped shims with duct tape to ensure they didn’t shift over time, maintaining the levelness during every wash cycle.
Test and Reinforce Stability
Run a short cycle to observe vibrations. If the machine remains steady, tighten the lock nuts to secure the position. In my case, I also added a non-slip mat under the washer, which acts as an extra shock absorber, akin to a mattress pad, reducing minor shakes and protecting the floor.
Regular Maintenance Tips
Periodically check the leveling, especially after heavy use or if you notice increased vibrations. Keep the area free of debris and dust that can interfere with the stability of the adjustable feet. For comprehensive tips on maintaining smart appliances like washers, visit this guide.

Many homeowners operate their appliances under myths that can lead to inefficiency and premature failures. One widespread misconception is that all refrigerators should be set to the coldest temperature to keep food fresh longer. In reality, overly cold settings can cause freezing of produce and increase energy consumption. Experts recommend sticking to approximately 37-40°F for refrigerators, optimizing both freshness and efficiency. Similarly, some believe that regularly running the dishwasher with a full load is enough to prevent buildup, but skipping periodic cleaning of spray arms and filters can result in poor cleaning performance over time. For smart appliances especially, neglecting firmware updates is a common mistake, which could leave your device vulnerable to bugs or decrease functionality. In fact, failing to keep software current might even limit energy-saving features or cause connectivity issues, as highlighted by appliance industry studies.
Why do so many get the most basic maintenance wrong?
It’s tempting to assume that a simple rinse cycle or regular loading suffices, but advanced appliances like smart washers and refrigerators require more nuanced care. For instance, not using the correct detergent or overloading machines can stress internal components, leading to early wear. Moreover, many users overlook the importance of voltage stability; surges or inconsistent power supply can damage sensitive electronics. A useful tip is to invest in a surge protector for these devices, which is often overlooked yet critical for longevity. Also, understanding the specific wash cycle options can dramatically impact cleaning efficacy — opting for eco modes is usually beneficial, but sometimes the intensive cycles are necessary for heavily soiled laundry. For comprehensive guidance, check out expert advice on [smart washing machines that save water](https://smartappliancereview.com/washing-machines-that-save-water-expert-advice-for-2025) and learn how nuanced knowledge can extend your appliances’ lifespan.
Push your appliances further with smart tech
Beyond basic care, integrating smart technology is transforming home appliance management. Many users miss out on utilizing the full potential of their connected devices—like scheduling cycles, diagnostic alerts, or energy monitoring. It’s essential to customize settings to your household routines; for example, setting your refrigerator to power-saving mode during peak electricity hours can reduce bills. Misconfiguration or neglecting these features might negate the benefits of your investment. Keep in mind, even small adjustments based on manufacturer guidance can yield significant savings and performance boosts. For a broader perspective, explore [top smart appliances for seamless living in 2025](https://smartappliancereview.com/top-smart-appliances-for-a-seamless-home-experience-in-2025) to understand how nuanced usage enhances your home experience.
Have you ever fallen into this trap? Let me know in the comments.
Maintaining your home appliances isn’t just about fixing issues as they arise; it’s about setting up systems that ensure long-term performance and reliability. One of my go-to tools for this purpose is a high-quality infrared thermometer. I use it regularly to check refrigerator door seals and freezer temperatures, making sure they stay within optimal ranges without guesswork. This simple step has saved me from costly repairs caused by overworking or inefficient settings. For anyone serious about appliance longevity, investing in a digital multimeter is equally beneficial. It helps diagnose electrical issues quickly, especially with smart appliances whose electronics may be sensitive to voltage fluctuations. Over time, consistent monitoring with these tools can prevent minor hiccups from escalating into major failures.
How do I maintain my appliances over time?
Another secret weapon in my toolkit is using a condensation sensor app integrated with my smart home system. It allows me to receive alerts if the refrigerator’s humidity levels or compressor activity deviate from normal ranges, as suggested by industry experts. Additionally, I schedule semi-annual deep cleanings of filter pathways and vents, using manufacturer-recommended cleaning agents. This ensures optimal airflow and prevents buildups that can cause overheating or inefficiency. Combining these practices with proactive software updates for smart devices—like firmware patches from this comprehensive guide—extends the lifespan of your appliances considerably. Predictions show that in the next few years, integrating AI diagnostics will become more accessible, automatically alerting homeowners to potential issues before they appear.
Enhance your maintenance routine with smart monitoring
For example, I recommend installing a smart plug with energy monitoring features on critical appliances. It helps track power consumption patterns, identifying irregularities that could indicate malfunction. I personally use a model that syncs with my home automation hub, making it easy to monitor from my phone. Regularly analyzing this data enables me to catch problems early, saving both time and money in repairs. As home appliances advance, embracing these innovative, data-driven tools becomes not just advantageous but essential for long-term performance. Trying out a smart plug with energy analytics is a step towards a more efficient and trouble-free household.

In addition to tools, establishing a maintenance schedule can dramatically improve appliances’ longevity. Use calendar reminders to perform regular checks—like cleaning filters or inspecting seals—so you stay ahead of potential issues. Keeping your appliances in top shape isn’t complicated but requires consistency and the right equipment. Start with the tools I suggested today, and watch your appliances perform better and last longer, saving you money and frustration in the long run.
What Hidden Truths About Home Appliances Did I Discover Late?
One of the biggest lightbulb moments for me was realizing how seemingly minor oversights—like ignoring a slight wobble—can snowball into costly replacements. I used to think that occasional noise was normal, but neglecting the importance of proper leveling and maintenance shortened my appliance lifespan and increased energy bills. Paying close attention to these details early on saved me a lot of frustration and money in the long run.
The Magic of Genuinely Reliable Tools and Resources
Over the years, I’ve come to trust certain tools and sources that truly make a difference. A high-quality digital multimeter helps me catch electrical issues before they escalate, and reading expert-driven guides on smart appliance maintenance has transformed my approach. These resources empower me to troubleshoot confidently and extend my appliances’ life, rather than waiting for breakdowns.
Investing Energy and Care Is a Form of Respect
The effort I put into maintaining my appliances isn’t just about saving money—it’s about respecting the devices that serve my family daily. Regular cleaning, software updates, and monitoring tools are acts of proactive care that foster a sense of control and peace of mind. Remember, your appliances are investments—treat them with the same attention you would give a cherished tool or hobby equipment, and they will serve you well for years to come.
What’s the biggest lesson you’ve learned from caring for your appliances? Share your story below—your experience might just help someone else avoid avoidable mistakes and extend their appliances’ lifespan!