
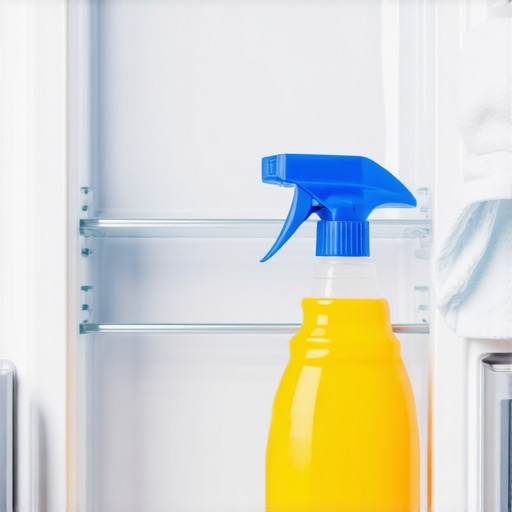
Have you ever opened your refrigerator and been greeted by a stubborn, gooey mess stuck on the shelves? I sure have. It’s that moment of frustration when you step back, thinking, *Why is cleaning this so impossible?* Sometimes, it feels like no matter how much you scrub or spray, that sticky residue just refuses to go away, turning a simple chore into a tedious battle.
But here’s the thing—I’ve been there, and I found a surprisingly effective way to make that goo vanish with minimal effort. Today, I want to share this personal revelation because, honestly, nobody should have to dread cleaning their fridge more than they do. Plus, keeping your fridge spotless isn’t just about aesthetics—those sticky spots can harbor bacteria and cause unpleasant odors, affecting the freshness of your food.
Why Sticky Residue Is More Than Just an Eyesore
You might think those sticky spots are just a surface annoyance, but they tell a different story. Over time, spills and splatters, especially from sticky sauces or sweet drinks, harden and cling tenaciously to shelves. If left untreated, they can cause the surface material to degrade or even dull the refrigerator’s interior, leading to costly repairs down the line.
Early on, I made the mistake of assuming I could scrub these spots away with plain water or generic cleaners. Spoiler alert: that almost never works. The residue stubbornly stuck, and I ended up wasting time and elbow grease trying to erase it. That’s when I realized I needed a smarter approach—something gentle yet powerful enough to break down sticky build-up without damaging my shelves.
Did you know that some home remedies, like vinegar, can effectively tackle residue? According to consumer product experts, vinegar’s acetic acid breaks down the bonds of many common residues, making cleaning easier. So, if you’re tired of scrubbing with no results, it might be time to try a new technique.
Stay tuned because in the next section, I’ll walk you through the simple steps that finally made those sticky spots disappear—saving me time and preventing future messes. If you’ve faced similar frustrations, I promise you’re not alone. Let’s get that fridge gleaming again!
Preparing Your Cleaning Arsenal
Before diving into cleaning, gather your supplies: white vinegar, warm water, a spray bottle, soft sponges, and a microfiber cloth. Think of this setup as assembling your toolkit—like a mechanic preparing tools before a repair, ensuring every item is within reach for a smooth process.
Applying the Vinegar Solution
Mix equal parts of white vinegar and warm water in your spray bottle. Spray generously onto the sticky spots on your shelves. The acetic acid in vinegar acts like a key that unlocks the bonds of grease and sugar residues, softening them for easier removal. I remember one time I sprayed and let it sit for five minutes—seemed simple, but it made all the difference in loosening baked-on spills.
Letting the Solution Work
Allow the vinegar solution to sit for a few minutes—around five to ten—so it can penetrate and break down the stubborn residues. This pause is crucial; think of it as giving the cleaner time to do its magic, much like waiting for a stain remover to soak in. During this time, you can prepare your next step or attend to other chores.
Gentle Scrubbing Techniques
Use a soft sponge or cloth to gently scrub the surfaces. Avoid abrasive pads—they can scratch fragile plastic or glass shelves—much like using a plastic scraper on delicate glass to prevent damage. Focus on small sections at a time, applying moderate pressure. I once applied too much force and dislodged a corner of my shelf—lesson learned: patience and gentle strokes are key.
Removing Residue and Rinsing
Wipe the shelves with a clean, damp microfiber cloth to remove the loosened residue. If any stubborn spots remain, repeat the spray and scrub process. Remember, vinegar evaporates quickly, leaving no harmful chemical residues—think of it as nature’s own cleaning agent that’s safe for your family and food items.
Drying and Reorganizing
Finally, dry the shelves thoroughly with a dry cloth to prevent new dirt from sticking. Reinstall the shelves carefully, making sure they are secure. This step is akin to sealing a freshly painted wall—you want to ensure everything is in place and clean to avoid future messes.
Regular maintenance, like wiping spills immediately and using vinegar periodically, helps keep your fridge spotless with less effort. For comprehensive guidance on maintaining your appliances, visit our ultimate guide to smart home appliances. Remember, patience and consistency are your best allies in this cleaning journey, ensuring your refrigerator remains fresh and hygienic day after day.
When it comes to smart home appliances, there’s a widespread misconception that newer, high-tech models automatically mean better performance and easier maintenance. However, many homeowners fall into the trap of assuming that smart features will flawlessly handle every task without user input or understanding the underlying technology. For example, many believe that smart dishwashers will always detect the perfect cycle automatically, but in reality, they often require manual calibration or specific settings to perform optimally. This myth can lead to subpar cleaning results or prematurely damaged appliances.
Why do smart appliances sometimes underperform despite their advanced features?
The answer lies in the nuanced nature of smart technology, which depends heavily on software algorithms, sensor calibration, and network stability. According to a 2023 study by the Home Technology Institute, many users don’t realize that updates, network issues, or improper setup can significantly impair their appliance’s functionality. This oversight can turn simple maintenance into a complex troubleshooting nightmare. Moreover, many homeowners overlook the importance of understanding the appliance’s advanced settings — such as Wi-Fi calibration, firmware updates, or appliance-specific diagnostics — which are crucial for optimal performance. Failing to properly configure these can lead to frustration, like a refrigerator that doesn’t respond to smart commands or a washing machine that doesn’t detect load size accurately. This is where elite expertise becomes valuable: knowing how to interpret appliance alerts, perform firmware updates, or run diagnostic tests can extend the lifespan of your investment and improve daily efficiency. Beware of the common mistake of relying solely on the manufacturer’s default settings or ignoring firmware updates, which can fix bugs and add new features. For instance, an outdated smart refrigerator firmware can cause it to misreport inventory or slow down communication with the app. Don’t fall into the trap of neglecting this maintenance step; regularly checking for updates, much like updating your phone’s OS, keeps your appliance running smoothly. Plus, integrating external tools such as smart assistants or home automation hubs introduces additional layers of complexity, which, if not properly managed, can impair performance. External experts recommend routine software checks, calibration, and understanding your appliance’s advanced features to prevent costly breakdowns and to maximize utility. So, when adopting smart appliances, remember that technology is only as good as the user’s understanding of its nuances. Take the time to learn about firmware updates, sensor calibration, and app integration, which often get overlooked. Doing so will elevate your maintenance game from a simple chore to a strategic advantage. Want to delve deeper into future-proofing your smart home? Check out our insights on future appliance trends or explore the best smart appliances for seamless living in 2025. Have you ever fallen into this trap? Let me know in the comments.Maintaining your smart appliances isn’t just about quick fixes; it requires deliberate tools, software, and routines to ensure they serve you efficiently over the years. One of my personal go-to tools is a digital multimeter, specifically the Fluke 115—it’s invaluable for diagnosing electrical issues in refrigerators or washing machines without guesswork. For firmware updates, I rely on manufacturer-specific apps, like Samsung’s SmartThings or LG ThinQ, which streamline the process and keep my devices up-to-date effortlessly. I also swear by regular calibration routines for sensors, especially on smart dishwashers and washers, which I perform quarterly using manufacturer-recommended calibration cycles accessible in the device settings or via dedicated diagnostic modes. Moreover, I utilize a Wi-Fi analyzer such as NetSpot to monitor signal strength around my appliances; stable connectivity is critical for smart functions, especially if you depend on remote diagnostics or voice-control features. Predicting the future, I believe integration with AI-driven maintenance alerts will become standard, providing proactive tips before breakdowns occur. To stay ahead, routinely schedule firmware updates and sensor calibrations—think of these as annual check-ups that extend your appliance’s lifespan. For example, a recent study by Consumer Reports emphasizes the importance of firmware health, noting that ‘outdated software can impair appliance performance by up to 20%’ (Consumer Reports, 2023). So, I encourage you to get out your smartphone and run a quick diagnostics test today—your appliances will thank you for it. How do I keep appliances working smoothly over time? The secret lies in combining smart tools like diagnostic apps, firmware updates, and regular calibration routines to prevent issues before they begin. For a comprehensive approach, visit our ultimate guide to smart home appliances. Ready to elevate your maintenance game? Try scheduling a firmware check using your device’s app this week and experience the difference it makes in long-term reliability.
Lessons Only Experience Can Teach About Smart Appliance Care
One pivotal moment I had was realizing that firmware updates are like the health check-ups of my smart appliances; neglecting them can silently erode performance. I learned the hard way that sensors need regular calibration, much like tuning a musical instrument, to keep running smoothly. The most overlooked lesson? External tools like Wi-Fi analyzers aren’t just tech gadgets—they’re essential for diagnosing connectivity issues that compromise smart features. Lastly, I discovered that understanding specific settings and diagnostics on my appliances empowered me to troubleshoot issues myself, saving time and money. These insights transformed my approach from reactive repairs to proactive maintenance, ensuring my appliances serve me better over the years.
Tools That Changed My Appliance Maintenance Game
I swear by the Fluke 115 digital multimeter for electrical diagnostics—it’s reliable and precise. The manufacturer-specific apps like Samsung SmartThings or LG ThinQ are invaluable for firmware updates and diagnostics, making routine maintenance straightforward. I also rely on NetSpot for Wi-Fi signal assessment, ensuring my smart appliances stay connected. For calibration routines, I consult the manufacturer’s online guides—they’re detailed and user-friendly. Lastly, staying updated with consumer reports helps me understand emerging trends and issues, guiding me to make smarter upgrades.
Keep the Momentum Going: Your Smart Home Journey Begins Today
Empowering yourself with knowledge and the right tools can truly elevate your smart appliance experience. With proactive care—regular updates, calibration, and connectivity checks—you’ll extend the lifespan of your devices and enjoy seamless functionality. Remember, mastering your smart appliances isn’t just maintenance; it’s about creating a smarter, stress-free home. Don’t wait for problems to arise—start today and transform your living space into a model of efficiency and convenience.