
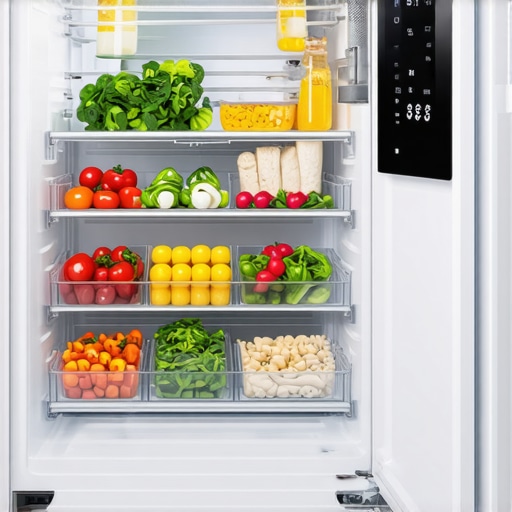
I’ll never forget the morning I opened my utility bill and nearly dropped my favorite mug. The numbers were staring back at me like a personal insult, and for the life of me, I couldn’t figure out why. I wasn’t running the AC yet. Then I heard it: that low, persistent growl from the kitchen. My refrigerator wasn’t just keeping my milk cold; it was working overtime because I had the settings cranked to “Arctic Tundra” for no good reason. I’ve made some dumb moves as a homeowner, but shortening the life of my fridge by overworking the compressor was a pricey lesson to learn. Most of us just plug the thing in and forget about it, but those factory dials are often set way too low. Today, I’m going to show you how to find that “Goldilocks” zone where your food stays fresh and your bank account stays full.
Stop Letting Your Fridge Burn a Hole in Your Wallet
It’s a weird realization when you find out your “smart” kitchen might be acting a bit dim. I spent years thinking that if I didn’t have my fridge at the absolute coldest setting, my leftovers would turn into a science project overnight. I was wrong. In fact, I spent months wondering how to stop my fridge from freezing the lettuce before I realized I was literally throwing money away. According to the U.S. Department of Energy, keeping your fridge at 37°F and your freezer at 0°F is the sweet spot for efficiency. Any lower, and you’re just paying for energy you don’t need. Have you noticed your fridge humming more lately, or are you just waiting for the next bill to give you a heart attack?
Is Energy Saver mode actually just a marketing gimmick?
I get it—you see that little green leaf icon or the “Eco” button and you think it’s just there to make you feel better while the machine does whatever it wants. I used to be a total skeptic too. I thought these hidden settings on your fridge were just for show. But after tracking my usage with a plug-in monitor, I saw the difference. Have you ever felt like these efficient settings actually make the motor run longer? You aren’t crazy. There’s a reason why your high-efficiency fridge runs more often than your old 90s clunker, and it’s actually a good thing for your bill. Let’s dive into the tweaks that actually move the needle.
Dial in Your Efficiency Without Overthinking It
The biggest mistake most people make is trusting the digital display on the door. It’s like trusting a car’s fuel gauge when it’s ten years old—it’s an estimate, not a scientific fact. To get your fridge to that 37°F sweet spot, you have to verify it manually. When I first started obsessing over my utility bill, I realized my display said 38°F, but my actual internal temperature was closer to 33°F. No wonder I was paying a premium for over-chilled groceries.
Verify the Numbers with a Glass of Water
Don’t just stick a thermometer on a shelf; air temperature fluctuates every time the door opens. Instead, place a glass of water on the center shelf and leave a cooking thermometer in it overnight. This simulates the actual core temperature of your food rather than just the air around it. If the reading isn’t 37°F, adjust your dial by a single degree and wait another 24 hours. This slow-and-steady approach is the most effective way of choosing the right refrigerator settings for your specific kitchen climate.

Quit Blocking the Vents Like a Roadblock
Think of your fridge like a small theater; if everyone stands in the aisles, nobody can get to their seats. Your appliance has internal vents that circulate cold air, and if you shove a giant carton of juice right in front of them, the sensor thinks the rest of the fridge is too warm. It keeps the compressor running non-stop. I remember when I first bought a high-capacity model; I was so excited to organize it that I blocked the back vent with a crate of eggs. Two days later, my milk was a solid block of ice while my produce was wilting. I had to learn how to stop my refrigerator from freezing the milk on the top shelf by simply understanding airflow patterns.
Master the Mystery of the Humidity Sliders
Those little plastic slides on your crisper drawers are your best friends for saving money. They control the airflow specifically for produce. Set one to “High Humidity” (closed) for leafy greens that wilt, and the other to “Low Humidity” (open) for fruits like apples that release ethylene gas. Properly using these is how to use your fridges humidity slides to keep produce fresh, which means fewer trips to the store and less food in the trash.
Clean the Coils or Pay the Price
If your condenser coils are covered in dust or pet hair, your fridge is essentially trying to run a marathon while wearing a heavy winter coat. It cannot shed heat effectively, which forces the motor to run longer and hotter. Pulling the unit out and vacuuming those coils once every six months is the secret to making your refrigerator last twice as long. When coils are clean, the compressor cycles off sooner, drastically reducing your energy consumption.
Level the Feet to Save the Seal
If your fridge is leaning slightly forward, the heavy doors might not close with enough force to engage the magnetic gasket fully. You might not see a gap, but cold air is constantly escaping, making your motor work overtime. Learning how to adjust the feet on your refrigerator to stop it from rocking ensures the unit is tilted slightly backward, allowing gravity to help keep that seal airtight and your kitchen energy-efficient.
The Secrets Your User Manual Forgot to Mention
Now that we’ve mastered the fridge, let’s talk about the biggest lie in the modern laundry room: the idea that more detergent equals cleaner clothes. I used to be the person who filled the cap to the brim, thinking I was being ‘extra clean.’ In reality, I was just gunking up my machine’s internals. Modern sensors are incredibly sensitive, and why your washer doesn’t need a whole cup of detergent to get clothes clean boils down to the fact that excess suds actually cushion the clothes, preventing the friction needed to scrub out stains. This leads to that dreaded ‘locker room’ smell because the machine can’t rinse away the soapy residue. It is a common trap where we think chemistry does 100% of the work, but it is actually the mechanical action of fabric rubbing against fabric that does the heavy lifting.
Why does your high-efficiency washer take forever to finish a load?
It’s the number one complaint I hear from frustrated homeowners. You switch from an old agitator model to a new one and suddenly a ‘Normal’ cycle takes 90 minutes. It feels like a step backward, right? But here is the nuance: why your high-efficiency washer takes so long to complete a load is actually a calculated move to save energy. According to experts at the Association of Home Appliance Manufacturers (AHAM), longer cycles with less water and lower temperatures actually use less energy than a short, hot blast. The machine is essentially ‘soaking’ your clothes more effectively rather than beating them up. It is a trade-off: your time for your utility bill’s health. If you force the ‘Quick Wash’ every time, you are actually putting more strain on the motor and using more water per minute than the standard cycle.

Stop treating your dishwasher like a pre-wash station
Here is my contrarian take: stop rinsing your dishes before they go in the dishwasher. I know, your mother told you to do it, and it feels wrong to put a plate with dried pasta sauce into a machine. However, innovative dishwashers with AI technology use turbidity sensors to measure how ‘dirty’ the water is during the first rinse. If you pre-rinse everything to a shine, the sensor thinks the load is already clean and runs a shorter, weaker cycle. This is a primary reason why your dishwasher pod isn’t dissolving completely; the water did not get hot enough or run long enough to break down the outer casing. You are literally sabotaging the machine’s brain by being too tidy.
The real ‘Oops’ factor that pros see every day is the neglect of the drain filter. Most people do not realize that if you do not clean that mesh screen at the bottom of the tub, the machine just recirculates dirty water over your ‘clean’ plates. This leads to biofilm build-up and is often the reason your high-efficiency washer smells like old gym socks (yes, dishwashers get it too). You have to run a dedicated cleaning cycle with an actual citric acid cleaner once a month, not just a quick rinse. Have you ever fallen into this trap and wondered why your ‘clean’ clothes or dishes smell funky? Let me know in the comments. We are all learning these expert advice for 2025 tricks together to keep our homes running smoothly.
Ditch the generic kit for these three specialized tools
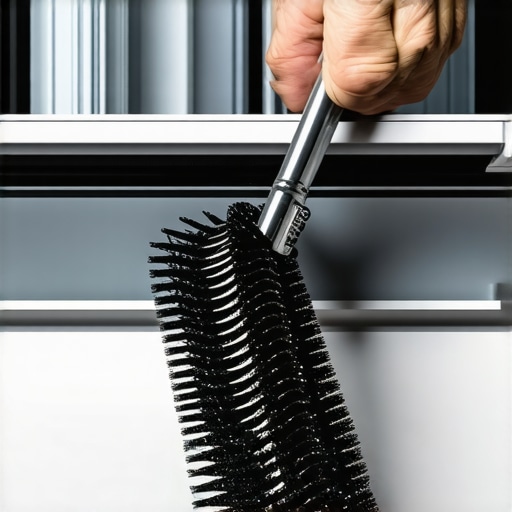
I used to think a standard screwdriver and a bit of elbow grease were all I needed to keep my kitchen humming. I was dead wrong. If you want to actually see results, you need a long-reach flexible condenser brush. Most vacuum attachments are simply too thick to get into the narrow fins where the real dust bunnies hide. When I finally used a proper brush, I pulled out enough lint to knit a small sweater. This isn’t just about tidiness; it is the secret to making your refrigerator last twice as long by preventing the compressor from overheating. Another tool I swear by is a simple multimeter. You don’t need an engineering degree to use one. If your washer won’t start, testing the door switch for continuity can save you a $200 ‘diagnostic fee’ from a repairman. I’ve saved thousands over the years just by checking the basics myself before making a call.
How can I keep these high-tech machines alive for years?
The key to longevity in the age of innovative dishwashers with AI technology is consistent, software-aware maintenance. It is no longer just about the mechanical parts; you have to treat your appliances like the computers they are. I make it a habit to check for firmware updates through my home app once a month. It sounds tedious, but manufacturers often release patches that optimize motor torque and water usage. Beyond the digital side, you must remain vigilant about the physical filters. According to a technical study by the National Institute of Standards and Technology (NIST), even minor sensor inaccuracies caused by debris can lead to a 15% spike in cumulative energy consumption. If your sensors are blocked, your machine is essentially flying blind, which is why I always keep a bottle of citric acid-based cleaner on hand to dissolve hard water scale before it causes a hardware failure.
Stop guessing and start using data for your repairs
If your front-loader starts throwing error codes, don’t just unplug it and hope for the best. I’ve learned that the most effective way to handle a drainage issue is to have a dedicated wet/dry shop vac ready to go. Learning how to clear a blocked pump on your front-load washing machine is significantly easier when you can suction out the standing water before opening the filter. It turns a potential flood into a five-minute fix. This data-driven approach is where the industry is going. In the very near future, the future of home appliances will involve predictive maintenance sensors that actually text you before a part fails. We are moving away from ‘fix it when it breaks’ to ‘fix it before it breaks,’ and that is a massive win for our wallets.
What your kitchen will look like in 2025 and beyond
As we look toward refrigerators in 2025, the trend is clear: modularity and self-repair. I’m already seeing manufacturers design parts that are easier for the average person to swap out without proprietary tools. This shift is a direct response to the ‘right to repair’ movement, and I couldn’t be happier about it. We’re moving toward a world where your dishwasher might actually suggest the specific part number you need and show you a video on the door screen of how to replace it. My advice? Don’t be intimidated by the tech. Embrace it, but keep your physical tools sharp. Go grab a cheap condenser coil brush right now and spend five minutes behind your fridge; your compressor and your monthly utility bill will thank me later.
The Expensive Lessons I Had to Learn the Hard Way
If there is one thing I have learned from years of tinkering, it is that a ‘set it and forget it’ mentality is a direct path to a massive repair bill. Here are the lightbulb moments that finally changed my approach to home maintenance:
- Maintenance is always cheaper than a repair call. Spending ten minutes once a month to clear debris or update firmware is far less painful than waiting a week for a technician to show up. I actually found out how to clean the lint filter you didn’t know your washer had only after my laundry started smelling like a damp basement.
- Trust the machine’s engineering over your own impatience. High-efficiency cycles feel slow, but they are designed that way for a reason. Overriding them with ‘heavy duty’ settings for every load is one of the primary 5 mistakes that are shortening the life of your smart refrigerator and other household electronics.
- Small, incremental adjustments win every time. You do not need to overhaul your entire kitchen settings at once. Start with the fridge temperature, wait a day, and then move on to optimizing your dishwasher loading habits.
Three Simple Tools That Save Me From Repair Bills
You do not need a professional-grade workshop to keep things humming, but these three items are non-negotiable for anyone who wants to keep their house running efficiently:
- A Long-Reach Flexible Coil Brush: This is the single best investment for your fridge. It reaches into the narrow fins where a vacuum nozzle cannot fit, preventing your compressor from dying a dusty death.
- A Basic Multimeter: This tool takes the guesswork out of broken sensors. If a door latch fails or a heating element goes cold, you can prove it with a five-minute test instead of guessing and buying expensive replacement parts that you might not even need.
- A Dedicated Wet/Dry Shop Vac: This is perfect for when you need to manually drain a clogged washer or suction out the standing water from a dishwasher filter area before it causes a mess.
For those looking for a more comprehensive gear list, I always check the ultimate guide to smart home appliances for a modern living to stay updated on what tools match the newest sensors and hardware on the market.
Take Control of Your Modern Kitchen Today
Owning high-tech gear does not have to be an intimidating experience. By mastering these small tweaks and maintenance habits, you are not just saving money on your utility bills—you are ensuring your home works for you, rather than the other way around. Whether you are currently researching how to choose the best dishwasher for your new apartment or just trying to lower your current electric bill, remember that knowledge is your most powerful tool. Your home is a complex ecosystem, and now you have the map you need to navigate it perfectly. What is the one appliance setting you have been too afraid to touch until now? Let me know in the comments below!