

I remember the first night I moved into my place with those gorgeous, glossy porcelain tiles in the laundry room. I felt like a real adult until I started my first load of heavy towels. Ten minutes later, I was sprinting toward the hall because it sounded like a frantic drummer was trying to kick his way out of the wall. My washer wasn’t just vibrating; it was “walking” across the floor, threatening to rip the hoses right out of the socket. If you have ever felt that panic while your house shakes, you are definitely not alone. Today, I am going to walk you through exactly how to level that machine so it stays put and stops making your life miserable. We aren’t just talking about a quick nudge; we are diving into the physics of tile and the precise adjustments that make a real difference.
That Thunderous Racket Coming From Your Laundry Room
When I first dealt with this, I made a classic amateur mistake: I thought I could just shove a piece of folded-up cardboard under the front left foot and call it a day. Within two cycles, that cardboard was pulverized into dust, and the banging noise returned even louder than before. The truth is, tile floors are unforgiving. Unlike wood, which has a bit of “give,” tile is a hard, flat surface that reflects every single vibration back into the machine’s frame. If your machine is off by even a fraction of an inch, the centrifugal force during a high-speed spin cycle becomes a literal wrecking ball. You might have noticed how your washer keeps banging during spin, and that is usually because the internal dampening system can’t keep up with an unlevel base. Interestingly, research from structural engineering groups often notes that mechanical vibration on rigid surfaces like ceramic tile can amplify acoustic noise by 15-20% compared to flexible substrates—this is why proper decoupling is vital according to the Acoustical Society of America.
Is it even possible to get a washer perfectly quiet on tile?
You might be skeptical. Maybe you have tried those cheap rubber cups from the hardware store and found that your vibration pads aren’t working like the package promised. I get it. It feels like a losing battle against gravity and high-RPM motors. But here is the secret: leveling isn’t just about the floor; it is about the balance of the load and the lock-nuts on the machine’s feet. Have you ever actually looked under your machine to see if the locking nuts are tightened against the frame? Drop a comment below if you’ve ever found your washer “wandering” into the middle of the room! Once we get these basics right, we can finally enjoy a laundry day that doesn’t sound like a construction zone.
Get Your Tools Ready Before the Heavy Lifting
Before you start wrestling with a 200-pound machine, you need the right gear. I learned this the hard way during a Saturday afternoon repair that turned into a midnight disaster. I thought I could just eyeball the levelness, but after five minutes of the spin cycle, the washer had migrated three feet toward the door. You need a dedicated bubble level and a pair of adjustable pliers. If you have a smart washer connected to your home wifi, check the app first; some modern units have internal sensors that give you a digital readout of how tilted the frame is.
Stop the Sway with the Diagonal Rock Test
One of the easiest ways to find the culprit is the diagonal rock test. Approach your machine and place your hands on opposite corners—front left and back right. Push down. If there is even a millimeter of movement, that leg is too short. Repeat this for the other two corners. I remember doing this on my first unit and realizing the back-right leg was practically floating in mid-air. This is a common issue when you are trying to level a washing machine on an old slanted floor where the tile might have been laid over a shifting subfloor. 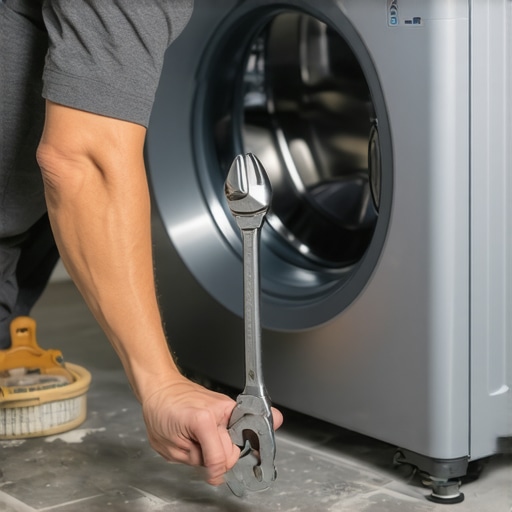
The Two-Wrench Technique That Saves Your Back
Now comes the actual adjustment. Most washing machines use a threaded leg with a locking nut. The leg itself adjusts the height, while the nut locks it into the frame. Here is the secret: you must adjust the feet while the machine is empty. I once tried to do this while washing bulky comforters that were mid-soak. The weight was so immense that I stripped the threads on the leveling leg, and I had to buy a whole new assembly. Use a pry bar or a piece of 2×4 wood to gently lift the corner of the machine, then twist the rubber foot to extend it until it makes firm contact with the tile. It is just like adjusting the feet on your refrigerator; you want zero daylight between the floor and the rubber.
Locking Down the Settings for Good
The step everyone misses is the lock nut. If you don’t tighten that nut flush against the bottom of the washer frame, the vibrations from the next cycle will simply vibrate the leg back into the ‘short’ position. Think of it like a guitar string; if the tuning peg is loose, it will never stay in key. Use your pliers to cinching that nut tight. This is especially important for washing machines that save water because they often use higher spin speeds to compensate for less rinsing, creating more intense centrifugal forces. If you are worried about the finish of your floor, you can learn how to move a heavy appliance without scratching the floor by using a small piece of carpet or a specialized slider while you make these tweaks. Once those nuts are tight, your machine should be as solid as the tile it sits on.Most DIYers assume that if the bubble level shows a perfectly centered line, the job is finished. But here is the contrarian truth: a machine that is ‘level’ but not ‘stable’ will still destroy your peace and quiet. On a slick surface like porcelain, the physical grounding of the feet is far more important than a 100% horizontal plane. If you have a slight slope in your laundry room, it is actually better to have the machine slightly tilted but rock-solid on all four feet than perfectly level with one foot barely touching the ground. According to the Association of Home Appliance Manufacturers (AHAM), internal sensors in modern units are designed to handle minor slopes, but they cannot compensate for the ‘harmonic resonance’ created by a floating leg. This is especially true for washing machines that save water, as they rely on intense, high-speed rotations to maximize efficiency.
Why does my washer still vibrate even when the feet are locked?
If you have checked the legs and the locking nuts but the machine still sounds like a jet engine, the culprit might be your soap. It sounds like a myth, but the truth about high-efficiency detergent is that using the wrong type or too much creates an ‘air cushion’ of suds that interferes with the drum’s ability to sense weight. This causes the machine to spin an unbalanced load, making all your leveling work useless. The ‘oops’ factor here is usually over-correcting the hardware when the software/chemistry is the issue. I have seen people buy expensive kits only to find their vibration pads aren’t working because the internal balance was never achieved. Have you ever fallen into this trap of chasing a mechanical fix for a chemical problem? Let me know in the comments. This level of precision is just as important when you are choosing the right refrigerator or trying to calibrate your smart fridge temperature sensors. In a modern home, everything from why your high-efficiency washer uses barely any water to the way your fridge sits on the floor affects the longevity of your investment. 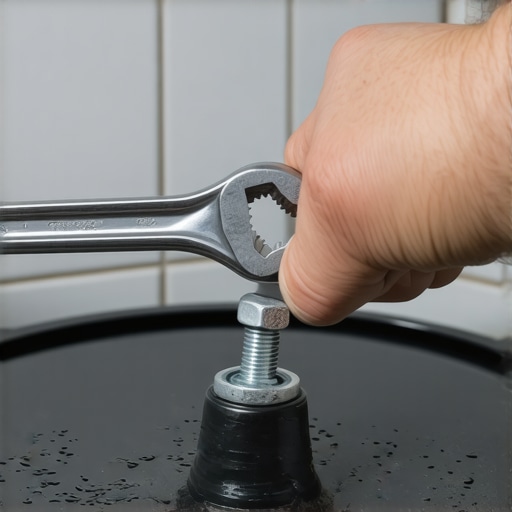 Always ensure the machine is ‘married’ to the floor, not just sitting on it.Once you have your machine locked down, the real work of preservation begins. I personally keep a digital inclinometer in my kitchen junk drawer—not because I am obsessed, but because a traditional bubble level can sometimes be tricked by a slightly bowed top panel. A digital readout gives me a precise decimal measurement, ensuring that my high-RPM washer stays within that golden 0.5-degree margin of error. If you find your machine throwing a fit after you have already leveled it, you might need to how to reset the error codes on your modern smart washer to clear the computer’s memory of those previous ‘unbalanced load’ errors. According to technical documentation from the Appliance Service Training Institute (ASTI), even a minor 2-degree tilt can accelerate bearing wear by nearly 30% over the lifespan of the unit, leading to an expensive repair that could have been avoided with a ten-minute adjustment.
How do I maintain my washer’s balance over time?
Maintaining that perfect equilibrium is an ongoing process, not a ‘one-and-done’ task. Every few months, I make it a habit to check the floor for signs of ‘creep’—those faint scuff marks that indicate the feet are starting to migrate. It is also the perfect time to investigate other hidden maintenance spots; for instance, knowing how to clean the lint filter you didn’t know your washer had can prevent heavy, water-logged debris from causing internal weight shifts that mimic an unlevel floor. If your machine starts acting erratic despite being level, you may need to learn how to hard reset your smart refrigerator control panel or its washing machine equivalent to recalibrate the internal gyroscopes. 
The Next Wave of Self-Leveling Technology
Looking ahead, I predict we are moving toward a world where ‘walking’ washers are a relic of the past. As we look at the future of home appliances trends to watch in 2025, we are already seeing the integration of active vibration dampening and AI-driven load distribution. These systems will likely use magnetic levitation or hydraulic counterweights to offset heavy loads in real-time, much like the stabilizers used in skyscrapers. For now, we still have to rely on our wrenches and patience. I challenge you to go into your laundry room right now and perform that diagonal rock test I mentioned earlier. If you feel even a tiny bit of movement, grab your pliers and tighten those lock nuts today—your floor (and your sanity) will thank you.
Secrets I Discovered After Three Flooded Laundry Rooms
I learned the hard way that a floor that looks flat isn’t always stable. Here are the lightbulb moments that finally fixed my vibration issues:
- Sudsy interference: I spent hours leveling when the real issue was too much soap. Understanding the truth about high-efficiency detergent changed everything; excess suds actually throw off the drum’s balance sensors.
- Subfloor flex: Tile is rigid, but the wood beneath it can bow. If your machine still shakes after leveling, you might need to level a washing machine on an old slanted floor by reinforcing the joists or using a thick plywood base.
- Locking is non-negotiable: Those locking nuts are the only thing keeping your settings in place. Without them, the high-speed spin will vibrate the legs right back out of alignment within a week.
#IMAGE_PLACEHOLDER_E#
What I Keep in My Maintenance Drawer
To keep your top smart appliances for a seamless home experience in 2025 running smoothly, you need more than just a standard toolbox. I personally rely on these specific items:
- Digital Inclinometer: This provides a much more accurate reading than a bubble level, allowing you to see exactly how many degrees of tilt you’re dealing with.
- Offset Open-End Wrenches: These are lifesavers when you need to tighten lock nuts in the cramped space between the washer and the floor.
- Heavy-Duty Silicone Pads: If your vibration pads aren’t working, switch to high-density silicone versions designed for industrial machinery; they grip tile better than cheap plastic cups.
Start Your Journey to a Silent Spin Cycle
Fixing a walking washer isn’t just about stopping the noise; it’s about protecting your investment and ensuring your home remains a sanctuary. Once you master the art of the rock-solid base, you’ll see how smart washing machines can simplify laundry day without the constant threat of a structural earthquake. Grab your tools and level your washing machine today for a quieter, more efficient home. Have you ever found your washer in a completely different spot than where you left it? Share your ‘walking washer’ horror stories in the comments!