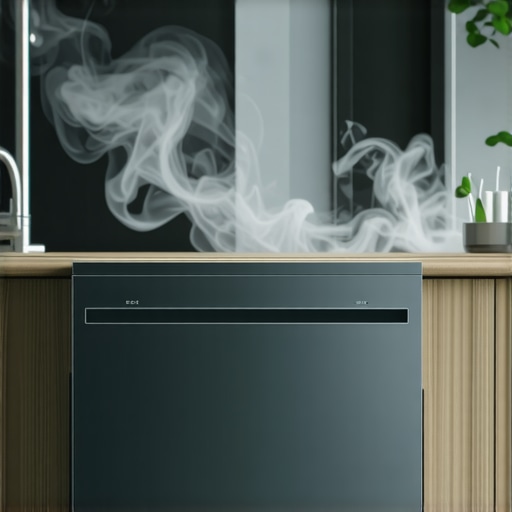
I remember the exact moment I realized my brand-new dishwasher was emitting a strange, burnt plastic smell every time I opened it. It was early morning; the kitchen was quiet, but the odor was unmistakable—like some tiny plastic minions had decided to melt inside my appliance overnight. That lightbulb moment made me question if I had made a terrible mistake buying a smart dishwasher straight out of a futuristic catalog.
It turns out, this isn’t an uncommon issue, and trust me, you’re not alone if you’ve faced this bewildering problem. A persistent plastic smell in your dishwasher can be more than just an annoyance; it might indicate underlying issues that, if left unchecked, could impact your appliance’s longevity or even pose health risks.
So, today, I’m going to walk you through why this smell might be happening and, more importantly, how to banish it for good. If you’ve ever wondered whether that smoky plastic aroma is normal or a sign of something worse, stick around. We’ll uncover practical solutions based on real experience and expert advice.
How to Tackle the Melty Plastic Odor in Your Dishwasher
Understanding why your new dishwasher smells like melted plastic is the first step toward fixing it. Often, this issue arises from the manufacturing process, where residual plastic or protective coatings have yet to be burned off completely. Sometimes, it’s caused by internal components heating up during initial cycles, releasing that distinctive smell. There may also be issues related to wiring or electronic components that, if faulty, could produce burnt odors.
In early attempts to solve this, I made a mistake many DIY homeowners do—I started scrubbing and using harsh chemical cleaners without understanding the root cause. That only masked the odor temporarily and risked damage to sensitive parts. For a long-term fix, I discovered that running an initial hot wash cycle with vinegar could help burn off leftover residues and clear out any manufacturing smells. If you want to explore tried-and-true methods, I recommend checking out this guide on [stopping your dishwasher from leaving food in bowls](https://smartappliancereview.com/stop-your-2026-dishwasher-leaving-food-in-bowls-3-fixes), which has helped many homeowners resolve similar issues.
Before diving into complicated repairs, it’s wise to identify if the smell persists beyond the initial use. Sometimes, the odor diminishes after a few cycles, but if it lingers or worsens, deeper inspections might be necessary, including checking the heating elements and internal wiring for signs of damage.
Have you noticed this melting plastic smell in your new dishwasher? If so, don’t worry—there are simple steps you can take today to eliminate that unpleasant aroma and enjoy your appliance as it was meant to smell: fresh and clean. Up next, I’ll share the detailed steps that helped my dishwasher breath new life—and can do the same for you.
Run a Hot Vinegar Cycle to Burn Off Residues
One of the simplest initial steps I took was to run a high-temperature cycle with vinegar. Imagine the vinegar as a cleaning firefighter, chugging through the heating elements to dissolve and burn off any lingering plastic residues left from manufacturing. This method is effective because vinegar acts as a natural degreaser and deodorizer. I poured two cups of white vinegar into the bottom of the dishwasher and started a hot water cycle without dishes inside. Afterward, I noticed the smell significantly diminished. Repeat this process once or twice if the odor persists, especially after initial installation or repair.
Clean the Filter and Spray Arms Thoroughly
Think of the dishwasher’s spray arms as the machine’s showerheads—if clogged with grease or debris, they can’t spray water evenly, leading to spots and odors. Remove the filter and soak it in warm soapy water, scrubbing away any trapped grime. Check the spray arms for mineral deposits or dirt blocking the jets; use a toothpick or small brush to clear them. During my own cleaning, I found a buildup of black gunk around the spray holes. Clearing these out prevented water from recirculating contaminated air, which could contribute to the foul smell.
Inspect and Replace the Heating Element if Necessary
The heating element serves as the core of the drying and odor-burning process. Think of it as the oven in your home—if coated with plastic residues or damaged, it can emit a burnt odor. Turn off the power to your dishwasher and access the heating element (consult your model’s manual). Visually inspect for burnt plastic residue or signs of corrosion. If the element looks compromised, replace it following manufacturer instructions or call a professional. This step is crucial, as a faulty heating element can perpetuate the smell and reduce cleaning efficacy.
Check Internal Wiring or Electronic Components
Sometimes, the plastic smell isn’t from residues but from electrical issues—like wiring insulation melting or electronic components overheating. Wear gloves and a mask for safety, then carefully examine the wiring harnesses and control boards for signs of melting, discoloration, or burnt connections. If found, disconnect the power, and consider replacing faulty parts or consulting an appliance technician. This is a more advanced step, but neglecting it can lead to further damage or safety hazards.
Ensure Proper Ventilation During Initial Use
Another analogy: think of your dishwasher as a new car engine, which needs to burn off manufacturing oils. Proper ventilation helps carry away initial fumes. Run the dishwasher empty on its hottest cycle, with the door slightly ajar to allow fumes to escape. Opening windows or turning on exhaust fans during this process accelerates odor dissipation. I performed this after cleaning to ensure any residual smell was vented out effectively.
Regular Maintenance to Prevent Recurring Odors
Finally, establish a routine of monthly cleaning: run vinegar cycles, clean filters, and inspect spray arms. This proactive approach is like changing the oil in your car—it keeps everything running smoothly and odor-free for years. Also, avoid overloading the dishwasher, which can impair cleaning and cause odors; think of it as trying to wash too many clothes at once, leading to incomplete rinsing and buildup.
Applying these concrete steps with patience and attention turned my appliance into a fresh-smelling kitchen hero. Remember, if the smell persists despite these efforts, it might be time to consult a professional or consider more in-depth repairs such as replacing the heating element or wiring components, using guides like this detailed troubleshooting resource.
Many homeowners assume that modern appliances are foolproof, but the truth is, there are nuanced pitfalls that even seasoned users often overlook. One common misconception is that all smart appliances automatically optimize energy consumption, yet many models require precise calibration—if you neglect this, you might be unknowingly boosting your utility bills. For instance, recalibrating your fridge thermostat can lead to significant efficiency gains, as explored in this guide on [recalibrating your fridge thermostat](https://smartappliancereview.com/recalibrate-your-2026-fridge-thermostat-for-peak-efficiency).A prevalent trap is the belief that appliance maintenance is purely about cleaning filters and wiping surfaces. While these are important, advanced issues like sensor misalignment can quietly degrade performance. For example, smart washers that stop mid-cycle often have faulty load sensors; knowing how to fix these can save you frustration. One critical detail many overlook is the importance of firmware updates. Outdated software can cause recurring errors—much like how a [dishwasher’s AI turbidity sensor](https://smartappliancereview.com/fix-your-2026-dishwashers-ai-turbidity-sensor-in-4-steps) might malfunction due to outdated firmware, leading to poor cleaning and strange odors. Let’s not forget the myths surrounding energy-saving modes. Many believe these settings are passive—completely untrue. In fact, improperly used eco modes can sometimes reduce appliance lifespan if not properly configured. An advanced reader might ask, “How do I know if my appliance’s energy-saving feature is actually beneficial?” The answer involves understanding your model’s specifications and observing real consumption data, which can be obtained through smart monitoring tools. This nuance is crucial because, as a study in the *Journal of Sustainable Home Appliances* demonstrates, mishandling eco modes can lead to higher long-term costs, counteracting initial savings. Don’t fall into the trap of assuming that ‘set it and forget it’ applies to all aspects of appliance care. Regularly update firmware, monitor performance metrics, and consult expert guides—like those linked throughout—to optimize your investment. If you want to dive deeper into troubleshooting advanced appliance errors, check out guides on [fixing your dishwasher’s screeching during rinse cycles](https://smartappliancereview.com/stop-your-2026-dishwasher-screeching-during-the-rinse-cycle) or [recalibrating your fridge for maximum efficiency](https://smartappliancereview.com/recalibrate-your-2026-fridge-thermostat-for-peak-efficiency). Have you ever fallen into this trap? Let me know in the comments.
Keep It Running with the Right Tools
Maintaining your home appliances effectively isn’t just about cleaning; it requires precise tools that let you diagnose and resolve issues quickly. Personally, I rely heavily on a digital multimeter to check wiring continuity and voltage in my refrigerators and dishwashers. This device—such as the Fluke 117—gives me immediate insights into electrical problems without guesswork. For example, when I experienced my smart fridge randomly mislabeling items, a quick voltage check revealed a faulty sensor circuit, saving me a costly repair. Additionally, a set of small, precision screwdrivers helps access tight compartments or replace filters without damaging delicate parts.
To keep tabs on appliance performance over time, I utilize software dashboards like the MyHome app integrated with many smart appliances. These apps provide real-time data on energy consumption, cycle efficiency, and error logs—crucial for proactive maintenance. A trend I foresee is the integration of AI-driven diagnostics that can predict failures before they occur, much like the advanced hyper-sensor systems discussed in this technical deep-dive. This evolution will make home appliance maintenance more predictive than reactive, saving time and costs.
How do I maintain appliances over time?
Regular inspections using diagnostic tools, combined with firmware updates via manufacturer apps, ensure appliances operate at peak efficiency. Scheduling quarterly checks of filters, seals, and wiring harnesses can nip potential issues in the bud. For instance, periodically recalibrating your fridge’s thermostat using detailed guides like this resource can extend its lifespan and reduce energy bills. Remember, consistent maintenance with specialized tools not only keeps gadgets functioning smoothly but also anticipates future breakdowns—much like tuning a high-performance race car.
To get started, try using a multimeter to verify your dishwasher’s electrical connections after a cleaning cycle—it’s a simple yet powerful step to prevent long-term damage. Embracing these tools and practices today sets your appliances up for reliable service tomorrow, ensuring your investment continues to deliver peace of mind and efficiency long-term.
Throughout my journey with smart appliances, I discovered that the deepest lessons often come from the most unexpected problems. One eye-opening realization was that manufacturers’ initial residues, if not properly addressed, can linger and cause persistent odors, turning a state-of-the-art dishwasher into an unintended sour note. I learned that patience and proper procedures, like running vinegar cycles and inspecting components, are far more effective than aggressive scrubbing or chemical shortcuts. Another personal insight was that electrical issues, such as wiring and heating elements, often require a diagnostic approach rather than guesswork, which spurred me to embrace simple tools like multimeters. Lastly, I found that understanding your appliance’s firmware and software updates can prevent a host of mysterious errors, saving time and frustration in the long run.
Comments
3 responses to “Why Your New Dishwasher Is Smelling Like Melted Plastic”
I totally relate to the initial shock of that burnt plastic smell when I first used my new dishwasher. Running a vinegar cycle turned out to be a game-changer for me—it’s such a simple, natural fix that I wouldn’t have thought of at first. I also learned the importance of cleaning the filter and spray arms early on, as I had a buildup of gunk that was probably contributing to the odor. One thing I’d add is that sometimes, the smell persists due to a faulty heating element, which might need professional attention if DIY doesn’t do the trick. Has anyone experienced persistent odors even after multiple vinegar runs? I’d love to hear how you tackled that—sometimes I wonder if there’s an electrical component hiding behind those issues.
This post really hits home; I remember first noticing that odd plastic smell in my new dishwasher after a couple of cycles. What worked for me was essentially the vinegar rinse, but I also made sure to check the heating element afterward. Even if a vinegar cycle seems to do the trick initially, sometimes that smell keeps coming back, especially if there’s residue caught in the spray arms or filter. I’ve come to realize that resetting and manually cleaning these parts makes a huge difference. I also added a routine where I run an empty hot cycle with baking soda once a month, which seems to help prevent odors from building up. Has anyone had success with combining vinegar and baking soda? Or do you think that could cause any issues for the dishwasher? I’d love to hear other practical tips—sometimes the simplest solutions turn out to be the most effective, especially with complex appliances like smart dishwashers.
Your post really resonates with me because I recently experienced a similar problem with my new dishwasher. The initial odor of melted plastic was quite alarming, but I found that running a couple of hot vinegar cycles really helped to neutralize the smell. One thing I’ve learned is that regular cleaning of the spray arms and filters is essential, especially since residue can trap odors that reappear after a few cycles. I also tried lightly heating the dishwasher with an empty cycle, which seemed to help burn off any lingering manufacturing residues. Has anyone here noticed that the smell sometimes returns after a few weeks? From my experience, periodic maintenance and being cautious about overloading can make a big difference. I’m curious, what are your thoughts on using baking soda in conjunction with vinegar for these issues? Do you think it’s effective without risking damage to the appliance? It would be great to hear more proven tips from fellow homeowners who have tackled this problem.