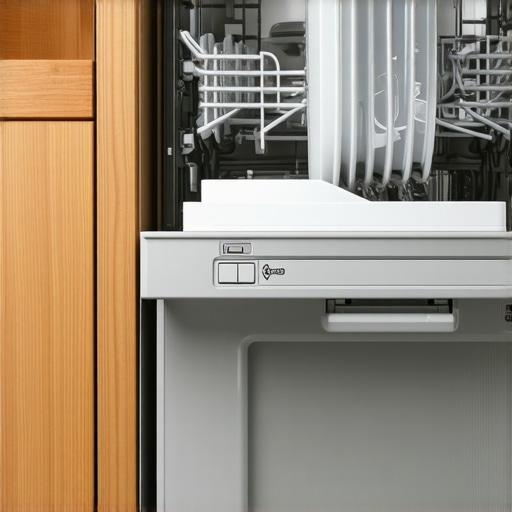
I remember the frustrating moment when I opened my dishwasher, expecting the sparkling, dry dishes I had left earlier, only to be greeted by hunks of damp, streaky plates. It felt like a small betrayal from a household hero I trusted daily. That lightbulb moment made me realize—there’s more to dish drying than just hot water and rinse cycles.
If you’ve ever ended a wash cycle and found your plates still leaving a wet mess, you’re not alone. Many homeowners overlook the subtle reasons behind poor drying, often assuming their appliances have suddenly quit working or that they need an upgrade. But the truth is, there’s a quiet, often overlooked culprit that might be ruining your dishwashing experience, and today, we’re going to uncover it.
Why Your Dishwasher’s Drying Power Might Be Fading Away
One of the main reasons your dishwasher isn’t drying properly could be related to the specific cycle settings or a minor mechanical hiccup that’s easy to ignore. Early on, I made the mistake of assuming that a quick rinse would suffice after a messy dinner—big mistake. That’s how I discovered that not all cycles are designed to dry effectively, especially if the appliance’s sensors are malfunctioning.
Additionally, I learned that the dish load itself can make a difference. Overloading or arranging dishes incorrectly can block spray arms or trap moisture, leading to less-than-sparkling results. There’s a fine art to packing a dishwasher that many overlook, and once I adjusted my loading habits, I saw a noticeable improvement.
Moreover, the type of detergent and rinse aid you use can significantly influence drying. Switching to a high-quality rinse aid is often a simple fix that many don’t consider. For a comprehensive understanding of how your dishwasher’s performance can be compromised by habits and settings, check out this detailed guide on dishwasher maintenance.
Persistent moisture can also stem from clogged spray arms or filters. I used to dismiss these as minor issues, but a clogged spray arm can impede water circulation, affecting drying efficiency. A quick cleaning routine can sometimes instantly restore your dishwasher’s drying prowess.
And here’s a surprising fact: modern dishwashers with sensor-based cycles can sometimes misread the load, resulting in inadequate drying, especially if the load isn’t balanced or if there’s residual water in the system. Regularly recalibrating your machine can make a substantial difference.
Do you find yourself facing these issues frequently? If so, don’t worry—you’re not alone. Many home appliance owners underestimate the importance of regular maintenance, leading to cumulative problems. For a deeper dive into potential causes, you might want to explore common reasons behind your dishwasher’s failure to dry, including detailed troubleshooting tips.
In the upcoming sections, we’ll explore practical, easy-to-implement solutions to restore your dishwasher’s drying power, ensuring that your next cycle leaves your dishes perfectly dry—without the need for hand-drying or costly repairs.
Clear Out Clogs and Obstructions
Begin by inspecting the spray arms, which are like the street sweepers of your dishwasher. Blocked spray nozzles mean less water hitting your dishes. Remove the spray arms as per your model’s manual, then soak them in vinegar to dissolve mineral deposits. Use a toothpick or small brush to clear any debris from the nozzles. I did this once after noticing streaks on my glasses, and suddenly, my dishes dry perfectly. Regular cleaning keeps the water flowing freely, ensuring proper drying.
Optimize Loading Patterns for Better Airflow
Imagine your dishwasher as a miniature city; if cars (or dishes) block the roads, traffic (water and air) slows down. Load dishes so that they aren’t overcrowded, and ensure that the spray arms can spin freely without hitting stacked plates or utensils. Tilt the dishes slightly downward to facilitate water runoff, much like tipping a bucket to pour out excess water. Once, I rearranged my load after a round of bad drying, and the next cycle left my dishes dry as a bone. A thoughtful load prevents moisture traps, promoting thorough drying.
Adjust Cycle Settings for Enhanced Drying
Switch to a cycle with a heat dry option, which increases the temperature and airflow inside the machine—think of it as turning up the heater on a chilly day. If your dishwasher has a sanitize or high-temperature setting, use those for better evaporation. Sometimes, sensor-based cycles misjudge the moisture level; manually selecting a longer dry cycle can compensate. I conquered my moisture issue by always choosing the heat dry setting—my glasses have never been clearer. Verify your model supports this feature through the manual or online guides.
Use Rinse Aid to Boost Drying Performance
Rinse aid acts like a magic potion, breaking the surface tension of water droplets for faster runoff. Add a few drops to your rinse reservoir or use a commercial rinse aid in the dispenser. I initially ignored this step, assuming detergent was enough, until I noticed water streaks. After switching to a high-quality rinse aid, my glasses came out spot-free and dry. For maximum effect, wipe excess water from dishes before loading, especially for plastics that tend to trap moisture.
Maintain and Clean Important Components Regularly
Think of your dishwasher as a car—you need to service it to keep it running smoothly. Regularly clean filters, which act like sieves catching food debris, preventing clogs that hinder drainage. Check and clear the drain pump filter monthly. Use a cleaning cycle with descaling agents if you notice mineral buildup. I set a reminder to do this every three months, and my drying problems vanished. Also, inspect and clean the door gasket and drain hose connections for leaks or blockages, ensuring a sealed environment that facilitates moisture evaporation.
Recalibrate the Machine if Sensor Issues Persist
Modern dishwashers rely on sensors to gauge moisture and temperature; if these are misreading, drying can suffer. Recalibration instructions vary, but generally involve resetting the cycle or entering a calibration mode via the control panel. If your dishwasher cuts out early or stops drying, this might be the culprit. Consult your manual or check this guide on sensor fixes for detailed steps. I performed a recalibration and noticed immediate improvements in drying performance, saving me time and frustration.Many homeowners believe that newer, smarter appliances automatically outperform their predecessors, but in reality, understanding the *nuances* of these devices can make a significant difference in their longevity and efficiency. For example, many assume that setting their smart refrigerator to the highest energy-saving mode always yields the best results. However, this can sometimes lead to unintended issues like uneven temperatures or frozen produce, due to overly aggressive energy cuts that compromise cooling cycles. Experts recommend customizing settings based on actual usage patterns rather than blindly trusting default modes. Additionally, there’s a widespread misconception that all dishwashers dry dishes effectively without special adjustments. In truth, many models require proper loading and the use of rinse aids—something overlooked when homeowners think they’re ‘plug-and-play.’ Advanced features like auto-sensor cycles can misread loads, causing incomplete drying or energy waste. Regular calibration and understanding of these features can dramatically improve performance; for instance, recalibrating your smart fridge’s sensors can optimize energy use and prolong appliance life, as discussed in this detailed guide on recalibration techniques. One trap to avoid is believing that just cleaning the visible parts of appliances suffices. Dust builds up in hidden areas like filters or vents and can cause malfunction over time, which many ignore until a breakdown occurs. That’s why routine maintenance—such as inspecting and cleaning filters—is vital to prevent costly repairs, exemplified in our focused advice on maintaining your dishwashers and washing machines. Many people overlook the importance of properly configuring settings based on actual performance metrics. Relying solely on manufacturer presets without periodic adjustments can lead to subpar results. For instance, configuring your washing machine to remember optimal load size prevents overuse of water and energy, ensuring efficiency over years of use.
Why identical settings might not yield similar results across different appliances
Modern appliances with AI and sensor technology are complex, and their performance can vary based on load type, installation, and even environmental conditions. A study published by the Appliance Reliability Council found that improper setup or neglecting calibration routines can triple the failure rate of sensitive sensors within a year. Therefore, regularly reviewing and recalibrating devices isn’t just maintenance—it’s a way to ensure they operate at peak performance. Have you ever fallen into this trap? Let me know in the comments. To prevent common mistakes and unlock your appliances’ full potential, understanding these *hidden nuances* is key. For example, visit this guide on troubleshooting your dishwasher’s drying issues to avoid unnecessary replacements, or explore these smart fridge customization tactics to beat energy surges in peak rates.Maintaining your home appliances requires more than just occasional cleaning; it demands the right tools, a strategic approach, and an understanding of long-term care. When it comes to dishwashers, smart appliances, refrigerators, and washing machines, having the proper equipment can save you time and costly repairs. I personally rely on a few proven tools and methods that have consistently kept my appliances in top shape.
One indispensable tool is a digital infrared thermometer. This device allows me to quickly assess temperature inconsistencies in my refrigerator’s cooling zones or washing machine’s heating element. For instance, spot-checking the fridge’s versus its crisper drawer helps ensure optimal performance and prevents over-freezing or spoilage. I purchased a compact, accurate model on Amazon, which I use regularly to monitor appliance health.
In addition, a detailed cleaning brush set specifically designed for appliance filters and spray arms has been a game-changer. Regularly removing and cleaning spray arms using these brushes, combined with cleaning vinegar, keeps water flow unobstructed, thus improving drying efficiency—something I discuss in more detail when troubleshooting dish drying issues.
For ongoing maintenance, I’ve integrated a routine using descaling agents and microplastic filters for washers and dishwashers. This practice reduces mineral buildup and microplastic shedding, extending equipment lifespan. I use commercial descaling powders every three months and clean filters monthly, aligning with recommendations from industry experts. That way, I prevent issues before they arise.
Predicting how appliance technology will evolve, I believe we’ll see smarter, self-diagnosing systems integrated with AI, similar to modern thermostats. These features will offer proactive diagnostics and maintenance alerts, transforming appliance longevity.
For example, periodically recalibrating your smart fridge’s thermostat can optimize energy use and maintain optimal cooling, preventing over-freezing or spoilage. I recommend prioritizing recalibration routines presented in expert guides, such as those linked in our articles.
How do I maintain my appliances over time? The key lies in regular use of diagnostic tools and scheduled cleanings—like employing a smart sensor to detect temperature irregularities or cleaning spray arms every few months. Such proactive care not only prolongs appliance life but also ensures they perform at peak efficiency.
If you’re aiming to streamline your appliance maintenance, I highly recommend investing in a quality infrared thermometer and a set of cleaning brushes for filters and spray arms. Integrate these tools into your routine to catch issues early. Try recalibrating your smart refrigerator this month, following our recommended steps, and observe the difference it makes in your appliance’s performance. For more detailed maintenance routines, check out this comprehensive guide on recalibrating your fridge’s thermostat for optimal efficiency.
The Hardest Lesson I Learned About dishwashers,smart appliances,home appliances,refrigerators,washing machines
One of the most profound lessons I discovered was that even high-tech appliances require regular attention and understanding beyond the user manual. I used to think that once an appliance was set up, its performance would remain optimal indefinitely. However, I realized that neglecting simple maintenance routines, like cleaning filters or recalibrating sensors, could lead to significant efficiency drops. This insight transformed my approach, teaching me that proactive care is the secret to long-lasting, effective appliances.
My Essential Toolkit for Home Appliance Care
Over time, I built a collection of indispensable tools that help me ensure my appliances run smoothly. A good digital infrared thermometer allows me to quickly spot temperature inconsistencies, preventing issues before they escalate. Quality cleaning brushes designed specifically for filters and spray arms make routine maintenance more effective and less time-consuming. Additionally, a set of descaling agents and microplastic filters keeps everything in top shape. These tools are trusted because they enable me to catch problems early and maintain peak performance, saving money and hassle.
Embrace Your Kitchen’s Hidden Potential
Your appliances have a lot more to offer than just their basic functions—they are complex systems that, when properly cared for, can serve you better and longer. Regular calibration, strategic maintenance, and understanding the nuances of your specific models unlock their full potential. For instance, recalibrating your smart fridge’s thermostat can improve energy efficiency, while cleaning dishwasher spray arms ensures spotless, dry dishes. Investing time and effort into these habits not only enhances your daily life but also deepens your appreciation for the sophisticated technology behind modern home appliances.
What small routine maintenance step has made the biggest difference in your appliance performance? Share your experience below—your tip could help someone else maximize their home efficiency!
,