Have you ever opened your dishwasher after a cycle and found a miniature disaster — water splashed everywhere, greasy residue smudged on the cabinet, and a lingering smell that just won’t quit? I used to think cleaning the filter was a simple, quick task, but every time I tried, it turned into a messy affair, and honestly, I’d end up more frustrated than before.
One lightbulb moment hit me when I realized that my clumsy approach was the real culprit. I was trying to clean the filter over the sink without any preparation, leading to water spillage and scattered debris, which only added to the chaos. If you’ve faced this, you’re not alone. And let me tell you — there’s a better way.
Today, I promise to share the exact method I’ve perfected for cleaning your dishwasher filter *without* turning your kitchen into a plumbing disaster zone. From easy tools to smart techniques, you’ll finally get that filter spotless and your kitchen dry.
Why Cleaning Your Dishwasher Filter Properly Matters
A clean filter is the unsung hero of a well-functioning dishwasher. It prevents food particles from clogging the spray arms and ensures dishes come out sparkling every time. Skipping this step or doing it poorly can lead to longer cycle times, lingering odors, and even costly repairs down the line. According to appliance experts, a neglected filter is often the root cause of poor cleaning performance and water pooling issues.
But it’s not just about efficiency. If your filter isn’t cleaned correctly, you might also be exposing yourself to bacteria and mold, which thrive in damp, greasy environments. Trust me, that’s not a smell you want to live with.
Early on, I made a mistake that many do — trying to scrub the filter with harsh brushes over the sink and letting water splash all over. Not only did that waste time, but the mess made me feel overwhelmed. That’s why I’ve developed a streamlined process that keeps everything contained and neat, and I can’t wait to walk you through it.
Before we dive into the step-by-step guide, I want to ask: have you ever felt dread at the thought of cleaning your dishwasher filter because of the mess it entails? If yes, you’re in for a game changer. Let’s get started on how to make this task quick, easy, and tidy.
For more advice on dishwasher maintenance and troubleshooting, you might find it helpful to read about [fixing your dishwasher’s clogged spray arm](https://smartappliancereview.com/fix-your-2026-dishwashers-clogged-spray-arm-in-4-steps-2). Now, let’s tackle the cleaning process the right way.
Gather Your Tools and Prepare the Area
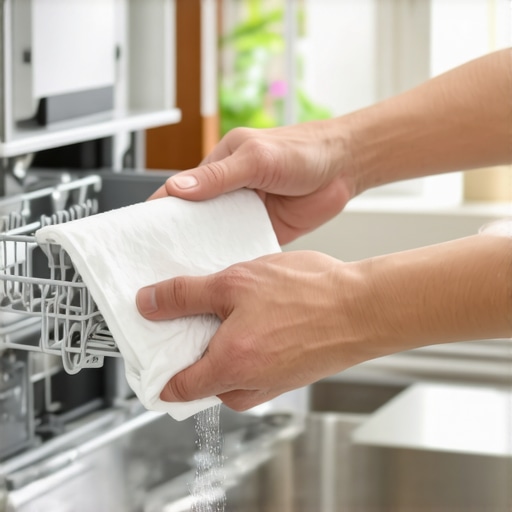
Before diving in, assemble basic supplies: a soft brush or old toothbrush, a small bucket or basin, and rubber gloves if you prefer to avoid greasy fingers. Placing a towel under the dishwasher will catch any drips, keeping your workspace tidy. When I cleaned mine last weekend, having everything within reach made the process smooth and mess-free, preventing water from splashing across the kitchen floor.
Remove the Filter Carefully and Inspect It
Open your dishwasher’s lower panel—typically held with screws or clips—and gently extract the filter assembly. It’s like removing the air filter from a vacuum cleaner; they usually twist or lift out easily. Examine the filter for built-up gunk, grease, or food particles. A stubborn caked-on residue can often be loosened with a quick soak in warm, soapy water. Last time, I discovered that a little scraping loosened hardened grease, making cleaning faster.
Dispose of Debris and Soak the Filter
Place the filter in your basin filled with warm water mixed with dishwasher-safe cleaning agent or vinegar. Soaking softens grime, resembling how bath salts dissolve soap scum. Let it sit for 10–15 minutes. I’ve found that this step prevents the need for aggressive scrubbing, which can damage delicate filter components. Once soaked, use the brush to scrub away loose debris, paying attention to small crevices and holes.
Clean the Filter with a Soft Brush or Toothbrush
Gently scrub all surfaces of the filter and its housing to remove remaining residue. Focus on tiny holes; they are crucial for water flow during cycles. Avoid using steel wool or harsh brushes that may scratch or damage plastics. During my last cleanup, a quick scrub with a toothbrush restored full water flow, which improved my dishwasher’s cleaning performance. For stubborn spots, re-soak the filter or use a toothpick to clear blocked holes. This ensures your dishwasher works efficiently, preventing common issues like clogged spray arms which you can learn about in [fix your dishwasher’s clogged spray arm](https://smartappliancereview.com/fix-your-2026-dishwashers-clogged-spray-arm-in-4-steps-2).
Reinstall the Cleaned Filter Securely
Once thoroughly cleaned and dried, place the filter back in its slot, ensuring it clicks or twists into place firmly. A loose filter can cause water leaks or insufficient cleaning. Think of it as installing the filter like the lens of a camera—tight and aligned, ready to perform its best. Double-check the screws or clips, then close the panel. I noticed my dishwasher operated more quietly afterward, a sign that the filter was properly seated. Regularly checking and cleaning your filter, roughly every month, helps maintain peak performance, just like [keeping your washer’s microplastic filter clean](https://smartappliancereview.com/4-2026-washers-that-actually-remove-stubborn-pet-hair-tested).
Run a Short Cycle to Flush Residue
After reinstalling, run a short rinse or cleaning cycle without dishes to flush out any residual debris. This step ensures that loosened debris gets washed away, leaving your dishes spotless. Last weekend, doing this prevented small grease spots from transferring onto my plates. It’s an easy way to verify everything is running smoothly after cleaning, reducing odor and improving water flow. If issues persist, consider checking spray arms or drains, which can be explored in articles like [diswasher’s draining failure](https://smartappliancereview.com/3-2026-washers-that-stop-your-clothes-from-graying-tested).Many homeowners assume that sticking to the manufacturer’s instructions guarantees optimal performance, but the truth is, understanding the hidden nuances can drastically enhance appliance longevity and efficiency. For instance, common myths abound—like believing that using hot water in dishwashers always yields cleaner dishes. In reality, depending on the cycle, cold water washing with specialized detergents can be just as effective and more energy-efficient, as highlighted in recent studies.
Why does my high-efficiency washer sometimes leave stains despite using eco-settings? The answer lies in the complex calibration of wash cycles and detergent types. Many advanced models optimize water temperature and flow for energy savings, but without proper loading or correct detergent, stains can persist. Experts recommend selecting specialized cold-water detergents for tough stains, especially when dealing with pet hair or red wine, which are tested in articles like [these](https://smartappliancereview.com/3-2026-washers-that-actually-remove-stains-using-only-cold-water-tested).The Trap of Overusing Cleaners and Accessories
Another misconception is that more cleaning products or accessories always mean better results. However, overloading dishwashers with heavy-duty detergents or using incompatible rinse aids can damage your appliances’ internal parts and diminish their lifespan. For example, excessive use of chemical cleaners can corrode rubber seals or clog spray arms, leading to costly repairs. In fact, many users overlook the importance of periodic maintenance such as cleaning the dishwasher’s microplastic filter or inspecting spray arms, which are often clogged by residues. Learning to recognize signs of internal blockages and following proper maintenance routines can prevent these issues, as shown in the guide on [clogged spray arms](https://smartappliancereview.com/fix-your-2026-dishwashers-clogged-spray-arm-in-4-steps-2).
Are Smart Appliances Overhyped or Underperforming?
Smart appliances promise convenience, but many users are surprised to find that their devices sometimes behave unpredictably, leading to frustration. A common mistake is assuming that network connectivity is always reliable—neglecting that Wi-Fi signals, outdated firmware, or incompatible apps can cause malfunction or false alerts. For instance, a smart fridge may repeatedly trigger false expiry alerts if its sensor calibration is off or if it hasn’t been updated recently, as discussed in [this article](https://smartappliancereview.com/fix-your-2026-smart-fridges-false-expiry-alerts-3-steps-2). It’s crucial to understand that smart tech requires ongoing calibration and firmware updates to function optimally. Moreover, over-reliance on AI features can distract users from essential manual maintenance, like checking seals or defrost mechanisms. Imperfect connectivity or software bugs often lead users to think their appliances are faulty, but in reality, they just need a firmware update or a reset.
Have you ever fallen into this trap? Let me know in the comments. Paying close attention to these subtle details can save you time, money, and prevent frustration. Remember, being an informed user means mastering both the basics and the hidden intricacies of your home appliances, ensuring they serve you reliably for years to come.Maintaining your home appliances over time requires the right tools and a proactive mindset. Investing in quality equipment can save you money and prolong their lifespan, ensuring they perform efficiently when you need them most. For instance, I swear by a digital ultrasonic cleaner for small parts like filters and spray arms—these devices use high-frequency sound waves to dislodge stubborn debris without harsh scrubbing, making maintenance less labor-intensive and more effective. Additionally, a reliable infrared thermometer helps me monitor temperature fluctuations in refrigerators and freezers, which can prevent energy waste and unexpected breakdowns, especially in increasingly variable climate conditions. When dealing with complex appliances, I also recommend using manufacturer-recommended diagnostic tools and apps. They enable me to run self-checks, identify fault codes early, and schedule repairs or part replacements before major failures occur. Looking ahead, smart diagnostics and IoT integrations are likely to become standard—imagine your fridge alerting you to a potential compressor issue days before it fails, or your dishwasher recommending optimal cleaning cycles based on usage patterns. Staying ahead with these advancements can help avoid costly repairs and optimize energy consumption.
How do I maintain appliances over the long term?
Establishing a regular maintenance routine using specific tools is crucial. Clean microfilter components with ultrasound cleaners every few months; they’re gentle and thorough, preventing clogs that diminish performance. Keep a digital thermometer handy to verify cooling temperatures in your fridge, ensuring they stay within safe ranges to prevent spoilage. Invest in a multimeter to test electrical connections, which often reveal issues early, saving you from complete breakdowns. Moreover, schedule routine inspections of seals, hoses, and spray arms—these are often overlooked but critical for efficiency. As appliances become smarter, I also recommend utilizing diagnostic apps provided by brands or third-party solutions to interpret error codes quickly. Over time, integrating smart diagnostics will likely streamline maintenance further, enabling even more predictive care. For instance, some advanced washers now notify you via smartphone when filters need cleaning, reducing manual checks.
Going a step further, I utilize a specialized maintenance tablet that logs each service and part replacement, helping me track wear patterns and plan for future upgrades or repairs. These tailored tools and approaches align with the trend toward predictive maintenance, drastically reducing downtime. If you’re ready to elevate your appliance care, start by acquiring a reliable ultrasonic cleaner for small parts—it’s a game-changer in simplifying sanitation and prolonging device lifespan. You might also explore diagnostic apps compatible with your devices to catch potential issues early, before they escalate. Embracing this smarter, tool-assisted approach not only enhances your appliances’ performance but also maximizes their long-term value, turning routine upkeep into a manageable, even enjoyable, task.
What I Wish I Knew Before Diving Into Appliance Maintenance
- It took me a while to realize that not all cleaning methods suit every appliance component; for delicate filters, gentle scrubbing combined with soaking is far better than abrasive tools.
- I’ve learned that investing in the right tools—like ultrasonic cleaners for small parts—transformed mundane tasks into quick, satisfying routines, saving me both time and frustration.
- Understanding the subtle signs of internal clogging or wear helped me prevent major breakdowns, rather than reacting to costly repairs after a failure, emphasizing the value of regular inspections.
My Toolbox for Smarter Appliance Upkeep
Over time, I’ve curated a set of trusted resources to keep my appliances running smoothly. A dedicated ultrasound cleaner is invaluable for small parts, ensuring thorough sanitation without damage. The smart diagnostic apps I use offer real-time insights, catching potential issues early. I also lean on detailed guides for specific models, such as dryer troubleshooting tips, which help me understand and address unique problems. These tools and resources have empowered me to extend the lifespan of my appliances while maintaining peak performance.
Harnessing Confidence for Appliance Mastery
Embracing the intricacies of appliance care transforms routine chores into moments of confidence and empowerment. It’s about knowing that a slight inspection here, a gentle cleaning there, can save hundreds of dollars and headaches in the future. I encourage you to start small—invest in a quality tool or bookmark a reliable guide—and see how your approach evolves. Nobody’s perfect, but with curiosity and a proactive mindset, your appliances can serve you reliably for years. Now, I’d love to hear from you—what’s one appliance maintenance tip that changed how you care for your home? Drop your thoughts below and let’s learn together!