
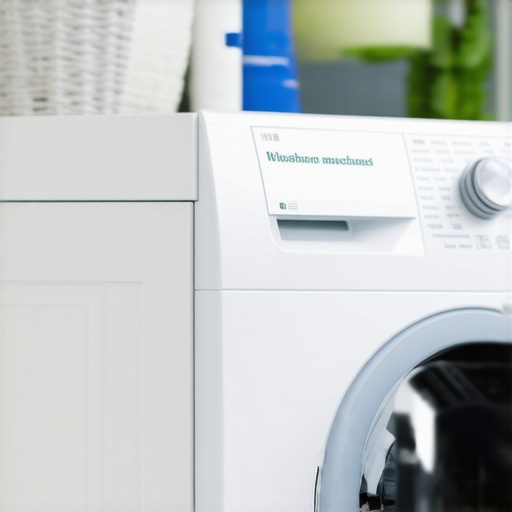
Ever had your washing machine refuse to start, despite the load being perfectly balanced? We’ve all faced that frustrating moment where our reliable top-loader suddenly becomes uncooperative. I remember the day my washer just wouldn’t spin, and I was convinced it was a major repair. That lightbulb moment when I realized the problem was a simple faulty lid switch changed everything for me. It’s amazing how such a tiny part can cause so much trouble.
Today, I’m going to guide you through identifying whether your lid switch is acting up—and more importantly, how to fix it yourself. No more guesswork or costly call-outs. Whether your washer stops mid-cycle or refuses to power on, diagnosing the lid switch could save you both time and money. And trust me, I’ve made my fair share of mistakes early on—like assuming the washer was dead without checking the lid switch first.
Why the Lid Switch Could Be Your Washer’s Worst Enemy
The lid switch acts as a safety feature that prevents the washer from running when the lid is open. Think of it as a gatekeeper—it ensures everything is in place for a safe operation. But like all mechanical parts, it can wear out over time or malfunction. When that happens, your washer won’t spin, won’t drain, or won’t start at all. It’s a common culprit, yet many people overlook it because it’s tucked away and seemingly insignificant.
Knowing how to diagnose this issue is crucial. If your top-loader isn’t behaving as expected, the problem might be as simple as a broken lid switch. You don’t need to be an appliance expert to handle this—just a few tools and a bit of patience.
Did you know that according to [a recent report](https://smartappliancereview.com/why-your-top-load-washer-wont-spin-after-a-heavy-load), faulty lid switches are among the top reasons washing machines fail to spin? Recognizing the signs early can prevent more severe damage and extend your appliance’s lifespan.
Now that you understand the importance of this tiny component, let’s move on to how you can determine if your lid switch is to blame—and what steps to take next.
Access the Lid Switch Carefully
Start by unplugging your washing machine to ensure safety. Locate the lid switch, usually near the top opening of the lid—think of it as the gatekeeper that signals whether the lid is closed. Use a screwdriver to remove the control panel or access panel if necessary, similar to opening a small door to peek inside your appliance’s brain.
Check the Switch for Continuity
Use a multimeter set to the continuity or ohms setting. Disconnect the wires from the lid switch terminals, then place the multimeter probes on each terminal. Press the switch mechanism (simulate closing the lid). If the multimeter shows no continuity when pressed and continuity when released, the switch is faulty—like a doorbell with a broken button.
Test the Switch In-Place
If removing the switch seems complex, test it in its installed position. With the multimeter probes connected to the terminals, close the lid manually or press the switch. If no continuity is detected, replace the switch. Imagine trying to turn on a device with a broken power button—no matter how much you press, it won’t respond.
Replace the Faulty Lid Switch
Obtain the correct replacement part, which you can find by matching model numbers or consulting the manufacturer. Disconnect the wires from the broken switch, then unscrew and remove it. Install the new switch, reconnect wires securely—think of this as replacing a faulty link in a chain to restore the whole system’s integrity.
Test the Repair Before Reassembly
Before putting panels back, plug in the washer and test if pressing the lid closes the circuit properly—your multimeter will confirm the continuity. If everything checks out, reassemble the panels. It’s like testing a new lock before shutting the door to ensure it works smoothly.
Additional Tips for Reliable Repairs
Cleaning the switch and its connecting points with a contact cleaner can prevent future issues—consider it akin to maintaining the keys on a piano for smooth play. Also, inspect the lid for proper alignment; misalignment may cause the switch not to trigger properly, much like a door not closing fully. Regular checks can save you time and prevent future breakdowns.
When it comes to home appliances, many of us harbor misconceptions that can lead to costly mistakes or subpar performance. Contrary to popular belief, not all smart appliances are foolproof or maintenance-free; in fact, their complexity often requires a nuanced understanding to avoid pitfalls. For example, many assume that a Wi-Fi connected fridge will automatically troubleshoot itself, but neglecting firmware updates can cause connectivity issues—something detailed in [our guide on updating smart appliances](https://smartappliancereview.com/how-to-update-the-firmware-on-your-smart-kitchen-appliances).
A common myth is that larger appliances always mean more durability. However, bigger models like French door refrigerators may have more components prone to failure, especially if not installed correctly or overburdened with improper use. This highlights the importance of understanding the specific nuances of each appliance, rather than relying on size alone.
Be cautious of the trap many fall into: assuming that newer equals better. Technological advancements in appliances like dishwashers and washing machines include AI features and energy-saving modes, but they can introduce new failure points. For instance, AI-driven dishwashers can misjudge load sizes, leading to incomplete cleaning—an issue explored in [our review of innovative dishwashers](https://smartappliancereview.com/innovative-dishwashers-with-ai-technology-you-must-know).
Advanced users know that the real trick lies in understanding how these features interact with your home’s power supply and Wi-Fi network. A sophisticated question is whether your smart refrigerator’s sensors might be affected by ambient temperature fluctuations, which can cause misreadings and improper cooling. As explained in [our article about refrigerator sensors](https://smartappliancereview.com/why-your-smart-fridge-wont-recognize-your-local-wi-fi-network), sensor calibration is often overlooked but crucial for optimal performance.
Another hidden nuance is how cleaning and maintenance extend beyond simple surface wiping. Many fail to realize that components like filters, drainage hoses, and electronic sensors need regular, specific care. Ignoring this can accelerate wear and tear, reducing appliance lifespan and increasing costs.
In summary, the world of modern appliances is full of misconceptions that can trip up even seasoned homeowners. Never assume that upgrades are foolproof; instead, invest time in understanding each device’s detailed workings and maintenance needs. Are you falling into any of these traps? Share your experiences in the comments and let’s help each other make smarter choices for our homes.
Investing in the Right Tools for Long-Term Maintenance
Maintaining your home appliances efficiently requires specific, high-quality tools that provide precision and durability. I personally rely on a digital multimeter for diagnosing electrical issues in appliances like refrigerators and washing machines. A sturdy set of screwdrivers—both Phillips and flathead—is indispensable for opening panels or replacing parts. For cleaning, I use a microfiber cloth alongside specialized contact cleaners to safely remove dirt and oxidation from electronic connectors, ensuring consistent communication with smart features.
One tool I highly recommend is a digital infrared thermometer. It allows me to quickly check the temperature of a refrigerator’s compressor or an oven’s heating elements without opening panels, helping identify potential issues early. For those working on dishwashers, a small, flexible brush alongside a sealant-safe cleaning solution helps maintain gasket integrity and prevent leaks. Investing in quality tools not only makes repairs easier but extends the lifespan of your appliances, saving you money in the long run.
Software and Apps That Simplify Maintenance
Technology has revolutionized appliance upkeep. I use manufacturer companion apps to run diagnostics and update firmware—these apps often notify me of potential issues before they become serious. For example, smart refrigerators with integrated diagnostics can detect sensor failures and suggest maintenance steps. Additionally, I recommend installing smart plugs like the TP-Link Kasa, which connect appliances to your Wi-Fi and log energy consumption, giving you insight into operation patterns and early warning signs of malfunction. These tools empower you to proactively address issues, often avoiding costly repairs.
Scaling Up: When to Consider Upgrades
As appliances age, their repair frequency increases. Recognizing optimal upgrade timing is key. For instance, if your smart dishwasher consistently needs firmware updates or your refrigerator’s cooling performance diminishes despite maintenance, it might be time to replace them. Modern models—such as the latest smart refrigerators—offer energy-saving, longer-lasting components, and enhanced functionalities like voice control and integration with home automation systems. Keeping abreast of trends via resources like future appliance trends helps ensure your home remains efficient and reliable.
How do I keep my appliances performing well over time?
Regular maintenance is the cornerstone. Schedule routine cleaning of filters, seals, and vents. Use diagnostic tools and apps to monitor performance and detect issues early. Keep firmware updated to benefit from improvements and security patches. Replace parts selectively—like door gaskets or filters—before they fail and cause larger problems. When possible, opt for models with smart diagnostics and remote monitoring capabilities, enabling you to troubleshoot from your phone. For example, regularly cleaning the drain filters in your dishwasher with solutions like those described in this guide can prevent costly clogs and leaks. Finally, consider upgrading appliances when repair costs surpass a certain threshold or efficiency drops. Staying attentive to these factors ensures your appliances serve you reliably for years to come. Don’t forget to try advanced tools like infrared thermometers—they can provide early warnings of potential issues, helping you avoid inconvenient breakdowns.
The Lessons That Changed My Approach to Appliance Care
- Never underestimate the power of a tiny part like the lid switch; it’s often the secret to avoiding costly repairs.
- Understanding how components interact helps prevent misdiagnosis—my early mistake was assuming the entire washer was dead, when it was just a faulty switch.
- Preventive maintenance, such as cleaning and testing switches periodically, extends appliance lifespan more than I ever expected.
- Real learning happened when I realized that simple tools and patience often outperform expensive service calls.
The Tools That Keep My Appliances Running Smoothly
My go-to toolkit includes a multimeter for electrical diagnostics and a contact cleaner to keep switches and sensors in top shape. I swear by a digital infrared thermometer for quick temperature checks on fridges, saving me from unnecessary part replacements. A good set of screwdrivers is priceless for timely repairs, and smart plugs help me monitor energy consumption and spot issues early. These tools empower me to handle problems proactively, which is crucial when working with smart appliances that often need firmware updates or sensor calibrations.
Your Next Move in Appliance Confidence
Armed with insights and the right tools, you can become the hero of your home. Whether it’s routine maintenance or troubleshooting stubborn issues, take charge and treat your appliances as the valuable assets they are. Dive deeper into smart appliance care with the latest trends and tips at future of home appliances. Remember, the key to long-lasting appliance performance lies in understanding—and caring for—the small, often overlooked parts.