

The sound of tempered glass shattering is something you never quite forget. It does not just crack; it explodes into ten thousand tiny, glittering cubes that find their way under the baseboard and into your socks for the next three weeks. There I was, standing in front of my open fridge at 11 PM, holding a cold jar of pickles and staring at the empty space where my middle shelf used to be. My first thought was not about the mess—it was about the money. We spend thousands when choosing the right refrigerator, expecting them to be tanks, but the reality is that why modern refrigerators don’t last as long as your grandma’s often comes down to these fragile interior components. Today, I am going to show you that a shattered shelf is not a death sentence for your appliance, and you do not necessarily need to shell out $150 for a proprietary piece of plastic and glass from the manufacturer. [image placeholder]
Stop Crying Over Spilled Milk and Shattered Glass
It is tempting to just shove everything onto the bottom crisper drawer and pretend the gap does not exist. I did that for a week, and let me tell you, it is a recipe for forgotten, rotting vegetables. Repairing a shelf in a modern unit requires a bit more finesse than the old wire-rack days, but it is incredibly rewarding. According to the Glass Association of North America, tempered glass is specifically designed to crumble into small chunks to prevent injury, but its Achilles’ heel is a sharp blow to the edge—exactly what happens when a heavy jar slips. If your frame is intact but the glass is gone, you have options that do not involve a credit card. Have you ever heard that heart-stopping ‘pop’ of glass breaking inside your fridge, or are you currently staring at a pile of shards right now?
Is a DIY Fix Even Safe for Food Storage?
I know what you are thinking. You are worried that a repaired shelf will not hold the weight of a gallon of milk or that weird adhesives will off-gas into your leftovers. These are valid fears. However, when you understand the mechanics of how these shelves are supported, you can actually make them stronger than the original. By utilizing the best refrigerator shelving hacks for more space, you can integrate reinforced glass or even high-grade acrylics that handle the thermal shocks of a cold fridge much better than the cheap factory glass.
My $150 Mistake and Why You Should Not Repeat It
When I first broke my shelf, I panicked and immediately ordered an OEM replacement. It arrived two weeks later, cost a fortune in shipping, and felt just as flimsy as the first one. I realized too late that I could have had a local glass shop cut a piece of tempered glass for twenty bucks. I failed to measure the thickness correctly, assuming all fridge glass was universal. It is not. That mistake taught me the importance of the ‘measure twice, cry once’ rule. We are going to walk through how to salvage your existing plastic frame and fit it with a custom, heavy-duty insert that will likely outlive the fridge itself.
Strip the Shards and Save the Frame
Your first move is a rescue mission. Most modern fridge shelves consist of a glass pane ‘press-fitted’ into a plastic or metal perimeter. Don’t throw that frame away! It is the skeleton that hooks into the tracks of your fridge walls. I remember my first attempt at this; I was so frustrated by the glass shards that I tossed the whole unit into the bin. Two days later, I was digging through the trash like a raccoon because I realized that the frame alone costs $90. Use a pair of pliers and a flat-head screwdriver to gently pry away any remaining glass glued into the rim. Be careful not to crack the plastic, as 5 mistakes that are shortening the life of your smart refrigerator often start with physical damage to these structural components. 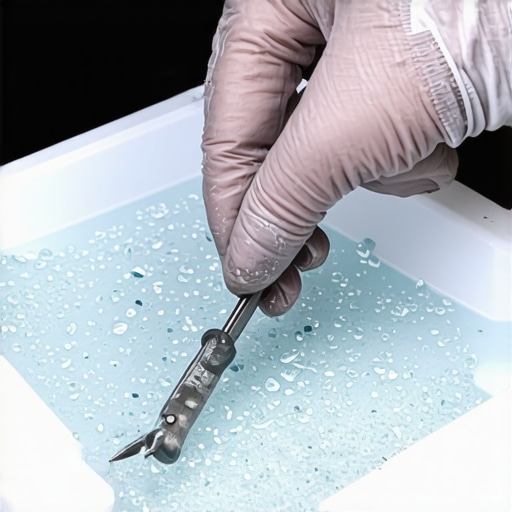
Precision Measurement Prevents Future Failures
Once the frame is clean, you need to measure the internal ‘lip’ where the glass sits. Use a digital caliper if you have one, or a very fine tape measure. You aren’t just measuring length and width; you are measuring thickness. Most fridge glass is exactly 3mm or 4mm thick. If you go too thin, the shelf will rattle and eventually fail under the weight of your groceries. If you go too thick, it simply won’t snap back into the frame. This is crucial because why your fridge is freezing everything on the top shelf can sometimes be exacerbated by poor airflow caused by incorrectly sized DIY shelves blocking the rear vents. I once estimated the thickness and ended up with a piece of glass that sat just high enough to prevent the crisper drawer below from closing. Measure twice, or you’ll be sanding down plastic for an hour.
Glass or Acrylic for Your Replacement
You have a choice to make: go back to tempered glass or switch to high-impact acrylic. Tempered glass is the gold standard for cleanliness and scratch resistance, but it is also why you are in this mess. Acrylic is virtually unbreakable, but it can scratch over time and may bow if you don’t get the thickness right. I once tried a thin piece of standard hobby-store plexiglass for a quick fix. Big mistake. It bowed so badly under a gallon of milk that it slipped right out of the tracks, sending my milk on a one-way trip to the floor. If you choose acrylic, ensure it is at least 1/4 inch thick for stability. If you prefer glass, call a local shop and specify ‘tempered with polished edges’ so you don’t cut your hands during the next cleaning cycle.
The Snap-Fit Technique for a Permanent Fix
When you have your new material, it is time for the ‘snap.’ If your frame uses a snap-fit design, you might need to warm the plastic slightly with a hairdryer to make it more pliable. Lay the frame on a flat, towel-covered surface and press the glass into place. If you find your fridge is inconsistent after the repair, you might want to learn how to stop your refrigerator from freezing the milk on the top shelf, as a new, solid shelf can change how cold air circulates in older models. Finally, using the best refrigerator shelving hacks for more space will help you organize your new shelf so you don’t overload the center point again. It feels incredibly satisfying to slide that shelf back in and hear it click, knowing you saved a hundred dollars with twenty minutes of work.
Stop Pre-Rinsing Your Dishes Like a Maniac
Repairing a shelf is a great start, but to truly master your kitchen, you have to look beyond the physical parts and into the logic of the machines themselves. We’ve been conditioned to believe that a dishwasher is just a glorified rinser, but if you are scrubbing your plates before loading them, you are actually sabotaging the machine. Modern units use turbidity sensors—essentially little eyes that ‘see’ how dirty the water is. If you put in clean plates, the sensor signals the brain to run a shorter, weaker cycle. The result? Your glasses come out cloudy because the detergent didn’t have enough ‘food’ to latch onto. Many people think that using the ‘Heavy Duty’ cycle for every load ensures a better clean, but in reality, the increased heat and mechanical agitation can cause plastic interior components to become brittle years before their time. This is also why your dishwasher still needs rinse aid even with 3-in-1 tablets; the chemistry of the drying cycle depends on the surface tension of the water, not just the soap. #IMAGE_PLACE_HOLDER_C#
The Detergent Trap That Kills Your Washer Bearings
The biggest ‘oops’ factor I see with DIY enthusiasts is the over-application of ‘natural’ cleaners or excessive soaps. I’ve seen homeowners use white vinegar in every load of laundry, thinking it is a miracle worker, but the high acidity can actually degrade the rubber door seals and internal hoses over time, leading to catastrophic leaks. Similarly, most people assume that more dirt requires more soap. In reality, why your washer doesn’t need a whole cup of detergent to get clothes clean is rooted in the high-efficiency (HE) design. According to the Association of Home Appliance Manufacturers (AHAM), using excessive detergent creates a ‘suds cushion’ that prevents clothes from rubbing together—which is what actually cleans them—and forces the pump to work double-time to drain. This extra strain is a major reason why modern refrigerators don’t last as long as your grandma’s; we are simply overworking the precision components by forcing them to fight through excessive bubbles or acidic environments that they weren’t engineered to handle.
Can Your Smart Fridge Actually Save You Money on Utilities?
The hidden nuance here isn’t just about the screen on the door; it is about energy ‘load shifting.’ Advanced users know how to update the firmware on your smart kitchen appliances to allow the machine to communicate with the local power grid. During ‘peak hours,’ your fridge can actually delay its defrost cycle—the most energy-intensive part of its operation—to a time when electricity is cheaper. Furthermore, ignoring these updates is a common trap; firmware often includes ‘tuning’ for the compressor that prevents it from cycling too frequently in humid environments. If you aren’t digging into these settings, you’re essentially driving a high-tech machine in manual mode. These nuances are what separate a casual owner from an expert who knows that 5 mistakes that are shortening the life of your smart refrigerator are often invisible until the compressor fails. Most people assume ‘smart’ just means ‘connected,’ but true functionality is about component protection. Have you ever fallen into this trap of over-cleaning or ignoring the ‘smart’ features in your home? Let me know in the comments.
Equip Your Kitchen with Tools That Actually Work
If you want to move beyond basic DIY and actually prevent failures, you need to stop using the back of a butter knife as a screwdriver. I’ve built a specialized ‘appliance go-bag’ over the years that has saved me thousands. My most used tool isn’t a wrench—it’s a digital multimeter. When my fridge stopped cooling last summer, I didn’t panic; I tested the defrost heater for continuity. Most people assume a dead fridge means a dead compressor, but it’s often a $20 sensor. You should also grab a long-reach flexible coil brush because learning how to clean the hidden debris under your refrigerator grille is the single most effective way to lower your electric bill and extend the life of your motor. I also swear by a small set of dental picks; they are perfect for clearing out the gunk in your dishwasher’s spray arms.
#IMAGE_PLACE_HOLDER_D#
Your Filter is the Secret to Appliance Longevity
We often treat filters as ‘set it and forget it’ components, but in the world of high-efficiency machines, they are the front line of defense. If you notice your plates aren’t sparkling, don’t just add more soap. Instead, find out how to clean the hidden filter in your energy efficient dishwasher to remove the trapped grease and bone fragments that cycle back onto your clean glass. In my experience, even the best machines will fail if they can’t breathe. According to technical documentation from the Association of Home Appliance Manufacturers (AHAM), a clogged filter can increase internal pressure enough to cause seal blowouts. This is why I schedule a ‘filter purge’ every three months. I also make sure to check my washer because knowing how to clean a front load washer filter without flooding the room prevents that nasty ‘old gym sock’ smell from ever developing.
How do I keep these complex machines running for a decade?
The secret isn’t just cleaning; it’s monitoring. I’ve started using the best smart plugs for monitoring appliance energy use to identify anomalies. If I see my fridge’s power draw spike suddenly, I know it’s struggling—likely due to a dusty coil or a failing fan. This proactive approach is the core of an ultimate guide to smart home appliances for a modern living. Looking ahead, I predict that by 2030, we won’t even be doing this manually. We are already seeing innovative dishwashers with ai technology you must know that can self-diagnose pump clogs before they cause a leak. This shift toward predictive maintenance is the most exciting trend in the future of home appliances trends to watch in 2025. For now, take ten minutes this weekend to check your washer’s health; learning how to tell if your washer bearings are about to fail can save you from a catastrophic laundry room flood. Go ahead and log into your appliance app right now and check for any pending alerts—it’s the easiest way to stay ahead of the curve.
The sound of tempered glass shattering is something you never quite forget. It does not just crack; it explodes into ten thousand tiny, glittering cubes that find their way under the baseboard and into your socks for the next three weeks. There I was, standing in front of my open fridge at 11 PM, holding a cold jar of pickles and staring at the empty space where my middle shelf used to be. My first thought was not about the mess—it was about the money. We spend thousands when choosing the right refrigerator, expecting them to be tanks, but the reality is that why modern refrigerators don’t last as long as your grandma’s often comes down to these fragile interior components. Today, I am going to show you that a shattered shelf is not a death sentence for your appliance, and you do not necessarily need to shell out $150 for a proprietary piece of plastic and glass from the manufacturer. [image placeholder]
Stop Crying Over Spilled Milk and Shattered Glass
It is tempting to just shove everything onto the bottom crisper drawer and pretend the gap does not exist. I did that for a week, and let me tell you, it is a recipe for forgotten, rotting vegetables. Repairing a shelf in a modern unit requires a bit more finesse than the old wire-rack days, but it is incredibly rewarding. According to the Glass Association of North America, tempered glass is specifically designed to crumble into small chunks to prevent injury, but its Achilles’ heel is a sharp blow to the edge—exactly what happens when a heavy jar slips. If your frame is intact but the glass is gone, you have options that do not involve a credit card. Have you ever heard that heart-stopping ‘pop’ of glass breaking inside your fridge, or are you currently staring at a pile of shards right now?
Is a DIY Fix Even Safe for Food Storage?
I know what you are thinking. You are worried that a repaired shelf will not hold the weight of a gallon of milk or that weird adhesives will off-gas into your leftovers. These are valid fears. However, when you understand the mechanics of how these shelves are supported, you can actually make them stronger than the original. By utilizing the best refrigerator shelving hacks for more space, you can integrate reinforced glass or even high-grade acrylics that handle the thermal shocks of a cold fridge much better than the cheap factory glass.
My $150 Mistake and Why You Should Not Repeat It
When I first broke my shelf, I panicked and immediately ordered an OEM replacement. It arrived two weeks later, cost a fortune in shipping, and felt just as flimsy as the first one. I realized too late that I could have had a local glass shop cut a piece of tempered glass for twenty bucks. I failed to measure the thickness correctly, assuming all fridge glass was universal. It is not. That mistake taught me the importance of the ‘measure twice, cry once’ rule. We are going to walk through how to salvage your existing plastic frame and fit it with a custom, heavy-duty insert that will likely outlive the fridge itself.
Strip the Shards and Save the Frame
Your first move is a rescue mission. Most modern fridge shelves consist of a glass pane ‘press-fitted’ into a plastic or metal perimeter. Don’t throw that frame away! It is the skeleton that hooks into the tracks of your fridge walls. I remember my first attempt at this; I was so frustrated by the glass shards that I tossed the whole unit into the bin. Two days later, I was digging through the trash like a raccoon because I realized that the frame alone costs $90. Use a pair of pliers and a flat-head screwdriver to gently pry away any remaining glass glued into the rim. Be careful not to crack the plastic, as 5 mistakes that are shortening the life of your smart refrigerator often start with physical damage to these structural components.
Precision Measurement Prevents Future Failures
Once the frame is clean, you need to measure the internal ‘lip’ where the glass sits. Use a digital caliper if you have one, or a very fine tape measure. You aren’t just measuring length and width; you are measuring thickness. Most fridge glass is exactly 3mm or 4mm thick. If you go too thin, the shelf will rattle and eventually fail under the weight of your groceries. If you go too thick, it simply won’t snap back into the frame. This is crucial because why your fridge is freezing everything on the top shelf can sometimes be exacerbated by poor airflow caused by incorrectly sized DIY shelves blocking the rear vents. I once estimated the thickness and ended up with a piece of glass that sat just high enough to prevent the crisper drawer below from closing. Measure twice, or you’ll be sanding down plastic for an hour.
Glass or Acrylic for Your Replacement
You have a choice to make: go back to tempered glass or switch to high-impact acrylic. Tempered glass is the gold standard for cleanliness and scratch resistance, but it is also why you are in this mess. Acrylic is virtually unbreakable, but it can scratch over time and may bow if you don’t get the thickness right. I once tried a thin piece of standard hobby-store plexiglass for a quick fix. Big mistake. It bowed so badly under a gallon of milk that it slipped right out of the tracks, sending my milk on a one-way trip to the floor. If you choose acrylic, ensure it is at least 1/4 inch thick for stability. If you prefer glass, call a local shop and specify ‘tempered with polished edges’ so you don’t cut your hands during the next cleaning cycle.
The Snap-Fit Technique for a Permanent Fix
When you have your new material, it is time for the ‘snap.’ If your frame uses a snap-fit design, you might need to warm the plastic slightly with a hairdryer to make it more pliable. Lay the frame on a flat, towel-covered surface and press the glass into place. If you find your fridge is inconsistent after the repair, you might want to learn how to stop your refrigerator from freezing the milk on the top shelf, as a new, solid shelf can change how cold air circulates in older models. Finally, using the best refrigerator shelving hacks for more space will help you organize your new shelf so you don’t overload the center point again. It feels incredibly satisfying to slide that shelf back in and hear it click, knowing you saved a hundred dollars with twenty minutes of work.
Stop Pre-Rinsing Your Dishes Like a Maniac
Repairing a shelf is a great start, but to truly master your kitchen, you have to look beyond the physical parts and into the logic of the machines themselves. We’ve been conditioned to believe that a dishwasher is just a glorified rinser, but if you are scrubbing your plates before loading them, you are actually sabotaging the machine. Modern units use turbidity sensors—essentially little eyes that ‘see’ how dirty the water is. If you put in clean plates, the sensor signals the brain to run a shorter, weaker cycle. The result? Your glasses come out cloudy because the detergent didn’t have enough ‘food’ to latch onto. Many people think that using the ‘Heavy Duty’ cycle for every load ensures a better clean, but in reality, the increased heat and mechanical agitation can cause plastic interior components to become brittle years before their time. This is also why your dishwasher still needs rinse aid even with 3-in-1 tablets; the chemistry of the drying cycle depends on the surface tension of the water, not just the soap. #IMAGE_PLACE_HOLDER_C#
The Detergent Trap That Kills Your Washer Bearings
The biggest ‘oops’ factor I see with DIY enthusiasts is the over-application of ‘natural’ cleaners or excessive soaps. I’ve seen homeowners use white vinegar in every load of laundry, thinking it is a miracle worker, but the high acidity can actually degrade the rubber door seals and internal hoses over time, leading to catastrophic leaks. Similarly, most people assume that more dirt requires more soap. In reality, why your washer doesn’t need a whole cup of detergent to get clothes clean is rooted in the high-efficiency (HE) design. According to the Association of Home Appliance Manufacturers (AHAM), using excessive detergent creates a ‘suds cushion’ that prevents clothes from rubbing together—which is what actually cleans them—and forces the pump to work double-time to drain. This extra strain is a major reason why modern refrigerators don’t last as long as your grandma’s; we are simply overworking the precision components by forcing them to fight through excessive bubbles or acidic environments that they weren’t engineered to handle.
Can Your Smart Fridge Actually Save You Money on Utilities?
The hidden nuance here isn’t just about the screen on the door; it is about energy ‘load shifting.’ Advanced users know how to update the firmware on your smart kitchen appliances to allow the machine to communicate with the local power grid. During ‘peak hours,’ your fridge can actually delay its defrost cycle—the most energy-intensive part of its operation—to a time when electricity is cheaper. Furthermore, ignoring these updates is a common trap; firmware often includes ‘tuning’ for the compressor that prevents it from cycling too frequently in humid environments. If you aren’t digging into these settings, you’re essentially driving a high-tech machine in manual mode. These nuances are what separate a casual owner from an expert who knows that 5 mistakes that are shortening the life of your smart refrigerator are often invisible until the compressor fails. Most people assume ‘smart’ just means ‘connected,’ but true functionality is about component protection. Have you ever fallen into this trap of over-cleaning or ignoring the ‘smart’ features in your home? Let me know in the comments.
Equip Your Kitchen with Tools That Actually Work
If you want to move beyond basic DIY and actually prevent failures, you need to stop using the back of a butter knife as a screwdriver. I’ve built a specialized ‘appliance go-bag’ over the years that has saved me thousands. My most used tool isn’t a wrench—it’s a digital multimeter. When my fridge stopped cooling last summer, I didn’t panic; I tested the defrost heater for continuity. Most people assume a dead fridge means a dead compressor, but it’s often a $20 sensor. You should also grab a long-reach flexible coil brush because learning how to clean the hidden debris under your refrigerator grille is the single most effective way to lower your electric bill and extend the life of your motor. I also swear by a small set of dental picks; they are perfect for clearing out the gunk in your dishwasher’s spray arms.
#IMAGE_PLACE_HOLDER_D#
Your Filter is the Secret to Appliance Longevity
We often treat filters as ‘set it and forget it’ components, but in the world of high-efficiency machines, they are the front line of defense. If you notice your plates aren’t sparkling, don’t just add more soap. Instead, find out how to clean the hidden filter in your energy efficient dishwasher to remove the trapped grease and bone fragments that cycle back onto your clean glass. In my experience, even the best machines will fail if they can’t breathe. According to technical documentation from the Association of Home Appliance Manufacturers (AHAM), a clogged filter can increase internal pressure enough to cause seal blowouts. This is why I schedule a ‘filter purge’ every three months. I also make sure to check my washer because knowing how to clean a front load washer filter without flooding the room prevents that nasty ‘old gym sock’ smell from ever developing.
How do I keep these complex machines running for a decade?
The secret isn’t just cleaning; it’s monitoring. I’ve started using the best smart plugs for monitoring appliance energy use to identify anomalies. If I see my fridge’s power draw spike suddenly, I know it’s struggling—likely due to a dusty coil or a failing fan. This proactive approach is the core of an ultimate guide to smart home appliances for a modern living. Looking ahead, I predict that by 2030, we won’t even be doing this manually. We are already seeing innovative dishwashers with ai technology you must know that can self-diagnose pump clogs before they cause a leak. This shift toward predictive maintenance is the most exciting trend in the future of home appliances trends to watch in 2025. For now, take ten minutes this weekend to check your washer’s health; learning how to tell if your washer bearings are about to fail can save you from a catastrophic laundry room flood. Go ahead and log into your appliance app right now and check for any pending alerts—it’s the easiest way to stay ahead of the curve.
Lessons from the Shards
After years of fixing my own gear, I’ve realized that the most expensive part of any repair isn’t the component—it’s the panic. When my shelf shattered, I assumed the whole fridge was a loss. Now I know that modern refrigerators are modular by design. One major ‘lightbulb moment’ for me was discovering that thermal shock is real; never take a cold glass shelf and put it directly into a hot dishwasher. Another insight? The ‘snap-fit’ frames are more flexible than they look, but they require patience, not force. I also learned that if you are choosing the right refrigerator today, you should check how easily the interior glass can be removed for cleaning before you buy.
The Gear That Saves Me Thousands
You don’t need a professional workshop to keep your home running. My go-to resources are simple but effective. First, I always keep a digital multimeter handy; it’s the only way to know if a sensor is actually dead. Second, I rely on the technical bulletins from the AHAM, which provide the real specs that manuals often omit. Third, for those looking at the future of home appliances trends to watch in 2025, I highly recommend using the best smart plugs for monitoring appliance energy use. They act as an early warning system for your compressor. Lastly, a good set of non-marring pry tools is essential for those plastic frames we talked about earlier.
Your Kitchen Deserves a Second Chance
Fixing a broken shelf or cleaning a hidden filter might seem like small potatoes, but these actions are what keep your home efficient and your stress levels low. Don’t be intimidated by the tech. Whether you are dealing with a shattered pane or trying to figure out how to diagnose a faulty lid switch on your top loader, remember that you are the master of these machines. Every small repair builds the confidence to tackle the big ones. Modern refrigerators in our homes are complex, but with a little curiosity, they can last far longer than the manufacturer’s warranty suggests. Have you ever had a DIY repair go surprisingly well (or hilariously wrong)? Let me know in the comments below!