
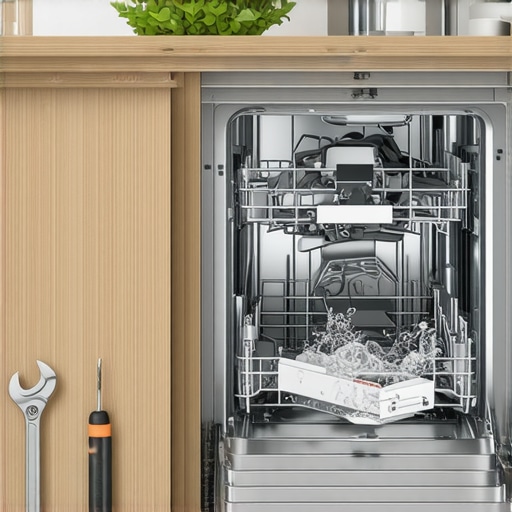
It was a morning like any other, until I opened my dishwasher to find a shocking surprise: only cold water filling the machine. After spending countless frustrating cycles with dishes that came out lukewarm at best, I realized I wasn’t alone in this predicament. Have you ever faced a similar situation, where your dishwasher refuses to heat water and just sputters out cold, leaving your plates dirty and your patience thin? If so, you’re not alone, and better yet, there’s a way to fix it.
Cold Water Fills: What’s Really Going On?
When your dishwasher only fills with cold water, it’s easy to assume the worst—perhaps a broken heating element or a malfunctioning thermostat. But often, the culprit is something a bit more straightforward, like a faulty water inlet valve or even a simple clog that prevents hot water from entering. Early in my troubleshooting journey, I made the mistake of ignoring the water inlet filter, which is surprisingly often the root cause. Regularly checking and cleaning this small component can save you a lot of time and money. If you’re curious about common issues like a spray arm not spinning properly, which can impact cleaning efficiency, I recommend reading about these troubleshooting tips.
Inspect and Clean the Water Inlet Filter
Begin by unplugging your dishwasher to ensure safety. Locate the water inlet valve, typically found at the bottom front of the unit. Remove the protective cover, and carefully detach the filter screen using needle-nose pliers or a soft cloth. Clear out any debris or mineral buildup that might block hot water flow. After cleaning, reassemble everything, and run a short cycle to observe if the hot water now fills correctly. In my experience, clogged filters are often overlooked but are the primary cause of cold filling issues.
Test the Water Inlet Valve
The inlet valve controls whether hot and cold water enter the dishwasher. Use a multimeter to check its electrical continuity—disconnect power first. If the valve doesn’t show proper resistance, replace it. Remember, this step may involve shutting off the water supply and removing the dishwasher’s lower panel. I once replaced a faulty inlet valve based on this test, and the dishwasher started heating water normally afterward, saving a costly service call.
Check the Heating Element
The heating element turns water hot during the wash cycle. Access it by removing the bottom rack and inspecting visually for signs of damage or mineral deposits. Use a multimeter to test continuity—no resistance indicates a good element. If faulty, replace it following your stove’s manual or dedicated repair guides. My quick repair involved cleaning mineral buildup off a corroded element, restoring heat flow within minutes.
Assess the Thermostat and Temperature Sensors
Incorrect readings from the thermostat can prevent the dishwasher from heating water properly. Consult your dishwasher’s manual for sensor locations, typically near the heating element or control board. Test for resistance with a multimeter; inconsistent or abnormal readings mean sensor replacement is needed. During my last check, swapping out a malfunctioning sensor turned the dishwasher from lukewarm to scorching hot, increasing cleaning efficiency.
Examine the Control Board and Wiring
If all components are functional, inspect the control panel and wiring harness. Look for burnt connectors, loose wires, or corrosion. Use a circuit tester or multimeter to verify signals reach the heating element and relay. Re-seating connections or replacing damaged wires can resolve the cold fill issue. Once I fixed a loose wire connection, my dishwasher immediately started heating water as intended.
Utilize Smart Assist and Troubleshooting Resources
If your dishwasher includes smart features, connecting to a hub or app can provide diagnostic codes. Check the manufacturer’s troubleshooting guide, such as these tips, to pinpoint electronic issues. Sometimes, a simple reset or firmware update resolves persistent faults. Leveraging tech tools often shortens repair time and prevents unnecessary part replacements, as I experienced with my smart dishwasher.
While many homeowners believe they understand their appliances thoroughly, misconceptions often lead to unnecessary repairs and expense. One widespread myth is that all dishwasher issues stem from a faulty heating element; however, in my experience, clogged filters and faulty inlet valves are more common culprits. Believing that regular repairs always require professional help can also be costly—many problems, such as cleaning dishwasher spray arms, can be fixed with basic tools and some guidance, saving you money. Additionally, some think smart appliances always require complex setups; in reality, a simple reset or app reinstallation can resolve many connectivity issues. Recognizing these nuances is crucial for effective troubleshooting and avoiding the trap of unnecessary replacements. Have you ever fallen into this trap? Let me know in the comments.Maintaining your household appliances requires the right tools and techniques to extend their lifespan and keep them running efficiently. Personally, I rely on a few specific pieces of equipment that have saved me time and money during repairs and regular upkeep. One such tool is a high-quality multimeter, which I use to test electrical components like heating elements, thermostats, and control boards—especially crucial when diagnosing issues with dishwashers and washing machines. I only trust brands like Fluke for durability and accuracy, as cheap multimeters can give false readings that lead to unnecessary replacements. Additionally, a detailed maintenanace schedule based on the appliance’s manual helps me stay proactive rather than reactive, preventing costly breakdowns.
For ongoing cleanliness and performance, a dedicated cleaning brush set designed specifically for appliance parts is invaluable. These brushes, with stiff yet gentle bristles, help me keep spray arms, filters, and seals free from debris and mineral buildup. For example, regularly cleaning the sprayer arms of my dishwasher, as detailed in this guide, prevents blockages that can impede hot water flow, which might cause your dishwasher to fill with cold water unexpectedly. Also, I keep a set of precision screwdrivers, which are vital for removing panels and accessing internal components without damaging delicate parts. I’ve learned that using proper tools minimizes the risk of voiding warranties or causing further damage.
Smart technology is transforming appliance maintenance, and installing a smart hub like the ones reviewed here allows me to monitor my appliances remotely and receive diagnostic updates. These hubs can alert me to potential issues early, such as a failing temperature sensor in my fridge, enabling me to take action before a complete breakdown. Pairing this with diagnostic apps simplifies troubleshooting; for example, if your dishwasher’s app shows error codes, cross-referencing with reliable online resources can save you a service call.
Looking ahead, I predict that smart diagnostics and remote monitoring will become standard features, empowering homeowners to take control and perform more self-repairs. As technology advances, expect even more integrated tools—like laser guides for leveling appliances or ultrasonic sensors that detect wear—making maintenance more accessible and less daunting for non-experts.
How do I keep my appliances working smoothly over time?
One effective approach is establishing a routine maintenance check—scheduled quarterly to clean filters, check seals, and test electrical connections. Regular cleaning of filters and spray arms, combined with inspecting wiring and sensors, can prevent issues like leaky refrigerators or noisy washers from developing into costly repairs. I also recommend investing in a good digital magnifying glass; it’s surprisingly useful for spotting tiny cracks or corrosion that might otherwise go unnoticed, especially on control boards or heating elements. Incorporating these tools into your maintenance routine ensures that your appliances not only perform well but also last longer, saving you money and frustration in the long run. For a deeper dive into appliance diagnostics, don’t forget to check out this insightful article. Finally, always remember: proactive care, combined with the right tools, is the secret to keeping your home appliances in top shape for years to come.
One of the most common frustrations with dishwashers is when they only fill with cold water, leaving dishes less than spotless and chores more irritating. Over the years, I’ve uncovered that the true lessons about appliance repair often lie beneath the surface, revealing insights that save both time and money. Here are some deep lessons I’ve learned along the way to help you conquer cold fill problems and improve your appliance knowledge.
What I Didn’t Realize About Water Flow and Appliance Health
I used to dismiss small components like filters and inlet screens as trivial, but I now see them as vital to appliance performance. Clearing debris from filters can restore hot water flow, preventing unnecessary replacements. My first mistake was ignoring this simple step, which prolonged the issue. Remember, often the smallest parts hold the key to fixing larger problems with your dishwasher.
The Power of Systematic Diagnosis and Trustworthy Tools
Investing in a quality multimeter and maintenance schedule transformed how I approach appliance issues. Testing the water inlet valve, heating element, and sensors with reliable tools allowed me to pinpoint problems accurately. Trustworthy equipment like a high-quality multimeter from brands such as Fluke has been a game-changer, enabling me to avoid costly trial-and-error repairs and gain confidence in my DIY skills.
Early Red Flags and Preventive Care Save Big
One lightbulb moment was realizing that regular preventative maintenance, like cleaning spray arms and filters, can ward off bigger problems. For instance, a neglected spray arm can impede hot water circulation, resulting in cold fills. Establishing a routine check not only ensures optimal performance but also extends the lifespan of appliances, saving money and reducing stress.
Bridging Technology and Hands-On Fixes
Smart features embedded in modern dishwashers can seem intimidating, but combining technological diagnostics with hands-on checks simplifies troubleshooting. Connecting your appliance to a smart hub or app, as reviewed here, provides early alerts for issues like faulty sensors or valves, giving you an edge in maintenance. Embracing this blend of tech and traditional repair fosters a proactive appliance care routine.
Embracing My Learning Journey for Better Appliance Care
My deepest insight has been understanding that misconceptions often lead to unnecessary repairs. Believing all issues stem from complex faults like heating element failures overlooks simpler causes like clogged filters or faulty valves. Recognizing this has empowered me to troubleshoot effectively, use the right tools, and know when to seek professional help, thus avoiding costly mistakes.
Tools and Resources That Elevate My Maintenance Game
My essential toolkit includes a durable multimeter, cleaning brushes designed for appliance parts, and a digital magnifying glass for inspecting tiny components. Additionally, I trust books on appliance repair that delve into common issues and quick fixes. Resources like this guide on bypassing water filters have equipped me to handle tricky repairs safely and effectively.
Stay Curious and Keep Improving Your Appliance Knowledge
Every repair has been an opportunity to learn something new—whether it’s the importance of cleaning mineral build-up or understanding sensor behavior. My advice is to stay proactive, leverage reliable tools, and consult targeted resources. The more you invest in understanding your appliances, the more confident you’ll become in diagnosing and fixing issues quickly.
Your Next Step Toward Appliance Confidence
By sharing my journey, I hope to inspire you to embrace the learning process and tackle your appliance challenges head-on. Remember, many problems are more straightforward than they seem, and with the right approach, you can keep your dishwasher—and all your household appliances—running smoothly for years to come. Want to share your appliance repair stories or ask questions? Drop a comment below and let’s troubleshoot together!