
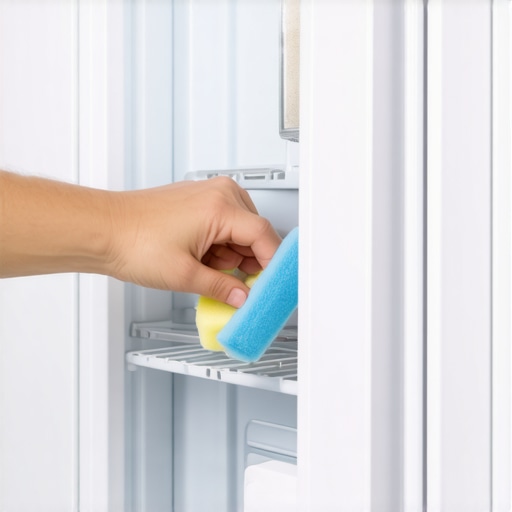
Ever opened your refrigerator and been greeted with a cloud of unpleasant odors or a sight of stubborn stains on the inside walls? I’ve been there—one minute, everything seems perfectly fine; the next, you’re faced with a mysterious, greasy film or old food spills that refuse to budge. That lightbulb moment hit me hard when I realized my spotless white fridge was quickly turning into a less-than-appealing mess, and I hadn’t even detected it until I caught a whiff of something off. Cleaning the inside of a fridge isn’t glamorous, but ignoring those stains can lead to bigger issues like mold growth, bad smells, or even compromised food safety.
The Hidden Struggles of Maintaining a Fresh-Smelling Fridge
Keeping the interior of a white fridge pristine might seem straightforward, yet it often feels like a battle lost before it even begins. Food spills, drips, and splatters are inevitable, especially in households where multitasking and busy mornings reign. Over time, these small messes build up, creating an environment perfect for bacteria and odors to thrive. The tricky part? Stains and grime are often hidden beneath layers of debris, making them tough to spot initially. If left unaddressed, they can cause lingering smells, discoloration, and a less-than-appealing appearance—none of which makes for a happy kitchen experience. Plus, a clean fridge helps maintain optimal appliance performance and energy efficiency, which should matter a lot if you’re aiming to cut down on utility bills and extend your fridge’s lifespan.
Now, here’s the thing: I used to think wiping down the shelves now and then was enough. But early on, I made a crucial mistake that cost me dearly—failing to clean the coils or the door seals properly. Turns out, those hidden corners harbor mold, and neglecting them can lead to a cycle of re-contamination. It’s a reminder that regular, thorough cleaning is vital, and understanding the right methods can make all the difference. If you’re tired of battling persistent stains and lingering smells, don’t worry—you’re not alone. I’ll guide you through simple, effective strategies to restore the freshness and brightness of your white fridge from the inside out.
Is Cleaning Your Fridge Really Worth the Effort?
It might seem like a tedious chore, but trust me, the benefits far outweigh the effort. Not only does a clean interior diminish unpleasant odors, but it also prevents cross-contamination of food and reduces mold growth. A study published in the Journal of Food Protection highlights how bacteria can flourish in damp, unclean environments—dangerous for anyone, especially those with sensitive immune systems. Maintaining a hygienic fridge is a simple step toward healthier, safer food storage.
So, if you’ve ever faced the frustration of discovering moldy shelves or that awful sour smell from a neglected corner, I understand. You’re about to learn how to banish those stains for good—no more guesswork, just straightforward tips to help your fridge stay sparkling and odor-free. Ready to dive into the practical part of this journey? Let’s get cleaning!
Empty the Fridge Completely
Start by removing all food, shelves, and drawers. It may seem obvious, but I once left perishable items inside while cleaning, which led to a messy spillage when I moved things around. Clearing everything makes it easier to access all areas and ensures no spot is overlooked. Use a box or cooler to temporarily store perishable items, especially if your cleaning takes a while.
Prepare a Cleaning Solution
Mix warm water with mild dish soap—think of it as giving your fridge a gentle bath, similar to washing delicate clothes on a delicate cycle. For stubborn stains or sticky residue, add a splash of baking soda, which acts as a gentle abrasive and deodorizer. I found that using natural solutions like vinegar, combined with water, also works wonders—not only cleaning but leaving a fresh scent behind. Avoid harsh chemicals that can leave residues or damage plastic surfaces.
Clean Shelves and Drawers
Remove all removable parts and soak them in the prepared solution. Use a soft cloth or sponge to scrub away dirt, grime, and dried spills—like polishing a car’s windshield for clarity. Rinse thoroughly with clean water and dry with a towel before reinstalling. I once neglected to dry the shelves properly, which led to a quick buildup of condensation and new stains. So, patience here pays off in the long run.
Wipe Down the Interior Walls and Door Seals
Use a microfiber cloth soaked in your cleaning solution to wipe the walls, paying special attention to corners and crevices where grime tends to hide. Door seals are particularly important; mold or crumbs can accumulate there, causing odors and affecting efficiency. I used an old toothbrush to gently scrub these seals, ensuring I didn’t damage the rubber. This step is critical, as neglected seals can cause energy loss and unpleasant smells. For detailed instructions, you can refer to cleaning seals properly.

Deodorize and Freshen Up
After cleaning, leave the door open for about 15-30 minutes to air out any residual odors. To keep your fridge smelling fresh longer, place an open box of baking soda or a charcoal bag inside. These natural deodorizers absorb lingering smells and are a more eco-friendly alternative to chemical air fresheners. I noticed a significant reduction in bad odors after implementing this simple step, making my refrigerator feel brand new.
Clean the Exterior and Maintenance Checks
While the interior airs out, wipe down exterior surfaces with a damp cloth. Check the condenser coils at the back or underneath (like the engine of your car) using a coil brush or vacuum to remove dust, which can improve efficiency. Neglecting this step can cause your fridge to work harder, increasing energy bills and reducing lifespan. Regular maintenance like this ensures optimal performance, especially if your fridge is a modern smart model that can be improved with proper upkeep.
Reinstate Items with Care
Once everything is dry, reorganize your food, paying attention to keep raw meats separate from produce. Wipe containers to prevent cross-contamination and spills. Returning items methodically prevents reintroducing messes and keeps the fridge tidy longer. I reorganized my fridge into zones—dairy here, snacks there—which made it easier to maintain cleanliness and find what I need quickly.
Many homeowners believe that simply purchasing the latest smart appliances guarantees a trouble-free experience, but in reality, there’s more beneath the surface. A frequent myth is that these devices automatically optimize themselves, eliminating the need for user involvement. However, smart appliances require proper integration and understanding of their advanced features to truly harness their potential. Rushing into upgrades without researching can lead to frustration and underperformance, especially if compatibility issues arise with existing home systems.
One often-overlooked nuance is that more features don’t always translate to better usability. For instance, some high-end smart refrigerators come with numerous interconnected features that can overwhelm users. Overcomplicating simple tasks might cause users to ignore or disable critical functions, negating the benefits of smart technology. An expert in home automation emphasizes that a balanced approach, focusing on essential features aligned with personal needs, results in better long-term satisfaction.
A common trap to avoid is neglecting network security. With connected appliances, vulnerabilities can expose your entire home network to cyber threats. Manufacturers sometimes prioritize feature-rich devices over robust security protocols, which is risky. For example, poorly secured smart washing machines or dishwashers could be exploited for malicious purposes. Studies from cybersecurity researchers highlight that updating firmware and changing default passwords are crucial steps often missed by users.
Now, how do you maximize the value of your smart appliances? The key lies in understanding their limitations as well as their advantages. For instance, choosing the right dishwasher involves more than just brand recognition; it requires assessing compatibility with your home’s Wi-Fi system and security features.
Equally important is maintaining proper communication with these devices. Regular firmware updates ensure that your appliances remain secure from emerging vulnerabilities. If you’re unsure about updating or troubleshooting, consulting the manufacturer’s guides or professionals can save time and prevent costly errors. Remember, smart appliances are tools designed to simplify life, but only if used correctly. If you’ve ever fallen into this trap of overestimating these devices or neglected their security, let me know in the comments! Help others avoid these common pitfalls and make smarter choices regarding home automation.
Tools That Keep Your Appliances Running Smoothly
Investing in the right tools makes all the difference in maintaining your smart appliances. For instance, I personally swear by a high-quality microfiber cloth and a soft brush, like the OXO Good Grips Microfiber Cleaning Cloth, for daily wipe-downs. These tools are gentle enough to prevent scratches but effective at trapping dust and grime. When it comes to deeper cleaning, especially of hard-to-reach areas like dishwasher filters or refrigerator coils, I rely on a compact coil brush with a flexible neck, which I found essential after reading this guide. Regular use of these tools extends the lifespan of your appliances and prevents costly repairs.
In addition, a digital multimeter aids in troubleshooting electrical components, especially for smart appliances connected to Wi-Fi. I use the Fluke 117 Electrical Multimeter for diagnostics, which helps me identify issues with circuit boards or power supplies quickly. Having the right tools saves time and gives you confidence when performing routine maintenance or diagnosing problems yourself.
Embracing Software and Automation for Ease
Keeping your appliances in top shape isn’t just about manual tools; leveraging the right software can automate regular maintenance. For example, many smart washing machines and dishwashers come with built-in apps that notify you when filters need cleaning or if there are operational issues. I recommend setting up automated alerts through their respective apps, which often integrate with platforms like Google Home or Alexa, to stay ahead of potential problems. Also, regularly updating firmware ensures your devices have the latest features and security patches—doing so can resolve bugs that might compromise performance, as detailed in this article.
How do I maintain appliances over the years without surprise failures?
Routine checks are key. Schedule bi-annual inspections of seals, vents, and filters. Keep a log of maintenance dates and issues to recognize patterns early. For long-term results, consider investing in a smart appliance monitor like the Sense Energy Monitor, which tracks energy consumption and alerts you to abnormal patterns that could indicate a malfunction. Monitoring not only helps prevent failures before they happen but also optimizes efficiency, saving you money in the long run. More about upcoming trends can be found in this forecast.
Questions on sustaining your smart appliances
Wondering how to ensure your appliances stay reliable over many years? Start with a comprehensive approach: use precise tools for cleaning and diagnostics, automate routine maintenance where possible, and stay informed with firmware updates and energy monitoring. Implementing these practices can make a significant difference—try using a microfiber cloth for your next cleaning session and see the results firsthand. Maintaining your appliances is an investment in your home’s future, ensuring they serve you well for years to come.
What Few Homeowners Discover About Smart Appliances
One of the most surprising lessons I learned involved the importance of regular firmware updates—neglecting this step can leave your appliances vulnerable to security threats, a detail many overlook. Additionally, I realized that over-complicating smart systems can backfire; simplicity often yields better results and less frustration. Lastly, the value of understanding your appliance’s manual and features became crystal clear—knowledge truly is power when it comes to troubleshooting and maximizing efficiency.
The Right Tools Transform Your Routine Maintenance
My secret weapons include a microfiber cloth, which gently cleans without scratching, and a flexible coil brush for deep cleaning coils and filters. These tools, combined with trusted resources like the Ultimate Guide to Smart Home Appliances, have made upkeep a breeze. Investing in quality diagnostic tools, such as a multimeter, pays off by helping me identify issues before they escalate, saving money and prolonging appliance lifespan.
Embrace the Future with Confidence and Care
Your journey with smart appliances is just beginning. With the right knowledge, tools, and mindset, maintenance becomes a manageable part of your smart home lifestyle. Don’t wait for problems to arise—start today by scheduling routine checks, staying informed through trusted sources, and sharing your experiences. Your future self will thank you for building a home that’s not only intelligent but also resilient and efficient.
What unexpected tip has transformed the way you care for your appliances? Share your story below and inspire others to master their smart home maintenance!