
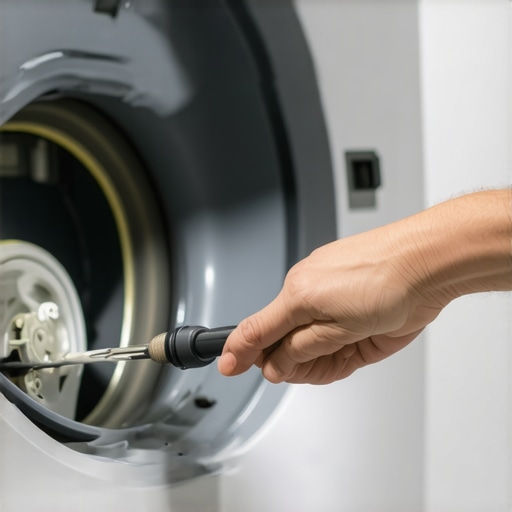
It was late on a Saturday afternoon when I noticed something was seriously off with my washing machine. Instead of the cheerful humming I’m used to, all I heard was a strange gurgling sound, and then water started pooling around its base. In that moment, I felt a wave of frustration—and a tiny bit of panic. We’ve all been there: a household disaster that strikes just when you least expect it. But what if I told you that the fix for this kind of mess can take just two minutes? Yes, really.
The lightbulb moment that changed everything
Worries about costly repairs or calling in a professional often make us ignore the simplest solutions. Early on, I made the mistake of trying to troubleshoot complex issues that weren’t even the root cause. I learned this the hard way—wasting time, money, and my weekend. The truth? Many common drainage problems stem from a clogged washing machine drain pump, but most homeowners overlook a straightforward fix. Once I discovered how quick and easy it is to clear this blockage, I couldn’t keep it to myself.
Let’s dive into how you can perform this quick fix and restore your washer’s peace—saving you both time and money.
Is a DIY fix really worth it or just a waste of time?
Initially, I was skeptical about attempting to fix something that seemed technical. I worried I might cause more damage or get overwhelmed. However, I found that with just a few simple tools and a little patience, I was able to unblock my drain pump myself. Trust me, this isn’t as intimidating as it sounds. Plus, knowing how to handle this minor issue can prevent larger, costly repairs later. For expert advice on maintaining your appliances, you might want to check out our guide on [washing machines that save water](https://smartappliancereview.com/washing-machines-that-save-water-expert-advice-for-2025).
Have you ever faced a similar situation, wondering if you should call a repair technician or give that tiny screw a try? If you’re ready to take matters into your own hands, keep reading. We’ll walk through the simple steps that can turn this potentially stressful moment into a quick victory.
Prepare Your Tools and Safety Measures
Start by unplugging your washing machine to prevent electrical hazards. Grab a towel, a small bucket, and a flathead screwdriver or pliers. Wearing gloves is recommended to protect your hands from dirt and sharp edges. Remember, safety first—if you’re unsure, consult your appliance manual or contact a professional through our contact page.
Access the Drain Pump via the Front Panel or Filter
Locate the access panel at the bottom front of your washer. Use the screwdriver or pliers to unscrew the cover. If your model has a dedicated filter handle, pull it out gently. Be prepared for water to spill—place the towel and bucket underneath to catch any drips. This step is similar to opening a lid on a soda bottle—expect some liquid to escape.
Identify and Remove the Drain Pump Filter
Inside, you’ll find the drain pump filter—a round, removable piece. Turn it counterclockwise to unscrew. It might be clogged with lint, hair, or small debris. Clean it thoroughly under running water, removing any stubborn residues with a soft brush. This simple action is like cleaning a filter on your air conditioner—crucial for optimal performance.
Check for Blockages and Clear Clogs
With the filter removed, look into the pump opening for any visible obstructions like coins or lint balls. Use your fingers or a long, thin object to dislodge these blockages gently. If you find a clog deep inside, insert a flexible brush or a pipe cleaner—think of it as unclogging a kitchen drain—but always be gentle to avoid damage.
Test the Pump Manually
Some pumps have impellers that can be spun manually. Gently turn the impeller to ensure it moves freely. If it feels stuck or hard to turn, the pump might need replacing, and consulting a professional could be worthwhile. However, in most cases, clearing the visible clog restores proper flow.
Reassemble and Test
Reinstall the filter by turning it clockwise until secure. Reattach the access panel and tighten screws firmly. Plug the machine back in and select a short cycle to test if the noise and drainage issues are resolved. This process is akin to clearing a jam in a coffee machine—the small effort yields big results.
Maintain Regularly to Prevent Future Problems
Perform this quick check every few months to keep your washing machine running smoothly. Regular maintenance is like changing oil in a car—cost-effective and extends appliance lifespan. For more home appliance tips and updates on smart appliances, explore our guide to smart appliances in 2025.
When it comes to home appliances like washing machines, refrigerators, and dishwashers, common wisdom often leads us astray. Many assume that newer models or higher-end brands automatically mean better performance, but the real story is more nuanced. For instance, a prevalent myth is that all smart appliances instantly optimize energy use without any user intervention. However, in reality, smart features like eco-mode require proper setup and understanding to truly save water and electricity — as detailed in our [expert advice on water-saving washing machines](https://smartappliancereview.com/washing-machines-that-save-water-expert-advice-for-2025). Another misconception is that appliance maintenance is only necessary when something breaks. In truth, regular upkeep, such as cleaning filters and seals, can prevent costly repairs down the line, a point emphasized by appliance experts.
A sneaky trap many fall into involves believing that all cleaning cycles are equally effective. For example, some think running a quick wash suffices for all loads, but heavy soiled items demand longer or specialized cycles. Overlooking this can lead to persistent odors or subpar cleanliness. Additionally, the notion that all refrigerators with digital displays are reliable often blinds us to subtle signs of malfunction, like temperature fluctuations or frost buildup, which can compromise food safety.
Let’s answer a pertinent question for advanced users: How do I accurately calibrate my smart refrigerator’s sensors to ensure optimal cooling without wasting energy?
Calibrating sensors involves accessing the appliance’s diagnostic settings, often through a combination of button presses or app configurations. Proper calibration can prevent issues like over-freezing or insufficient cooling, which not only spoil food but also increase utility bills. Experts highlight that sensor misalignment can be caused by power surges or manual adjustments, a fact supported by recent appliance studies. For a comprehensive guide on this topic, check out [our detailed calibration instructions](https://smartappliancereview.com/choose-the-right-refrigerator-tips-from-industry-experts).
A notable oops moment occurs if you neglect to regularly update your smart appliance’s firmware. Outdated software can lead to bugs, reduced efficiency, or security vulnerabilities. Many users ignore these updates, assuming their device’s basic functions won’t change, but in fact, manufacturers release patches that enhance performance and protect against cyber threats.
To avoid these pitfalls, stay informed about your appliance models’ latest features and firmware updates. Connecting with a professional for periodic tune-ups can also be a game-changer, as hard-to-diagnose issues often stem from overlooked glitches. If you’re unsure about initiating maintenance, don’t hesitate to reach out to experts.
In summary, there’s a depth of nuance behind household appliance performance that enthusiasts often overlook. By challenging common assumptions—like the automatic efficiency of smart modes or the sufficiency of quick washes—you can optimize your appliances’ longevity and functionality. Have you ever fallen into this trap? Let me know in the comments.
Keep Your Appliances Running Smoothly with the Right Tools
To ensure your home appliances perform optimally over the years, investing in quality maintenance tools is crucial. I personally rely on a few specialized items that save me time and prevent costly repairs. One essential tool is a digital multimeter. I use it frequently to check electrical components in refrigerators and washing machines, ensuring they’re receiving proper voltage or identifying faulty wiring before a problem escalates. Contact us if you’re unsure about testing your devices safely.
Another indispensable item is a set of precision screwdrivers. Modern appliances often have delicate screws and fasteners; having a set with various sizes allows me to access panels and filters without damaging anything. I prefer magnetic tip screwdrivers for easier reassembly. Additionally, a flexible inspection mirror helps me examine hard-to-see areas like behind refrigerators or under dishwashers, making routine inspections effortless.
Recommended Cleaning and Diagnostic Kits
When it comes to diagnosing issues like water leaks or sensor malfunctions, I use dedicated appliance cleaning and diagnostic kits. For example, a high-quality ultrasonic cleaning tool can revive sensors or small parts, extending their lifespan. Modern diagnostic tools with Bluetooth capability connect to my smartphone, providing real-time data and troubleshooting tips. These tools are valuable for smart appliances, which often require firmware updates or software calibration to maintain peak performance.
Leveraging Software for Long-Term Care
Beyond physical tools, software management plays a vital role. I use manufacturer-specific apps to monitor appliance health, receive firmware updates, and run diagnostic tests remotely. Regularly updating firmware ensures compatibility with new features and security patches, which is becoming increasingly important as more appliances connect to the internet. Keeping a service log—either digitally or on paper—helps track maintenance history, preventing neglect and catching potential issues early.
How do I keep my appliances functioning well over time?
Developing a routine maintenance schedule is key. This includes cleaning filters, inspecting seals, and running calibration cycles. For smart appliances, I schedule firmware checks monthly to ensure optimal operation. Using the right tools, like a multimeter and screwdrivers, combined with software monitoring, creates a comprehensive maintenance approach. Gradually, this proactive method reduces breakdowns and extends the life of your appliances. Experts suggest that pairing physical tools with digital diagnostics is the future of home appliance care—embrace these methods now to stay ahead of potential issues. For instance, regularly updating the software on your smart refrigerator can prevent temperature fluctuations, ensuring food stays fresh and saving energy. Try integrating a Bluetooth diagnostic device into your routine and see the difference it makes in appliance longevity.
Lessons That Turn Ordinary Repairs Into Confidence Boosters
One of my key revelations was realizing that many appliance issues stem from overlooked details, like tiny clogs or miscalibrations, which can be fixed with simple tools and patience. This insight transformed my approach, making me more proactive and less reliant on professionals for minor fixes. It taught me that understanding the core mechanics often reveals solutions before costly replacements become necessary.
Another lesson was the importance of routine maintenance—regular filter cleaning or firmware updates acting as preventive health checks. Embracing these habits not only extends appliance lifespan but also saves money and reduces stress. Learning to read appliance error codes and troubleshooting online has empowered me to keep everything running smoothly without panic.
Lastly, I discovered that investing in quality diagnostic tools and staying informed through trusted sources like this comprehensive guide can make maintenance more efficient. These tools and knowledge are game-changers, turning maintenance from a dreaded chore into an engaging, rewarding challenge.
Tools That Keep My Appliances Smooth and Smart
My go-to device is a Bluetooth-enabled diagnostic scanner, which connects effortlessly to my smartphone to read error codes and suggest fixes—trusted for its reliability and ease of use. I also rely on a precision screwdriver set, essential for accessing tight spots without causing damage, and a digital multimeter to verify electrical components—a small investment that pays off in preventative diagnostics. For cleaning and recalibrating sensors, ultrasonic cleaning kits have become invaluable, restoring performance without professional help.
Furthermore, I utilize manufacturer-specific apps for firmware updates and remote monitoring, ensuring my appliances adapt to new features and security patches. These digital tools, combined with physical maintenance, form a robust system, safeguarding my appliances against unexpected breakdowns. For more advanced support, our latest resources can guide you in building your own toolkit.
Your Next Step Starts Today
Armed with new insights and reliable tools, you’re equipped to extend your home appliances’ lifespan effortlessly. Remember, small maintenance steps today can prevent big frustrations tomorrow. The power to master your appliances is in your hands—take action now, and enjoy the peace of mind that comes with being knowledgeable and prepared. The future of your home’s comfort depends on your willingness to learn and adapt—so why not start today?
What’s the first appliance maintenance task you plan to tackle? Share your thoughts below and let’s grow stronger together in managing our home tech.