
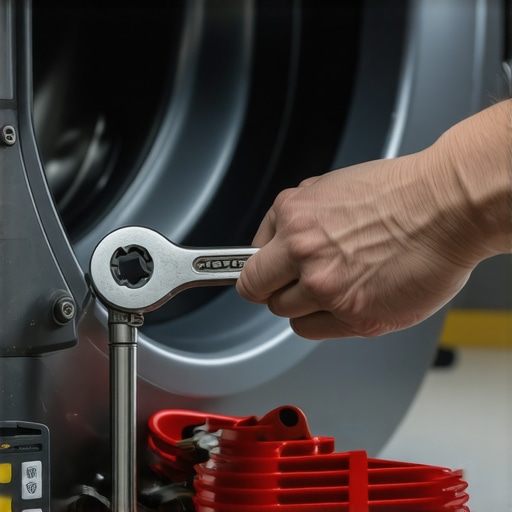
Ever had that sinking feeling when your washing machine starts to smell strange or stops draining properly, and you realize it’s been sitting there, full of water, longer than it should? I remember the first time I faced this mess. It was a hectic Saturday, and my laundry was piling up, but my machine refused to cooperate. After some frantic online searching, I discovered a simple yet often overlooked fix—the 2-minute pump clearance. That lightbulb moment changed everything for me, and I bet it can do the same for you.
Why a Simple Fix Can Save Your Laundry Day
Sometimes, it just takes a few minutes to fix what seems like a major problem. A clogged washing machine pump can lead to water backing up, bad odors, and even damage if ignored. What surprised me early on is how straightforward the solution was—if you know the right steps. Regularly clearing out debris from the pump prevents clogs and extends your washer’s lifespan. Plus, it saves you from costly repairs or calling in a technician.
Is This Really Worth the Hype?
Admittedly, I was skeptical at first—thought it might be complicated or risky. I made a mistake early on by not unplugging the machine before starting, which nearly resulted in a minor shock. Turns out, a basic understanding of your appliance goes a long way. Once I learned the correct method, I realized that with some guidance, anyone can handle this quick fix. If you’ve ever wondered whether it’s worth trying yourself or just calling a pro, I say give this a shot—it’s simpler than you think.
So, if you’re tired of dealing with drainage issues or funky smells from your washer, stick around. We’re about to dive into a step-by-step guide that demystifies this repair, making it accessible for every homeowner. Ready to take control of your appliances and save time and money? Let’s get started on mastering the 2-minute washing machine pump fix.
Prepare Your Workspace and Gather Supplies
Before diving into the repair, unplug your washing machine to prevent electrical shocks, similar to turning off a power strip before working on electronics. Place towels or a shallow pan under the pump area to catch any residual water, which can be like placing a tray before fixing a leaky pipe. Have a flat-head screwdriver or socket wrench ready, depending on your washer model. During my first attempt, I forgot these basics and ended up with a little flood—trust me, prepping avoids messes.
Access the Pump Easily
Locate the Pump Port
Remove the access panel at the back or front of the washer; this is often held with screws. Think of it as opening the hatch of a submarine to get inside. Usually, the pump filter or cover is near the bottom, behind a small door—similar to opening a snack pack. My friend once spent 15 minutes hunting for it, only to realize he needed to unscrew a panel first.
Storing and Protecting Components
Set aside removed screws and parts in a container. This prevents losing tiny pieces—think of it as organizing your fishing tackle before casting. When I did this, I avoided the frustration of hunting for missing screws after reassembly. Attention to detail here streamlines the entire process.
Clear Obstructions and Debris
Unscrew or unclip the filter or pump cover; it’s like opening a filter on a coffee machine—dirty water and lint will pour out. Clean out debris, coins, or hair tangled inside with fingers or tweezers. As a quick tip, most blockages form from accumulated lint and small objects, much like how hair clog drains at home. I once found a forgotten sock ball inside and instantly improved drainage after removing it.
Inspect and Clean the Pump
Check the impeller—the small blades that push water—making sure it spins freely without resistance. Grab a flashlight if needed, which is like shining a torch into a cave—safety first. If it’s jammed, clear any obstructions carefully. During my initial fix, I had to free a clump of hair around the impeller, which restored proper water flow and ended the funky smell.
Reassemble and Test
Replace the filter or cover securely, ensuring no tools or debris are left inside. Screw everything back tightly; think of sealing a bottle—nothing should leak. Plug in the washer and run a short cycle to verify proper draining and inspect for leaks. After my first success, I felt like I had a new, trouble-free machine—saving money and laundry time.
Regular Maintenance Makes a Difference
Schedule simple weekly checks of the pump filter, much like changing oil in a car. Removing debris prevents clogs and extends your appliance’s life. For ongoing advice and smart solutions, visit this comprehensive guide on modern appliances. Proper care keeps your washer running smoothly, preventing those dreaded “water standing” episodes and costly repairs—proof that a small routine saves big bucks.
Don’t Believe Everything You Think About Your Appliances
Many homeowners operate under misconceptions that can lead to inefficient use or even damage to their appliances. For example, a prevalent myth is that leaving a refrigerator door slightly open can help cool the kitchen or save energy. In reality, this practice causes the compressor to work harder, increasing energy consumption and risking spoilage. According to experts at the Department of Energy, improperly sealing refrigerator doors not only wastes power but also accelerates wear and tear. Smart appliances are also often misunderstood; many believe they are only for convenience when, in fact, their advanced sensors optimize operation for energy efficiency, extending appliance lifespan.
Beware of the Over-Reliance on Self-Adjusting Features
It’s tempting to trust automatic features, but overdependence can be a trap. Washing machines with auto-dosing detergent or dishwashers with automatic cycle adjustments are popular, yet they aren’t foolproof. For instance, not all detergents are compatible with their dosage mechanisms, leading to poor cleaning results. Moreover, these smart features often require proper calibration and maintenance. An overlooked nuance is that sensors can be fooled by residue or buildup, causing misjudgments in cycle selection. Regular manual checks and understanding the mechanics behind these features ensure you get the best performance and durability from your appliances.
What Advanced Users Get Wrong About Smart Appliance Data Privacy?
An often-underestimated aspect is data privacy. Many believe that smart appliances only collect usage data for optimization, but they can also be vulnerable to hacking or unauthorized access. Studies by cybersecurity firms reveal that IoT devices in homes are increasingly targeted, exposing personal routines and preferences. To protect yourself, it’s vital to review privacy policies and secure your Wi-Fi networks. For detailed strategies, visit our privacy policy page for best practices and recommendations. Remember, being informed about these hidden nuances keeps your smart homes secure and functioning optimally.
Have you ever fallen into this trap? Let me know in the comments. Mastering these nuances ensures you’re not just using appliances but leveraging their full potential, leading to smarter, safer, and more efficient home management.
Maintaining your home appliances requires the right tools, a systematic approach, and knowledge of future trends. Personally, I rely on high-quality multimeters like the Fluke 117 to troubleshoot electrical issues in appliances because they provide fast, accurate readings and help diagnose problems without guesswork. For cleaning and preventative maintenance, I use specialized brushes and silicone-based lubricants, which I apply to moving parts to reduce wear and squeaking over time. These simple yet effective tools allow me to identify potential failures early, saving money and extending appliance lifespan.
One method I swear by is keeping a detailed maintenance log—either digitally with apps like Home Maintenance Schedule, or physically in a binder. Tracking service dates, parts replaced, and observed issues helps pinpoint recurring problems and plan proactive repairs. This approach aligns with the trend of smart home integrative solutions, where automation can remind you of routine checks, as discussed in our comprehensive guide to smart appliances. Looking ahead, I predict that the integration of IoT sensors with predictive analytics will become standard, enabling appliances to alert us proactively about potential failures before they happen.
How do I maintain appliances over time? Regularly inspecting and cleaning filters, seals, and vents is crucial. For example, with refrigerators, removing and cleaning condenser coils every six months ensures energy efficiency and prevents overheating, a tip supported by industry experts at industry professionals. I also recommend sealing minor leaks promptly and updating firmware on smart devices when updates are available, which often include crucial security patches and performance improvements.
To keep long-term results consistent, I use software like SmartThings or Home Assistant to monitor appliance status remotely. These platforms allow me to set custom alerts for irregular activity, such as unusual power consumption or connectivity drops, which could indicate impending failures. Implementing these systems not only minimizes downtime but also prepares you for scaling your smart home network. As the market evolves, expect more appliances to feature modular components that are easier to replace, reducing waste and repair costs.
If you’d like to make proactive maintenance a habit, start by investing in a reliable multimeter and a maintenance app. For example, testing your refrigerator’s compressor voltage periodically can reveal early signs of motor wear—something I learned the hard way early in my DIY repair journey. Armed with the right tools and knowledge, you can ensure your appliances stay efficient and functional for years to come. Don’t wait until a breakdown forces expensive repairs—be proactive, stay informed, and give your appliances the care they deserve.
The Hardest Lesson I Learned About Appliances that Changed My Routine
One of my biggest surprises was realizing that most appliance issues are simpler than they seem—when you know the insider tricks. I once thought a stubborn washer leak was a major repair, but it turned out to be a clogged filter that was easily accessible with the right tools. This eye-opener taught me the value of regular maintenance and understanding my appliances’ inner workings.
不要忽视你的设备的基本维护,这个小习惯能省下一大笔维修费
From cleaning condenser coils on refrigerators to checking door seals on dishwashers, these small steps can significantly extend the lifespan of your appliances. Early on, I ignored these details and paid the price with costly repairs. Now, I see routine checks as investments in my home’s efficiency and savings.
My Essential Toolkit for Smarter Home Appliance Care
- Multimeter like Fluke 117: Accurate diagnostics save time and prevent unnecessary replacements. I trust it because it’s precise and durable.
- Specialized brushes and lubricants: These keep moving parts in top condition, reducing noise and wear. Personal experience shows that proactive maintenance keeps appliances humming longer.
- Maintenance Log Apps: Tools like Home Maintenance Schedule help me track service dates and recurring issues, making proactive care manageable and effective.
Believe in Your Power to Improve Your Home
Taking charge of your appliances isn’t just about fixing issues—it’s about unlocking their full potential. Embrace the small routines, educate yourself about smart features, and don’t shy away from DIY fixes. Your home can become smarter, more efficient, and resilient when you trust your ability to care for it. Start today, and watch your confidence grow—your appliances and wallet will thank you!