
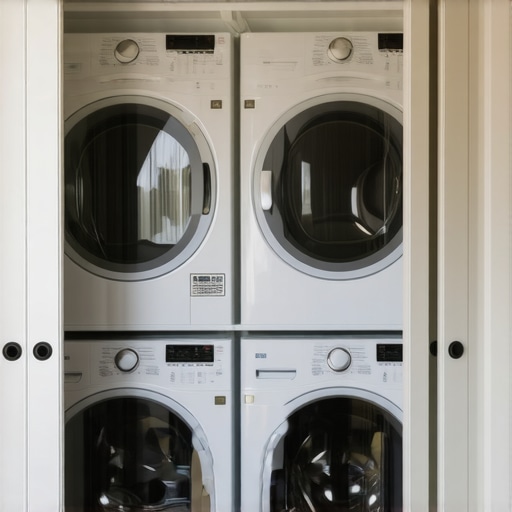
Walking into my laundry room one hectic morning, I realized I was pushed to the limit—clothes piled high, and no room for anything else. That was the moment I understood how crucial efficient appliance arrangement is, especially when space is tight. If your hallway closet is more of a cluttered cave than a functional space, chances are you’re feeling the frustration every laundry day. I’ve been there, and I’m here to tell you—there’s a solution that can transform your cramped corner into a streamlined, practical zone. Today, we’re diving into the world of stackable laundry units perfectly suited for hallway closets, and I promise, after reading this, you’ll have the confidence to make that essential upgrade.
Transform Your Hallway Closet with Stackable Laundry Units
Imagine fitting full-sized appliances into a tiny closet without sacrificing your decor or daily convenience. That’s the power of **stackable laundry units**. These appliances are designed to maximize vertical space, allowing you to have a washer and dryer side by side in a compact footprint. When I first considered stacking my units, I was skeptical—would it be reliable? Would it fit? Would I regret the decision? Early on, I made the mistake of choosing mismatched models that didn’t communicate well, which led to more hassle than convenience. But through trial, error, and lots of research, I discovered that today’s smart stacking solutions are more reliable and user-friendly than ever. Want to avoid my mistakes? Keep reading for tips and pointers that will help you select the perfect units for your space.
Is the Stacking Trend Worth the Hype
Many homeowners wonder if investing in stacked laundry units is truly beneficial or just a trendy gimmick. My personal experience confirmed that when properly selected—taking into account size, capacity, and connectivity—stacked units can significantly improve your laundry routine and free up much-needed space. They’re especially ideal for homes where square footage is precious. Moreover, modern appliances come equipped with smart features—like auto-dispense detergents and remote diagnostics—that can halve your laundry stress. Curious about how smart appliances can make your life easier? Check out [how smart washing machines can simplify laundry day](https://smartappliancereview.com/how-smart-washing-machines-can-simplify-laundry-day).
A Common Pitfall to Avoid
One of the biggest mistakes I made early on was ignoring the importance of proper installation and ventilation. A poorly installed stack can cause vibrations, noise, or even leaks. Plus, with smart appliances, ensuring correct Wi-Fi setup is crucial for features like remote start or diagnostics—you don’t want your devices to be talking and not listening! For more expert tips, I recommend reviewing [tips from industry experts on choosing the right refrigerator](https://smartappliancereview.com/choosing-the-right-refrigerator-tips-from-industry-experts).
As we move forward, I’ll walk you through the practical steps to select, install, and maintain your stackable laundry units for your hallway closet. Trust me, transforming a chaotic corner into a streamlined laundry station isn’t just a dream—it’s entirely doable, and I’ll show you how.
Measure Your Space Carefully Before Selecting Units
Begin by measuring the inside dimensions of your hallway closet, accounting for clearance space around existing cabinetry or walls. Use a tape measure to record height, width, and depth, then jot down these numbers. During my project, I found that my closet was 52 inches high, 24 inches wide, and 24 inches deep, limiting my options to compact models. Accurate measurements prevent purchasing units that won’t fit, saving time and money.
Choose Compatible Appliances for Seamless Integration
Look for washer and dryer pairs designed for stacking, with matching load capacity and compatible control interfaces. Think of this like choosing compatible puzzle pieces—if they don’t fit together, you’ll face functionality issues. I opted for a pair from the same manufacturer with Wi-Fi features, which made syncing and troubleshooting much easier, akin to connecting two smartphones via Bluetooth.
Prepare the Area and Optimize Ventilation
Clear the closet space, remove any obstructions, and ensure the floor is level. For washing machines, a level surface minimizes vibrations—imagine balancing a spinning top; if uneven, it wobbles. I used a spirit level and shims to stabilize my unit, which reduced noise and movement. Check that there’s enough space for ventilation, especially if your units are smart, to prevent overheating. Refer to these tips for proper ventilation practices.
Install the Units Step-by-Step
Start by stacking the washer on the pedestal, following manufacturer instructions. Use the included stacking kit to secure the units together; think of it as anchoring two LEGO blocks firmly. During my installation, I attached the brackets first, then carefully lowered the dryer onto the washer, ensuring the locking hooks clicked into place. Secure all connections tightly to prevent shifting during operation, similar to how you would tighten a bicycle seat post.
Connect Water, Power, and Data Properly
Attach the water hoses securely to the inlet valves—tighten hand-tight plus a quarter turn with pliers. Use high-quality hoses to prevent leaks, just as you wouldn’t water your plants with damaged tubing. Plug the units into grounded outlets, and ensure your Wi-Fi signals reach the smart features effectively. During my setup, I placed the wireless router closer to the closet to ensure stable connectivity, which simplified remote monitoring. For guidance, consult this setup guide.
Test and Fine-Tune Your New System
Run a test cycle to verify proper functioning. Check for leaks around hoses, monitor vibrations, and ensure controls respond correctly. I noticed a slight wobble during my first wash; tightening the legs fixed it. For smart appliances, test remote controls and app connectivity. Once everything runs smoothly, consider sealing the space with shelf liners or moisture barriers to protect your flooring and keep the closet tidy. Remember, proper installation not only safeguards your appliances but also prolongs their lifespan—think of it as giving your devices a sturdy foundation to thrive on.
While many believe that selecting high-tech appliances guarantees a hassle-free experience, there’s a deeper layer of complexity often overlooked. For instance, the popular assumption that smart appliances automatically solve all connectivity issues is misleading. In reality, these devices require meticulous setup and regular firmware updates to function optimally, as highlighted by experts who note that automatic updates often stall without user intervention. Moreover, a widespread myth is that newer models are inherently more durable; however, cutting-edge features sometimes come at the expense of longevity, especially if consumers neglect proper maintenance routines such as regular cleaning of filters and condensation trays. One common trap to avoid is prioritizing features over compatibility; investing in the latest smart fridge or dishwasher without ensuring that your home network can support their bandwidth demands can result in frustrating disconnects and delayed notifications. This is particularly critical in multi-device households, where network congestion may hinder smart appliance performance, as studies show that Wi-Fi interference significantly impacts device responsiveness. Are you aware that some advanced appliances have hidden dependencies, like specific electrical requirements or integration protocols, which can cause compatibility issues? For example, a top-tier refrigerator might require a dedicated circuit to prevent overloads, yet many homeowners overlook this detail. To truly harness the benefits of modern appliances, comprehension of these nuanced requirements is essential. For deeper insights, check out [Top smart appliances for a seamless home experience in 2025](https://smartappliancereview.com/top-smart-appliances-for-a-seamless-home-experience-in-2025) and learn how to avoid common pitfalls that can diminish your investment. Have you ever fallen into this trap? Let me know in the comments.Maintaining your home appliances, especially smart refrigerators and washing machines, requires more than just regular use — it demands the right tools and methods to keep them functioning at peak performance over time. Personally, I rely on a few key pieces of equipment that help me troubleshoot, clean, and optimize my appliances, extending their lifespan and ensuring energy efficiency. For example, I use a Digital Multimeter to verify electrical connections and monitor voltage fluctuations, which is crucial for diagnosing smart appliance power issues. Investing in a high-quality vacuum with a narrow nozzle attachment allows me to clean condenser coils periodically, preventing overheating and reducing energy consumption—a simple yet effective maintenance step that can save you on costly repairs, as noted in [this expert guide](https://smartappliancereview.com/why-your-refrigerator-is-getting-hot-on-the-outside-panels).
The Hardest Lesson I Learned About Smart Appliances and Space Optimization
One eye-opening realization I had was that even the most advanced smart appliances can be rendered inefficient if not chosen and installed thoughtfully. I once bought a state-of-the-art smart washer and dryer, expecting them to revolutionize my laundry routine. Instead, I faced connectivity issues, compatibility snags, and space problems that could have been avoided with a deeper understanding of my home’s specific needs. This taught me the importance of meticulous planning and knowing the subtleties that come with integrating smart appliances into tight spaces.
How Small Details Prevent Big Frustrations
A small but crucial insight I gained was verifying the electrical requirements for the appliances. Oversights here led to overheating or insufficient power. Also, ensuring your Wi-Fi network supports multiple smart devices isn’t just a technicality; it’s a game-changer. Keep your devices’s firmware updated regularly, as neglecting this can cause disconnections and functional hiccups down the line. To navigate these complexities smoothly, I rely on resources like this guide, which has been invaluable for me in making informed decisions.
Lessons Learned—What I Wish I Knew Earlier
- Prioritize Compatibility: Matching appliances within the same brand and series simplifies control and reduces troubleshooting time. I regretted mixing mismatched units, which caused synchronization headaches.
- Measure Before Buying: Precisely measure your space, including clearance for ventilation and door openers. Skipping this step led me to faulty purchases, wasting time and money.
- Invest in Proper Installation: Ventilation and leveling are vital. I overlooked this initially, which caused excessive vibrations and noise during cycles.
- Stay Connected and Updated: Regular firmware updates and secure Wi-Fi are essential. Neglecting them turned my smart appliances into dumb appliances temporarily.
Equip Yourself to Keep Smart Appliances Running Smoothly
I recommend having a set of essential tools: a digital multimeter for electrical checks, a compact vacuum for condenser coils, and a reliable Wi-Fi extender if necessary. These tools have saved me from costly repairs and extended the lifespan of my appliances. Moreover, subscribing to updates from reputable sources ensures you’re always ahead of potential issues and innovations that can make your laundry and kitchen life easier.
Your Next Step Starts Now
Transforming your hallway closet with smart, stackable laundry units isn’t just about saving space; it’s about reclaiming your time and peace of mind. With a little knowledge and the right tools, you can create a functional haven that seamlessly blends technology and practicality. Embrace the journey—you’ve got this!
What challenge have you faced when trying to fit appliances into tight spaces? Share your story below—we can all learn from each other’s experiences!