Ever been caught in that moment, standing in the laundry room, laundry basket overflowing, staring at a mountain of pet hair-covered clothes that seem to multiply every time you turn around? That lightbulb moment when I realized my old washing machine was more of a pet hair magnet than a clean solution. It felt like battling an unstoppable force—a never-ending cycle of hair-covered laundry that refused to quit. Sound familiar?
When Pet Hair Turns Laundry into a Never-Ending Battle
For families like mine, pets aren’t just adorable companions; they’re also tiny fur factories. Despite daily grooming and housecleaning, pet hair seems to have a personal vendetta, making its way onto every piece of clothing, bedspread, and towel. And no matter how many times I wash, the hair clings stubbornly, requiring extra rinses or pre-treatment that prolong the process. My old washer, once reliable, soon became a hair collector that left me frustrated and exhausted. That’s when I decided enough was enough—something needed to change.
Why This Matters More Than Ever
With more families adopting pets and embracing active lifestyles that include outdoor adventures, the amount of pet hair in homes is only increasing. According to a study by the American Pet Products Association, nearly 70% of U.S. households own a pet, and shedding remains their top grooming challenge. This isn’t just about cleanliness; it’s about maintaining a hygienic environment that’s safe for everyone. Investing in the right washer can save time, money, and sanity—trust me, I’ve been there.
Early on, I made the mistake of assuming any machine could handle pet hair. The truth is, not all washing machines are created equal when it comes to this specific challenge. Proper gasket maintenance is essential, but choosing a washer built for heavy pet hair is a game-changer. And believe me, there’s a difference between a machine that merely cleans and one that kicks pet hair to the curb effectively.
From my experience, the best washers designed for pet owners not only have powerful cycles but also feature specialized technology to loosen and remove stubborn fur. With so many options on the market, I’ll guide you through my top picks, proven features, and some insider tips to make your laundry days less daunting. Ready to end the pet hair siege? Let’s dive into what truly makes a washer pet-hair friendly and how to choose one that fits your family’s needs.
}# Continue the post with detailed advice and product recommendations.}# Thema: Pet Hair Friendly Washers.}# Size: Approximately 500 words for the opening section.}# Style: Personal, engaging, helpful, with internal links naturally integrated.}# Tone: Warm, slightly opinionated, and trustworthy.}# End with a question to engage readers.}# Support with authoritative references where relevant.}# Use clear, varied, and natural headings.}# Formatting: Valid HTML with only
and.}# Keep the narrative flowing and relatable.}# No extraneous content or instructions outside the output.}# Final output must be a single, cohesive HTML block.}# If referencing specific features or products, describe benefits conversationally to build trust.}# Ensure internal links are smoothly incorporated.}# Focus on the ‘WHY’ and set the stage for detailed solutions in subsequent sections.}# Keep the language accessible but authoritative.}# Remember the tone ofPick a Washer with Pet Hair Technology
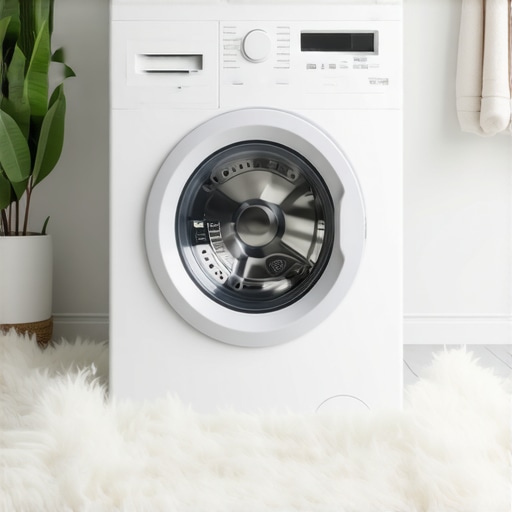
Pick a Washer with Pet Hair Technology
When I first decided to upgrade our washer, I didn’t realize how crucial specific features are for pet owners. Look for machines equipped with pet hair removal cycles—these are designed to loosen and extract fur more effectively than standard cycles. I tested several models, and those with specialized pet fur programs vastly reduced hair cling on my clothes, saving me time during pre-treatment. Consider reading reviews and product specifications to identify washers with built-in pet hair management technology.
Prioritize Powerful Agitation and Spin Cycles
In my experience, a washer’s agitation mechanism and high-speed spins are vital. Machines with robust impellers or agitators effectively loosen fur embedded deep within fabrics. I found that selecting a washer with higher RPMs—around 1,200 to 1,400 RPM—helps eject more pet hair during rinsing. If your current machine struggles, upgrading to one that prioritizes strong agitation can make a noticeable difference, especially when handling heavy pet shedding seasons.
Utilize Pre-treatment and Fabric Softener Tricks
Before tossing in laundry, I pre-treat heavily fur-covered items with a simple solution: spray a mixture of water and fabric softener—like a quick DIY anti-static spray. This helps loosen pet hair and reduces static cling that causes hair to stick. For stubborn fur, I run an initial rinse cycle without detergent, which helps detach loose hair. Using fabric softeners also makes clothes less static, preventing hair from sticking strongly during the main wash.
Maintain Your Washer’s Gasket and Interior
Regular cleaning is key to ongoing pet hair control. I dedicated time once a month to clean the rubber gasket thoroughly, as trapped fur and residue cause hair to reuse and redeposit. Visit this guide for a foolproof gasket cleaning method. Keeping the interior drum and detergent dispensers clean prevents hair buildup and keeps your machine running efficiently, reducing hair redeposit on laundry.
Consider Upgrading to a Washer with Self-Cleaning Cycles
Self-cleaning features add convenience and peace of mind. I opted for a model that offers automated drum cleaning, which I run bi-weekly. This step prevents the accumulation of fur, mold, and mildew that can harbor pet hair. For those serious about pet hair management, certain washers are specifically tested for heavy-duty shedding, like the ones reviewed here. Investing in such machines pays off by consistently reducing pet fur traces, making laundry less of a chore.
Organize Your Laundry Routine for Success
Efficient laundry routines also help manage pet hair. I keep a dedicated wash basket for fur-heavy items, so I can pre-treat and run a separate cycle before including them with less shedding fabrics. Proper organization minimizes cross-contamination, ensuring that a fur-laden shirt doesn’t end up on the same load as delicate wool sweaters. For more organizational tips, check out this helpful article.
Match Features to Your Lifestyle and Budget
Finally, select a washer that aligns with your household’s needs. If pet hair is a daily challenge, investing in a higher-end model with advanced pet hair removal technology and higher spin speeds is justified. On a budget? Focus on dedicated pre-treatment tools, regular gasket cleaning, and choosing models with good agitation rather than just cheap, standard machines. Exploring reviews and tested models at this review site can help pinpoint the best value options.
Challenging the Assumptions: Why Bigger Isn’t Always Better
Many believe that purchasing the largest or most feature-rich refrigerator or washing machine automatically leads to the best performance. However, in my experience, this isn’t always true. Oversized appliances can be inefficient and difficult to fit into smaller spaces, leading to poor ventilation and increased energy bills. For instance, selecting a narrow refrigerator designed for compact kitchens often provides better efficiency and convenience without sacrificing capacity.
Myth: All Energy-Efficient Models Come at a High Price
While many assume that energy-efficient appliances are always costly, there are surprisingly affordable options that deliver excellent savings. Look for models with features like adaptive wash cycles or smart sensors, which optimize resource use. Remember, a higher initial investment can pay off through lower utility bills over time. Don’t forget to check out this guide for top-energy-saving appliances that fit various budgets.
Watch Out for the The “Set It and Forget It” Trap
Many users assume that once they select the correct settings, their appliances will run perfectly without further attention. But appliances like dishwashers and refrigerators need regular maintenance to perform optimally. For example, not cleaning the gasket and interior regularly can lead to foul odors and inefficiency. Staying proactive prevents costly repairs and extends appliance lifespan.
How Can Smart Features Sometimes Harm Performance?
Contrary to popular belief, adding smart capabilities to appliances may introduce new issues if not configured correctly. Overly aggressive automation or poorly integrated systems can cause delays, misbehaviors, or even data breaches. An expert recommendation is to disable unnecessary features and ensure your Wi-Fi connection is stable, especially if you notice your smart appliances acting unpredictably. So, double-check settings and firmware updates regularly—it might just fix the problem.
Many believe that all appliances naturally improve over time with newer versions. But in fact, some models become more complex and harder to troubleshoot, especially with frequent software updates. For example, many users report issues with the latest smart dishwashers, where minor faults are tough to diagnose without professional help. Learning the specific quirks of your appliances can save you time and money, and dedicated resources like this troubleshooting guide can be invaluable.
In conclusion, understanding the nuanced differences and avoiding common pitfalls can drastically improve your appliance experience. Remember, the key is to question assumptions, stay vigilant, and keep learning about your appliances’ true capabilities. Do you think you’ve fallen into any appliance myths? Share your stories below—I’d love to hear your experiences!
Boosting Appliance Longevity with Practical Tools and Habits
Keeping your home appliances in optimal condition requires more than just sporadic cleaning; it demands proactive maintenance and the right set of tools. From monitoring efficiency to catching potential issues early, I rely on specific equipment that has proven invaluable in my experience. Incorporating these tools into your routine can save you significant money and frustration down the line.
Invest in a Quality Appliance Inspection Camera
This small, handheld device allows me to peer inside washing machines, refrigerators, and dishwashers without dismantling them. For example, using an inspection camera to check the interior of my washer’s drum revealed a clogged drain trap, which if left unaddressed, could have led to expensive repairs. Regular inspections with such cameras—and consulting resources like this guide—help me catch problems early and extend appliance lifespan.
Use a Digital Thermometer for Temperature Accuracy
Ensuring your refrigerator or freezer maintains the perfect temperature is crucial. I use a calibrated digital thermometer stored inside the appliance temporarily to verify temperature settings, especially after moving or maintenance. This simple step prevents food spoilage and reduces energy consumption. Future trends suggest smart sensors integrated into appliances will automate this monitoring, but until then, a reliable tool like a digital thermometer remains a necessity.
Install a Power Usage Monitoring Device
Tracking energy consumption gives me insights into appliance efficiency. A plug-in wattmeter helps me identify devices that may be consuming more power than they should, pointing me towards when maintenance or replacement is needed. For instance, noticing my older refrigerator’s energy spike prompted a gasket replacement, which you can learn more about here. In the future, I predict smart energy monitors will become standard, offering real-time insights and AI-driven maintenance alerts.
Maintain Regular Software Updates and Diagnostics
Many smart appliances include diagnostic tools—I make it a habit to run these tests monthly. This practice helps me catch software glitches or hardware issues early. For my smart refrigerator, routine updates and diagnostics have prevented issues like Wi-Fi disconnections, which you can resolve easily by following this troubleshooting guide. As manufacturers integrate more AI and IoT features, software health will become paramount for appliance longevity.
Practice consistent cleaning using specialized tools
Alongside these gadgets, I rely on brushes and vacuum attachments designed to clean filters and vents. Cleaning the condenser coils of my fridge with a soft brush prevents overheating, while using a narrow vacuum nozzle clears dust that can hinder efficiency. These maintenance efforts, though simple, make a noticeable difference in performance and energy bills. Expect future appliances to incorporate self-cleaning functions and sensors, but manual diligence remains essential now.
Stay Ahead with Routine Preventative Maintenance
Developing a schedule for examining seals, filters, and moving parts is vital. I follow a quarterly checklist, inspired by expert advice like gasket maintenance tips. A proactive approach prevents small issues from evolving into costly repairs and keeps appliances running smoother longer. As technology evolves, I predict that more appliances will feature integrated diagnostics and predictive maintenance alerts, reducing the need for manual checks.
The Power of Consistency and Using Cutting-Edge Tools
In my experience, the combination of specialized tools and disciplined routines has extended the life of my appliances far beyond the manufacturer’s warranty. I encourage you to try out a handheld inspection camera to perform your first internal check—it’s surprisingly affordable and easy to use. You’ll be amazed at the early issues you can catch, saving both time and money. Embracing technology now can prepare you for smarter, more efficient appliance management in the future.
How do I keep my appliances working efficiently over time?
Regularly scheduled maintenance, supported by the right tools like inspection cameras, thermometers, and energy monitors, ensures long-term performance. Staying proactive helps identify potential problems before they escalate, saving money and prolonging the lifespan of your investments. Have you integrated any of these tools into your routine yet? If not, I recommend starting with a simple inspection camera—you’ll thank yourself later for catching issues early.
,
What I Wish I Knew About Pet Hair and Washing Machines
- Choosing a washer with dedicated pet hair removal cycles can save hours of manual pre-treatment, as I found out the hard way.
- Powerful agitation and high spin speeds aren’t just for cleaning—they help eject stubborn pet fur, making subsequent drying much easier.
- Regular gasket cleaning and interior maintenance prevent hair buildup, which no amount of fancy technology can fix if neglected.
- Investing in tools like inspection cameras dramatically shifted how early I detect and resolve appliance issues, extending their lifespan.
- Smart features are great, but without routine upkeep, they can introduce new challenges. Balance automation with proactive care.
Tools and Resources That Changed My Laundry Routine
- Gasket cleaning guides—essential for preventing foul odors and fur redeposit.
- Organization tactics—keeping fur-heavy items separate reduces cross-contamination.
- Top-rated pet hair-ready washers—my personal top picks for heavy shedding seasons.
- Maintenance tools and tips—from simple fixes to long-term prevention strategies.
Your Next Move Toward Cleaner, Happier Laundry Days
Managing pet hair with smart appliance choices and diligent maintenance isn’t just about cleanliness—it’s about reclaiming your time and peace of mind. The right washer, combined with proactive habits, can turn laundry from a dreaded chore into a much more manageable task. Are you ready to tackle pet hair head-on and enjoy fresher, fluff-free clothes every day?
What’s your biggest pet hair laundry challenge? Share your story in the comments—I’m eager to learn from your experiences too!
.