
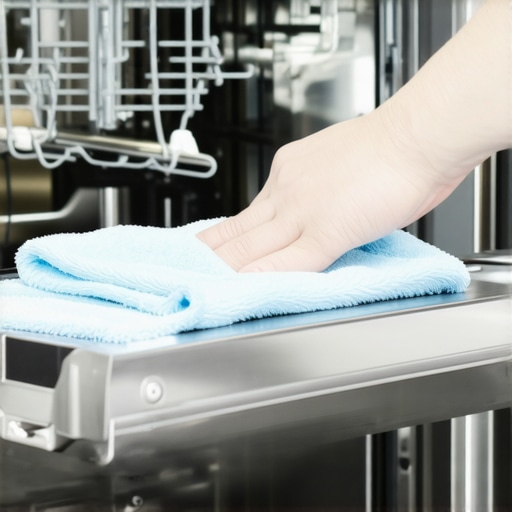
Ever opened your dishwasher and recoiled at the sight of a grimy, film-covered door? I remember the lightbulb moment when I realized that overlooking this seemingly minor area was actually inviting buildup and bad odors into my kitchen. It’s easy to focus on the dishes, but the door often becomes a neglected zone that can harbor mold, grease, and soap scum. Believe me, once I started paying attention to the inside of the door, my dishwasher not only smelled fresher but also cleaned more effectively.
Why the Inside of Your Dishwasher Door Deserves More Attention
The truth is, cleaning the inside of the dishwasher door is crucial for maintaining optimal performance and hygiene. Residual food particles, soap scum, and hard water deposits tend to collect around the rubber gasket and in the crevices, creating a breeding ground for mold and bacteria. A dirty door can transfer grime back onto your clean dishes and compromise the overall cleanliness of your kitchen.
One common mistake I made early on was neglecting the rubber gasket, thinking it was just a seal. In reality, it’s one of the dirtiest parts, trapping debris and moisture if not properly maintained. Regular cleaning not only prevents unpleasant odors but also extends the lifespan of your appliance. Since many of us are investing in smart appliances, like those outlined in our ultimate guide, keeping them in tip-top shape becomes even more important to protect that tech investment.
Did you know that a buildup of soap scum and mold can reduce your dishwasher’s efficiency by up to 30%? According to appliance experts, regular maintenance not only keeps your machine running smoothly but also offers significant savings on repairs and replacements in the long run. So, if you’re tired of spotty glasses or lingering smells, it’s time to roll up your sleeves and give the inside of your dishwasher door some attention.
Let’s dive into how you can effortlessly keep this area clean and hygienic, ensuring your dishwasher is always ready to perform at its best.
Remove and Inspect the Rubber Gasket
Start by carefully peeling back the rubber gasket around the door edge. Use your fingers or a plastic spatula to loosen any debris stuck in the crevices. Check for mold, soap scum, or trapped food particles. I once spent an afternoon scraping dried cheese from mine, and the difference in smell and efficiency was immediate. Be gentle to avoid damaging the gasket, as it acts like the seal of a submarine — preventing water leaks and keeping the inner components dry.
Clean the Gasket Thoroughly
Mix a solution of equal parts white vinegar and water or use a mild dish soap. Dip a microfiber cloth or an old toothbrush into the mixture and scrub all surfaces of the gasket. Pay special attention to folds and textured areas, where grime hides like a secret. For stubborn mold, apply a small amount of baking soda onto the brush before scrubbing. Remember, mold buildup is like mold at a campsite — quick to spread if left unchecked.
Clear the Crevices and Hinges
Use a small brush or compressed air to clear out debris from the hinges, seams, and the space between the door and the gasket. Think of these as the tiny gateways where dirt is sneaking in unnoticed. I once used an old pipe cleaner to wiggle into tight spots—worked perfectly, and I discovered hardened soap residue accumulated there, reducing the gasket’s flexibility. Keeping these areas clean ensures a tight seal and prevents odors from seeping out.
Wipe Down the Surface and Interior of the Door
With a clean cloth dampened with vinegar solution, wipe the entire door interior, including the control panel if it’s touchscreen. This not only removes fingerprints and smudges but also kills bacteria and mold spores. I recommend doing this weekly, especially in humid environments where mold loves to grow like a tropical jungle. If your door has a window, clean it with a glass-safe cleaner for a streak-free shine.
Let the Gasket Dry and Reassemble
Allow all cleaned parts to air dry completely. This prevents moisture from acting like a breeding ground for mold. Once dry, press the gasket back into its original position, ensuring it fits snugly. This simple act restores the seal, much like sealing a jar, to prevent future grime from invading. If you notice cracks or tears in your gasket, consider replacing it—it’s a quick fix that saves money and keeps your dishwasher running efficiently.
Execute a Maintenance Cycle for Freshness
After cleaning, run an empty dishwasher cycle with a cup of vinegar or a commercial descaling agent. This flushes out any residual dirt, soap scum, or mold spores lurking inside. Think of it as a spa day for your machine—refreshing and reinvigorating its performance. Regular maintenance like this, combined with cleaning the gasket and crevices, can extend your dishwasher’s lifespan and keep it smelling clean, like a brand new appliance.
Tips for Ongoing Maintenance
Make cleaning the door gasket a monthly habit, and inspect the seals for signs of wear. Use high-quality, eco-friendly detergents to minimize buildup, and avoid rinsing dishes excessively—rinsing can leave mineral deposits that cling to surfaces and gaskets just like hard water stains. For tech-savvy households, explore smart appliances’ features that alert you when cleaning is needed—more on that in our review of AI-enabled dishwashers. Continuous care will keep your dishwasher performing at peak levels, ensuring spotless results every time.
While many believe that choosing high-end appliances guarantees effortless performance, this is often a misconception. For instance, the assumption that smart appliances automatically require less maintenance overlooks the nuances of their functioning and firmware updates. In reality, smart appliances demand proactive management; ignoring firmware updates can leave your devices vulnerable to bugs or security issues, as highlighted by appliance experts in our comprehensive guide.
Are There Hidden Pitfalls in Smart Appliance Connectivity?
Many users underestimate the importance of network stability, assuming all Wi-Fi connections are equal. However, a weak or inconsistent signal can cause smart appliances to malfunction or delay notifications. This trap is particularly common with Wi-Fi-enabled dishwashers or washing machines that rely on continuous internet access for optimal operation. Researchers from the University of California found that unstable networks can significantly impair smart device performance, emphasizing the need for a robust home network. Ensuring your Wi-Fi router is properly configured and placed is essential to prevent these issues.
Another often overlooked detail is the lifespan of electronic components within appliances. While many focus solely on energy efficiency or capacity, components like sensors and control boards degrade over time, especially if not managed correctly. For example, a dishwasher’s moisture sensors can give false readings if they become dirty or corroded, leading to unnecessary cycles or incomplete washing. Regular diagnostics and cleaning, as advised in our guide on smart appliances, help extend their life and functionality.
Furthermore, a prevalent myth suggests that newer models are infallible and immune to faults. In truth, technological advancements sometimes introduce new failure points; complex firmware can freeze, or sensors may misread conditions, resulting in subpar performance. Therefore, even with top-tier models, scheduled maintenance and staying informed about software updates are key to avoiding unexpected breakdowns.
Have you ever fallen into this trap? Let me know in the comments. Remember, being an informed homeowner means understanding these intricacies. For a detailed look at selecting and maintaining smart appliances, check out our ultimate guide.Maintaining modern appliances requires the right tools and a strategic approach to ensure longevity and optimal performance. One essential instrument I swear by is a digital infrared thermometer. By regularly checking the temperature of your refrigerator coils and oven surfaces, you can detect early signs of malfunction and address issues before costly repairs become necessary. For example, maintaining the correct temperature in your refrigerator — typically around 37°F (3°C) — prevents energy waste and spoilage, as explained in our guide on refrigerator troubleshooting. I personally use a Fluke infrared thermometer because it provides quick, accurate readings without contact, making regular maintenance faster and more precise.
In addition to physical tools, investing in compatible maintenance software adds a layer of smart oversight. Many modern appliances — especially those reviewed in our 2025 top smart appliances list — support firmware updates and diagnostic checks via dedicated apps. I recommend connecting your appliances to their manufacturer’s app and scheduling routine diagnostics to catch issues early. For washing machines, tools like the smart washer diagnostics feature help detect leaks or sensor errors before they escalate.
Deeper maintenance often calls for specialized cleaning solutions. For example, descaling agents designed specifically for dishwashers or coffee machines prevent mineral buildup that reduces efficiency. I prefer using citric acid-based descalers because they’re eco-friendly and highly effective, as recommended by appliance experts. Regularly running these solutions through your appliances — especially after hard water seasons — prolongs their lifespan.
Looking ahead, I predict that AI and machine learning will become standard in household appliances, providing proactive maintenance alerts based on usage patterns. This means your smart fridge or washing machine will tell you when to schedule a tune-up before a failure occurs, much like the predictive diagnostics discussed in our trend report for 2025. To make the most of this trend, try integrating your appliances with a dedicated home automation hub — a step I took with great success, simplifying overall appliance management.
If you’re ready to elevate your maintenance game, start by acquiring a quality infrared thermometer and using it weekly to monitor your appliances. Consistent physical checks combined with smart diagnostics will significantly extend your devices’ lifespan and keep them performing efficiently for years to come. Remember, staying proactive with simple tools can save you money and frustration down the line. Want to learn more about integrating advanced tools? Visit our contact page for personalized recommendations.
The Hardest Lesson I Learned About Smart Appliances
One of the biggest surprises I encountered was how neglecting simple maintenance tasks, like cleaning the refrigerator’s condenser coils or the dishwasher’s filter, could dramatically reduce efficiency and lifespan. I used to believe that modern smart appliances were almost maintenance-free, but the truth is, a little proactive care saves money and frustration in the long run.
Tools That Changed My Approach to Appliance Care
Investing in a high-quality infrared thermometer and a dedicated appliance diagnostic app transformed the way I monitor my appliances. These tools provide instant feedback, helping me catch issues early before they become costly repairs. My recommendation is to explore products like the Fluke infrared thermometer and the manufacturer-specific apps I mention in our comprehensive ultimate guide.
Embrace Mindful Maintenance Before It’s Too Late
Don’t wait for that alarming noise or a sudden breakdown. Regularly inspecting seals, cleaning filters, and updating firmware can extend your appliances’ lifespan and keep them running smoothly. It’s a small effort that makes a big difference, especially as appliances become more integrated into our smart homes. Remember, consistent care today prevents major headaches tomorrow.
What Are Your Appliance Hacks?
Have you discovered any clever tricks for maintaining your refrigerators, dishwashers, or washers? Share your tips below—I’d love to hear how others are keeping their smart appliances in top shape and avoiding common pitfalls.