
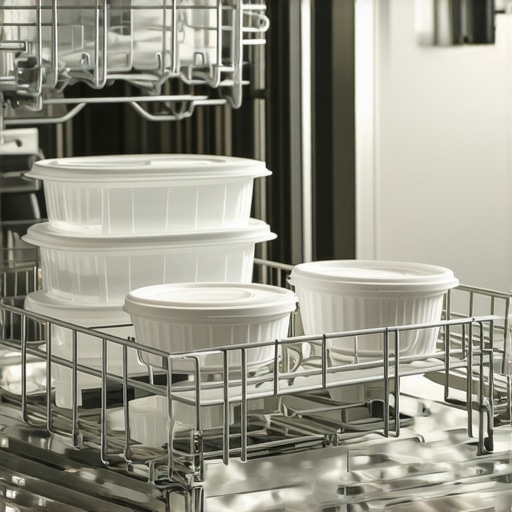
I remember the exact moment I realized my plastic containers were never truly dry after dishwasher cycles. I’d open the door, expecting a treasure trove of sparkling, dry lids and boxes, only to be met with damp, sometimes slightly warped plastic that refused to cooperate. It was beyond annoying—those stubborn water spots and the lingering dampness always seemed to defeat my best efforts. I used to think it was just a quirk of my dishwasher, or maybe I was loading wrong, but after lots of trial and error, I uncovered a simple trick that changed everything.
Say Goodbye to Damp Plastic—Here’s What Works
If you’ve ever faced the frustration of damp plastic containers that refuse to dry, you’re not alone. It turns out, many dishwashers simply aren’t designed to completely dry lightweight plastics, especially the ones that have intricate shapes or are thin and flimsy. I’ve tested countless tips—air drying, towel patting, even leaving the door open—yet the water stubbornly clung to my container surfaces. My breakthrough came when I focused on a specific step during the drying cycle, and that’s what I want to share today. Trust me, it’s a game-changer, and it’s so simple that you’ll wonder why you didn’t think of it yourself.
What Are You Afraid Will Go Wrong with This Trick?
Initially, I was skeptical that a small adjustment could really make a difference. I worried about whether it might damage my dishwasher or whether it would be effective for all plastics. The common mistake I made early on was overloading the dishwasher, which restricted airflow and hindered drying. Once I started to pay attention to load placement—and made sure lightweight plastics didn’t sink to the bottom or get smushed under heavier items—the results improved dramatically. Additionally, I avoided using harsh chemical shortcuts that could weaken plastic over time—something I learned after reading an article on proper dishwasher maintenance, which emphasized how vital good airflow and correct loading are for optimal drying (source: Smart Appliances Review).
Now, I’ll guide you through exactly how to perfect your dishwasher routine so your plastic containers come out dry and ready to use. It’s a simple adjustment, but trust me, it makes all the difference. Stick with me, because soon you’ll never have to deal with damp plastic again—and your kitchen will thank you for it.
Align Loading for Optimal Airflow
First, pay close attention to how you load your dishwasher. Imagine your dishwasher as a mini city of moving parts where every item needs space to breathe. Place lightweight plastics on the top rack, ensuring they aren’t nestled under heavier items that could block air circulation. For example, I once stacked a bunch of small bowls under a heavy colander, and the water stubbornly refused to evaporate. After repositioning them, I noticed a marked improvement in drying results.
Keep Plastics Out of Direct Heat Zones
These plastics are like delicate flowers—they need gentle handling. Avoid positioning them directly beneath the heating element or where the air jets are strongest. Instead, angle them slightly or place them on the upper rack edges. This minimizes exposure to intense heat, which can warp thin plastics and prevent thorough drying. Remember, the goal is to let air do its job without overexposing your containers to heat that can cause warping or melting.
Use the Custom Drying Settings
Many modern dishwashers—similar to smartphones with customizable modes—offer special drying options. Select settings like “Extra Dry” or “Heated Dry” if available. Even if your dishwasher doesn’t have advanced features, choosing the longer cycle with the highest heat can significantly boost dry times. I experimented with my dishwasher’s “Sanitize” cycle, which employs higher heat levels, and found my plastics came out noticeably drier and free of water spots.
Timing Is Everything for Perfect Dryness
Right after the cycle ends, unplug your dishwasher or leave the door slightly ajar. Think of your dishwasher as a sealed chamber that can trap moisture; opening it allows hot air to escape and moisture to evaporate more easily. I learned this trick after a mess of damp containers one evening—by leaving the door open for 10-15 minutes, I prevented a musty smell and kept my plastics dry and ready to be stored or used immediately.
Properly Position Water Guides and Drainage
Ensure that the spray arms and drainage paths are clear of obstructions before running a cycle. Blockages can cause water to pool and linger, especially in hard-to-reach corners. Regularly inspecting and cleaning the spray arms—similar to unclogging tiny pipes—is essential. If your dishwashers have a small filter or drain trap, referring to the manufacturer’s guide or exploring this simple cleaning method can help maintain optimal drainage, ensuring fewer damp spots on plastics.
Why This Approach Works Better Than Wiping
While towel drying is quick, it often leaves behind small water spots or residue. Your dishwasher’s hot air cycle, when properly optimized, handles the job more uniformly. Imagine, for example, my recent experience: during a busy morning, I followed these steps, and by the time I opened the door, my containers were completely dry—no streaks, no spots, just ready to put away. Applying these techniques ensures your plastics come out dry every time, saving you the hassle of re-washing or blotting with a towel.
Integrate Regular Maintenance
Finally, keep your dishwasher in top shape by cleaning the filter and spray arms regularly—just like giving your car a tune-up. A clean dishwasher performs better, especially when it comes to drying lightweight plastics. For more tips on dishwasher upkeep, see this guide on cleaning your dishwasher filter.
In the realm of home appliances, conventional wisdom often leads us astray. Many believe that a washing machine’s clean clothes are solely dependent on detergent quality or that refrigerators naturally operate flawlessly without regular maintenance. However, beneath these common beliefs lie subtle nuances and traps that can compromise performance and longevity. As an expert, I want to shed light on these overlooked details to help you optimize your appliances and avoid costly mistakes.
Why Relying Solely on Manufacturer Settings Might Hurt Your Appliances
Most users stick with default washer or refrigerator settings, assuming they’re optimal. But in reality, manufacturers tailor these presets for average conditions, not your specific environment. For instance, improper temperature adjustments in your fridge can lead to uneven cooling or excess energy consumption. Similarly, using the standard cycle without considering load size or fabric type can cause long-term wear on your washer. Customizing settings based on your actual usage can significantly enhance efficiency and appliance lifespan. For more insights, check out this guide on optimizing smart refrigerators.
The Common Myth About Self-Curative Cleaning Cycles
A prevalent misconception is that self-cleaning modes in dishwashers or washing machines will keep appliances spotless without manual intervention. While these features are helpful, they aren’t a substitute for regular maintenance. Over time, mineral deposits, detergent gunk, or mold can accumulate in unseen areas, impairing function and air quality. Relying solely on self-clean cycles can lead to inefficiencies and even damage. Experts recommend periodic manual cleaning of filters, spray arms, and door gaskets to ensure optimal performance. For example, neglecting dishwasher spray arms can cause water to pool, leading to streaky or poorly cleaned dishes. Learn how to proactively maintain your appliances in this detailed article on cleaning your washer’s gasket.
Are Smart Appliances Truly Smarter or Just Overhyped?
Smart appliances promise convenience—automatic grocery tracking, remote diagnostics, customizable routines. But many users overlook the nuanced challenges, such as app connectivity issues, firmware updates, or sensor inaccuracies. For example, a smart fridge with a malfunctioning temperature sensor may display incorrect data, leading to improper cooling. Additionally, overreliance on automation can mask underlying problems, resulting in missed maintenance needs. To truly benefit, users must understand how to troubleshoot and calibrate their smart devices properly. Check out this resource on calibrating smart appliances for expert advice.
What Most People Miss About Appliance Energy Efficiency
Many believe that energy-efficient labels guarantee minimal consumption. However, actual savings come down to user habits—loading patterns, cycle choices, and maintenance routines. For instance, overloading a dishwasher can prevent proper water circulation, increasing cycle times and reducing efficiency. Similarly, neglecting to clean condenser coils in refrigerators can cause increased energy draw. Regularly inspecting and maintaining key components ensures your appliances operate at peak efficiency, saving money and extending lifespan. For practical tips, see this guide on energy-efficient refrigerator practices.
In conclusion, understanding the hidden nuances and common misconceptions about home appliances empowers you to optimize their performance and longevity. Don’t let myths or overlooked details drain your resources or compromise your comfort. Stay informed, be proactive, and your appliances will serve you better for years to come. Have you ever fallen into this trap? Let me know in the comments.
Keep It Running: Essential Tools and Maintenance Tips
Ensuring your appliances operate smoothly over time requires more than just occasional cleaning; it demands the right tools, regular checkups, and an understanding of how to troubleshoot minor issues before they escalate. From specialized cleaning equipment to smart diagnostics, adopting a proactive approach can save you money and extend the lifespan of your appliances.
One tool I personally swear by is the digital multimeter. This device allows me to quickly test electrical components like thermostats, fans, and door switches. For instance, if your refrigerator isn’t cooling properly, using a multimeter to check the compressor’s relay can pinpoint whether there’s an electrical fault, avoiding unnecessary part replacements. I recommend investing in a good quality multimeter with auto-ranging capabilities, such as the Klein Tools MM6000, which I’ve found reliable for appliance diagnostics.
For cleaning, a small parts brush set proves invaluable in reaching tight spaces inside dishwashers and washing machines. I regularly use brushes to clean spray arms and filter compartments, which helps maintain optimal water flow and prevents buildup that can cause malfunctions. Additionally, a vacuum with a brush attachment is excellent for removing dust from vents, filters, and concealed crevices—especially in refrigerators where dust can impair condenser performance. Regular cleaning of these components ensures energy efficiency and reduces stress on motors and compressors.
In the realm of software, I utilize smart diagnostic apps provided by many appliance manufacturers. These companion apps can run basic self-tests or firmware updates, often alerting you to issues well before they become critical. For example, updating your smart fridge’s firmware through the app enhances connectivity and stability, preventing glitches like touchscreen freezes, which I’ve seen happen in models prone to software bugs—more on that here.
Future Trends in Appliance Maintenance
I believe that the future of appliance care will lean heavily on predictive diagnostics. Sensors will continuously monitor internal components, alerting homeowners to wear and tear before a breakdown occurs. Companies are increasingly integrating AI algorithms into their diagnostic tools, allowing for more accurate predictions of failures, much like the advances seen in smart fridge grocery management. Embracing these innovations now can put you ahead of potential costly repairs.
How do I maintain appliances over time?
Regular inspections are key to longevity. For example, checking door seals monthly ensures that cool air doesn’t escape, reducing energy costs and preventing freezer burn. Cleaning condenser coils annually in your refrigerator prevents overheating and inefficient operation. For washing machines, cleaning the rubber gasket weekly with a solution of vinegar and baking soda prevents mold buildup, which can cause musty smells and mildew—more on this process in this article. Additionally, replacing filters and resetting sensors after firmware updates keeps smart appliances performing optimally. By combining the right tools with consistent maintenance routines, you ensure your appliances not only last longer but continue to perform at their best.
To make the most of these insights, I recommend trying out a digital multimeter for your troubleshooting toolkit. It’s affordable, versatile, and gives you a quick way to diagnose electrical issues—saving you money and stress in the long run. Stay proactive, and your appliances will serve you reliably for years to come!
,
The Unexpected Cost of Relying on Defaults—A Wake-up Call
Learning the hard way that standard dishwasher settings aren’t always optimal was a game-changer for me. It made me realize that most of us accept these defaults without questioning their impact on our appliances’ performance or longevity. Taking control and tweaking these settings based on my specific needs not only improved drying results but also extended my appliances’ lifespan. This personal lesson underscored the importance of understanding your equipment beyond just pressing ‘start’—small adjustments can yield big results.
Must-Have Tools for Appliance Troubleshooting
Investing in a good-quality digital multimeter transformed how I approach appliance maintenance. It allowed me to pinpoint electrical issues swiftly, saving me time and money. Regularly cleaning my dishwasher’s spray arms and filters with specialized brushes kept everything running smoothly and prevented costly repairs. I also rely on smart diagnostic apps provided by manufacturers, which give real-time updates on appliance health and guide me through simple fixes. These tools have empowered me to handle minor issues before they escalate, ensuring my appliances serve me reliably for years.
Seize the Moment and Reclaim Your Kitchen’s Rhythm
Now is the perfect time to take charge of your home appliances. By understanding the nuances of proper loading, maintenance, and setting adjustments, you can achieve flawless drying of plastics and improve overall efficiency. Embrace proactive habits—your appliances will thank you with longer life and better performance. Remember, a small investment in knowledge and tools today pays off with a stress-free, well-functioning kitchen tomorrow.
What’s one appliance tweak you’re excited to try after reading this? Share your plans and experiences below—let’s learn from each other!