
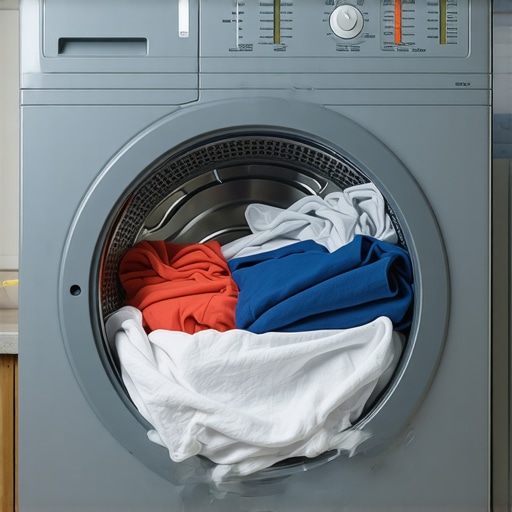
I’ll never forget the moment I realized my dryer was playing hard to get. I’d toss in a small load of clothes, expect them to come out dry, and instead, I’d find myself running a second cycle — sometimes even a third. Frustrating doesn’t begin to cover it. I felt like I was caught in a never-ending loop, wasting time, energy, and money. Sound familiar? If you’ve experienced the same headache, you’re not alone. Many homeowners face this puzzling issue, and the good news is, there’s a straightforward reason behind it — and a simple fix.
Solving the Mystery of the Double Dry Cycle
What’s really going on when your dryer needs two cycles to do what once took one? The culprit often lies in a common but overlooked problem: poor airflow or a clogged vent. When the vent is blocked, hot air can’t escape efficiently, which causes the dryer to struggle in removing moisture from your clothes. Instead of drying thoroughly on the first run, it leaves behind dampness, prompting a second (or third) cycle. This issue not only prolongs your laundry time but also boosts your energy bills and can even shorten the lifespan of your appliance.
Is This Troublesome Phenomenon Worth the Hassle?
From my early missteps, I learned the hard way that neglecting to check the vent is a common mistake. I used to believe that my dryer was simply aging or that I needed a new one. However, regular maintenance reveals that many drying problems are solvable with a good clean-up. Curious about why lint buildup causes so many issues or how to clear a hidden filter? You might want to check out this article for more insights.
Early on, I also dismissed the importance of proper venting, thinking it was just an extra step. Big mistake. This slip-up cost me time and added strain on my unit. Recognizing these mistakes was a game changer, leading me to clean vents regularly and troubleshoot issues proactively. Now, I want to share how you can do the same—preventing double cycles and ensuring your laundry routine is as smooth as possible.
End of this section, get ready for the practical solutions that will save you time, money, and frustration in your laundry room.
Inspect and Clean the Vent Hose
Start by unplugging the dryer and locating the vent hose behind the unit. Detach it carefully, using a screwdriver if needed. Use a long brush or a specialized vent cleaning kit to clear out lint buildup and debris. Think of it as cleaning the filter on your vacuum—removing blockages ensures maximum airflow. Once cleaned, reattach the hose securely, making sure there are no kinks or bends that could restrict airflow.
Test the Dryer After Cleaning the Vent
Plug your dryer back in and run a short cycle with a load of damp clothes. Monitor the drying time and temperature. If it dries efficiently, you’ve addressed the core issue. If not, proceed to check the lint filter.
Check and Replace the Lint Filter
Locate the lint filter—usually inside the door or on the top panel. Remove it and inspect for lint buildup or damage. Clean the lint trap thoroughly with warm water and a soft brush. Replace if it’s frayed or broken. Regular cleaning of this filter prevents lint from recirculating and choking airflow, much like clearing a clogged artery keeps blood flowing.
Examine Other Airflow Obstructions
Walk around the appliance and look for any obstructions around the vent opening inside your home, like a poorly installed cover or insulation blocking airflow. Removing such barriers lets hot air escape freely, ensuring your dryer works as intended.
Assess the Dryer Thermostat and Heating Elements
If airflow isn’t the problem, use a multimeter to test the thermostat and heating elements for continuity. Faulty components may cause the dryer to run inefficiently, leading to damp loads despite proper airflow. Replacing these parts might require a professional if you’re not comfortable with electrical work.
Ensure Proper Load Size and Spinning Speed
Overloading can hamper drying performance, just as too many clothes in a washing machine cause incomplete rinsing. Adjust your laundry loads to the recommended capacity, and ensure the drum spins freely without obstructions. This improves air circulation and accelerates drying times.
Monitor and Maintain Regularly
Set a reminder to clean your vent and filter every three to six months. Regular maintenance keeps lint from accumulating and reduces the risk of fires or prolonged drying cycles. Think of it as a health checkup—preventative care keeps your appliance running smoothly and extends its lifespan.
While smart appliances promise convenience and efficiency, many homeowners fall into common traps due to misconceptions about how these devices truly operate. One prevalent myth is that all smart appliances are intuitive and self-maintaining, but the truth is, they often require nuanced understanding and regular management to perform optimally. For example, many users assume that connecting your smart washing machine to Wi-Fi automatically ensures flawless performance, yet issues like connectivity drops or firmware bugs are frequent and can impact cleaning cycles—as discussed in experts’ reviews on troubleshooting connectivity problems [see here](https://smartappliancereview.com/why-your-smart-washer-refuses-to-connect-to-the-5ghz-wi-fi). Additionally, there’s a misconception that the latest models are inherently more durable, but advanced features sometimes come with complex electronics that are prone to specific failures unless properly maintained. Many forget that smart refrigerators with touchscreen panels can develop software glitches, which are often mistaken for hardware faults, and addressing these requires updates or resets—details on how to handle such problems are available in comprehensive guides. Be cautious about the oversimplification that smart appliances are maintenance-free; in reality, they depend heavily on firmware updates, app integrations, and hardware checks. Overlooking these factors can lead to frustration and unexpected breakdowns, which could have been avoided with proactive care. Have you ever fallen into this trap? Let me know in the comments. Understanding these nuanced expectations is critical—after all, maximizing your investment means going beyond surface-level knowledge to grasp the technological intricacies involved in smart appliances.
Essential Tools for Long-Term Appliance Care
Maintaining smart appliances effectively requires reliable tools and a strategic approach. I personally rely on a high-quality digital multimeter for diagnosing electrical components like thermostats and heating elements in dryers and refrigerators. This tool provides precise readings, helping me identify faulty parts without unnecessary replacements. Additionally, a flexible, extendable vent cleaning brush is invaluable for accessing hard-to-reach ducts and removing lint buildup, ensuring optimal airflow and reducing fire risks.
Another gadget I swear by is a Bluetooth-enabled appliance diagnostic scanner. This device syncs with my smartphone, allowing me to read error codes and monitor real-time performance data from smart washing machines and dishwashers. It’s a game-changer for troubleshooting issues before calling in professional help. For software updates, I use manufacturer-specific apps that guide me through firmware upgrades, which can fix bugs and enhance functionality—keeping my appliances up-to-date and efficient.
Regularly scheduling maintenance with these tools extends the lifespan of my appliances and keeps them running at peak performance. As smart appliance technology advances, I predict greater integration of diagnostic AI that will suggest maintenance needs proactively, reducing downtime and repair costs. Staying ahead means investing in the right equipment now and learning how to use it effectively.
How do I maintain appliances over time?
Integral to this process is establishing a routine with these tools: monthly checks with a multimeter, biannual vent cleanings, and keeping firmware updated through manufacturer apps. This approach minimizes unexpected breakdowns and keeps energy bills in check. For instance, cleaning the hidden filter in a high-efficiency washer regularly, as explained in this guide, prevents residue buildup and ensures efficient operation. By adopting these practices, you turn appliance maintenance from a chore into an effortless part of household care—saving money and stress in the long run.

Over the years, I’ve discovered that taking a proactive approach to maintaining your smart appliances can not only extend their lifespan but also save you significant money and stress down the line. The real insider tip is embracing a routine that combines knowledge, the right tools, and awareness of common pitfalls — sometimes, the simplest step can make the biggest difference.
Lessons That Turn Maintenance Mistakes into Wins
- Skip the silos of info — I used to focus only on cleaning the lint filter, believing it was enough. Now, I see maintenance as a holistic habit that includes vent cleaning, software updates, and load management. Focusing on just one aspect is a recipe for overlooked problems.
- Ignore the hype of new tech — I was enchanted by the latest Wi-Fi-enabled fridge, but I learned that older models often work just as well with proper care. The real upgrade comes from understanding how to troubleshoot and maintain what you already own.
- Put routine before reaction — Waiting until a dryer stops working is costly. Setting up reminders for vent and filter cleaning helps prevent breakdowns, keeping your home running smoothly and your appliances performing their best.
- Trust local expertise — DIY fixes are great for minor issues, but knowing when to consult professionals who know your specific model saves time and prevents accidental damage. Building this relationship is invaluable.
Tools I Swear By for Smart Appliance Care
- Digital multimeter — Diagnosing electrical issues accurately, saving me from unnecessary replacements.
- Extendable vent cleaning brush — Getting into hard-to-reach ducts to prevent fire hazards and maintain airflow.
- Bluetooth appliance diagnostic scanner — Monitoring error codes and performance data on my phone makes troubleshooting faster and more precise.
- Manufacturer-specific update apps — Keeping firmware current ensures my smart appliances operate with bug fixes and new features, so I get maximum benefit from my investment.
Your Move Toward Smarter Maintenance Starts Now
The journey to smarter appliance care is ongoing — it’s about forming habits, staying informed, and acting with intention. With the right mindset and tools, you can turn what feels like a chore into an empowering routine that benefits your home and wallet. Remember, every small step you take today compounds into long-term savings and peace of mind.
What’s one maintenance habit you’re planning to adopt this month? Share your plans below and inspire others to keep their appliances running smoothly!