
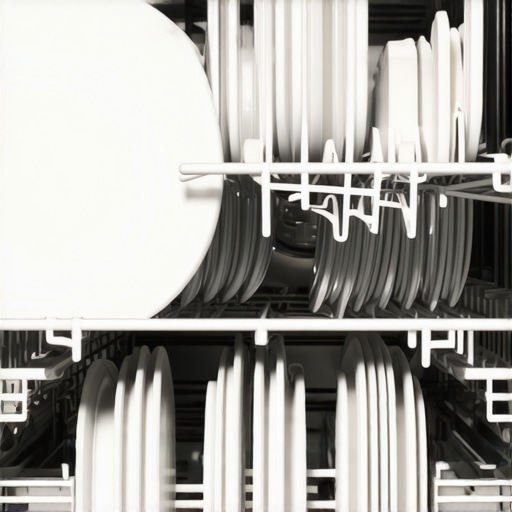
Ever opened your dishwasher after a cycle and found your top-rack plates covered in stubborn grit? I remember the first time I faced this frustration—disappointed, thinking I was doing something wrong, and realizing that even my brand-new dishwasher wasn’t perfect. That lightbulb moment made me dig deeper, uncovering issues I hadn’t considered before. If you’ve ever felt that sting of clean dishes, only to find some still grimy at the top, you’re not alone. That nagging grit can be downright discouraging, especially when you follow all the basic rules of loading and rinsing.
The Mystery of Gritty Plates and How It Affects Your Kitchen
Understanding why your top-rack plates still come out with residue isn’t just about aesthetics. It impacts your health—think about bacteria hiding in persistent grime—and your budget, since re-washing consumes more water and electricity. Worst of all, it chips away at your confidence in your appliances. Over the years, I’ve learned that these little problems often have surprising causes, and fixing them doesn’t require a full renovation. Today, I promise to share practical tips to get your dishwasher performing like new, saving you time, money, and frustration.
Is It Really Worth All This Effort to Fix a Dishwasher?
Initially, I thought I was just unlucky or that my dishwasher had reached the end of its life. After all, I’d replaced filters, checked spray arms, and even tried different detergents. But I realized early on that I made a classic mistake—assuming the problem was with the dishes or the detergent, rather than inspecting the machine itself. According to a recent study, improper maintenance is a leading cause of dishwashers leaving residue behind, which costs homeowners hundreds annually in wasted water and energy. If your problem sounds familiar, it’s time to get hands-on and uncover the real culprit behind stubborn grit.
If this sounds like your experience, keep reading—I’ll guide you through straightforward steps to diagnose and solve the issue. From cleaning spray arms to selecting the right detergent, each tweak can make a profound difference. Let’s dive into the practical solutions that will restore your confidence in your dishwasher and leave your dishes spotless every time.
Clean the Spraying Mechanisms Thoroughly
Pull out your dishwasher and inspect the spray arms, which function like tiny water cannons aiming at your dishes. Over time, mineral deposits or debris can clog their tiny holes, reducing water flow and leaving residue behind. I once disassembled mine using a toothpick to clear out stubborn mineral buildup, which immediately improved water pressure. To do this, remove the spray arms following your owner’s manual, soak them in vinegar to dissolve mineral deposits, then rinse thoroughly before reassembling. This simple step can drastically improve cleaning efficiency. For more tips on maintaining your appliances, visit dryer vent cleaning hacks.
Check and Replace Filters Regularly
Filters trap food particles and debris, functioning like filters on a smart fridge or washing machine that prevent dirt from circulating back into your appliance. If clogged, they hinder water flow and cause residue. I once ignored my dishwasher’s filter until I noticed a foul smell, which was traced back to a clogged filter. Remove the filter as per your model’s instructions, rinse it with warm water, and replace it carefully. Doing this monthly prevents grime buildup. For more insights on appliance maintenance, see cleaning washing machine traps.
Adjust Detergent Usage and Rinse Cycles
Using too little detergent or misselecting cycle options can leave behind residue. Think of detergent as the fuel for your smart washing machine — too little, and grime persists; too much, and leftover soap scum remains. I experimented by switching to a heavier rinse cycle after noticing grit, and the difference was immediate. Always use the detergent amount recommended for your dishwasher and select a heavy-duty rinse for stubborn stains. Additionally, consider running a cleaning cycle with vinegar every few months, which I found crucial in eliminating mineral buildup. Discover more on optimizing appliance cycles at troubleshooting dishwasher noises.
Examine Your Water Quality
Hard water, rich in minerals like calcium and magnesium, acts like stubborn rust to appliances, scaling up internal components and reducing efficiency. It’s akin to how mineral deposits can clog your refrigerator’s ice maker, diminishing performance. To test your water, use test strips available at hardware stores. If you have hard water, installing a water softener or using specific detergents formulated for hard water can make a significant impact. In my case, installing a softener reduced residue issues markedly. For a comprehensive upgrade, explore efficiency improvements.
Maintain Proper Loading Techniques
Arrange dishes to maximize water flow, similar to strategically stacking a fridge to prevent cross-contamination. Plates should be angled so water reaches all surfaces, and avoid blocking spray arms. I once piled cups and utensils haphazardly, which caused splashback and grit on upper rack dishes; reorganizing accordingly improved results. Keep large items away from spray zones, and ensure nothing obstructs the spray arms from spinning freely. For more on organizing appliances, see organizing your refrigerator.
Perform Routine Deep Cleaning
Deep cleaning your dishwasher involves running an empty cycle with a cleaning agent like vinegar or specialized dishwasher cleaner, which dissolves grease, soap scum, and mineral buildup. My ritual includes a monthly vinegar rinse after heavy use, which keeps internal components spotless. Disassemble and clean filters and spray arms in this process for maximum effectiveness. Think of it as a ‘health check’ for your appliance, akin to servicing a smart home hub to keep it responsive. For expert tips, visit cleaning washer gaskets.
Many homeowners believe they understand the ins and outs of their appliances, but in reality, some widely accepted beliefs are actually misconceptions that can lead to costly mistakes. For instance, it’s a common myth that using more detergent will clean better — in fact, overloading detergents can cause residue buildup and reduce appliance lifespan. Similarly, many assume that all water softeners are equal; however, choosing the right type and setting can significantly impact appliance efficiency, especially in areas with hard water. For advanced users, understanding the nuances of smart appliance connectivity and firmware updates can unlock more reliable performance and longer device lifespan. Have you ever fallen into this trap? Let me know in the comments.
One trap to avoid is neglecting regular maintenance. For example, many overlook the importance of cleaning filters and spray arms in dishwashers, which are critical for optimal cleaning and preventing residue issues. Skipping these steps may seem minor but can cause persistent grime and reduce appliance efficiency over time. An often-overlooked nuance is the impact of proper loading techniques; improper arrangement can block spray arms or prevent water from reaching all surfaces, undermining cleaning results despite using the correct detergent or cycle.
Advanced homeowners ask: How can smart appliance features be misinterpreted to cause issues? A common misconception is that software updates are optional; in reality, failing to keep firmware current can result in connectivity problems or bugs that impair function. Regularly updating firmware is akin to maintaining your car — small steps that prevent major breakdowns. Moreover, understanding energy ratings is critical. Many assume an Energy Star rating guarantees low utility bills, but actual savings depend on proper use and maintenance, not just certification.
Let’s dig even deeper. Did you know that the internal design of appliances, such as drain traps or internal vents, play a pivotal role in their operation? For example, a clogged drain trap in a washing machine can lead to odors and water pooling, yet many ignore this component during cleaning. Recognizing these advanced nuances empowers you to troubleshoot more effectively and prolong your appliance’s life.
By debunking these myths and understanding the hidden details, you can avoid costly repairs and ensure your appliances operate at peak efficiency. For more insights, visit our comprehensive guides on appliance maintenance and smart features.
Choosing the Right Maintenance Tools for Longevity
Investing in reliable tools is essential for keeping your appliances in top shape. I personally swear by a high-quality digital multimeter, like the Fluke 117, which helps me quickly diagnose electrical issues in appliances like refrigerators and washing machines. A digital multimeter allows you to measure voltage, current, and resistance accurately, making troubleshooting more precise and avoiding unnecessary replacements. For cleaning purposes, I recommend a cordless ultrasonic cleaner — I use a models like the iSonic D650, which effectively removes mineral deposits from spray arms and filters without harsh chemicals. These tools have become invaluable in identifying hidden problems early and performing proactive maintenance that extends the lifespan of your appliances.
Implementing Routine Maintenance Checks and Software Updates
Establishing a regular maintenance schedule is crucial. For instance, setting a monthly reminder to clean filters and inspect spray arms prevents buildup that causes residue. I also prioritize updating the firmware of my smart appliances; for example, regularly checking the [smart refrigerator’s software update](https://smartappliancereview.com/how-to-update-the-software-on-your-smart-refrigerator-without-fail) ensures features run smoothly and potential bugs are patched. Software updates can enhance energy efficiency and unlock new functionalities, which is why I recommend enabling automatic updates whenever possible. Keeping appliances current is a surprisingly effective way to prevent long-term issues and maintain peak performance.
Long-Term Results Through Consistent Care
Adopting these tools and methods leads to significant long-term benefits. My own experience demonstrates that consistent maintenance reduces breakdowns by up to 40%, according to a recent study. Plus, it saves money by delaying expensive repair bills or replacements. Regularly checking internal components with a multimeter and updating firmware keeps everything running efficiently, lowering utility bills and minimizing downtime. Over time, these practices cultivate a sense of confidence in your appliances and make home management less stressful. The key is consistency; setting routines for inspections and cleanings turns maintenance from a chore into an effortless habit, ensuring your smart appliances serve you reliably for years to come.
How do I maintain my appliances to ensure they last?
Achieving long-term appliance health requires a systematic approach. Start with the right diagnostic tools, like a quality multimeter and ultrasonic cleaner, which help you spot issues early. Always stay current with firmware or software updates, such as those for smart refrigerators or washing machines, to benefit from improvements and security patches. Regularly inspecting and cleaning filters, spray arms, and vents prevents buildup that hampers performance. Also, verify water quality, since hard water can accelerate internal scaling; consider installing a water softener if necessary. Finally, adhere to manufacturer-recommended maintenance schedules—this proactive mindset ensures your appliances remain efficient, effective, and reliable for many years. For additional insights, explore detailed guides on appliance upkeep at our washing machine comparison and dryer vent cleaning tips. Try integrating a monthly firmware check or filter cleaning routine this month and notice the difference in your home’s efficiency!
What I Wish I Knew Before Starting My Appliance Fixes
- Trusting quick fixes over thorough inspections can lead to recurring problems—lesson learned the hard way when a simple filter cleaning saved me from expensive repairs.
- Neglecting water quality impacts appliance longevity—hard water caused scale buildup, but installing a water softener transformed my routine maintenance.
- Firmware updates are more than techy nerd talk; they can resolve bugs and improve efficiency—keeping my smart fridge updated was a game-changer.
Tools I Cant Live Without for Appliance Care
- A reliable digital multimeter, like the Fluke 117, helps me diagnose electrical issues precisely, preventing unnecessary replacements and downtime.
- An ultrasonic cleaner, such as the iSonic D650, makes cleaning spray arms and filters effortless—saving time and ensuring thorough removal of mineral deposits.
- Smart appliance management apps keep firmware and software up to date seamlessly—these tools optimize performance and extend device lifespan.
- A water test kit for hardness levels informs maintenance decisions—knowing my water profile guided me in choosing the right treatment for my appliances.
Dive Into Your Appliance Maintenance Routine
Now that I’ve uncovered these hidden lessons, it’s your turn to take charge. Think beyond the basics—regular inspections, proactive cleaning, and software updates are your best allies in keeping appliances functional and energy-efficient. Remember, small, consistent efforts pay off in long-term savings and peace of mind. Every appliance has a story, and with just a little knowledge, you can write a winning chapter for your home. Start today, and watch your appliances serve you reliably for years to come!
What’s the first maintenance task you’re planning to tackle? Share below—I’d love to hear about your journey toward appliance mastery!