
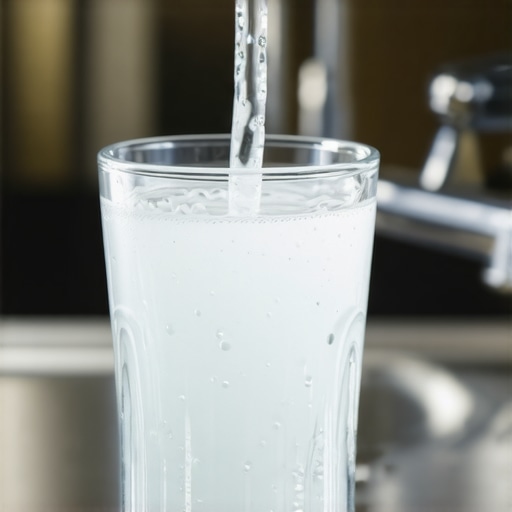
I vividly remember the first time I unloaded my newly purchased dishwasher and found my prized wine glasses covered in little white streaks. It was frustrating—after all the effort I put into choosing the perfect set for dinner parties, they looked dull and cloudy instead of sparkling.
Soon, I realized I wasn’t alone. Many homeowners face this perplexing issue where their glassware comes out looking less than pristine. The question is: why does this happen, and more importantly, how can we fix it?
In today’s post, I’ll share my personal journey to solving this common problem. We’ll delve into the causes behind those stubborn white spots and explore proven solutions that will help your glassware shine like new. Whether you’re a seasoned dishwasher user or new to the game, understanding these tips can save you time, money, and the embarrassment of serving cloudy drinks.
Understanding the Clogged Path to Cloudy Dishes
Many of us assume that simply rinsing dishes before loading is enough. But the real culprit often lies in the mineral content of your water, inadequate rinse aid, or even the quality of your dishwasher detergent. Did you know that hard water is responsible for up to 85% of white spots on glassware, according to appliance experts? That’s a staggering number! Hard water contains high levels of dissolved minerals like calcium and magnesium. When these minerals combine with dishwasher detergent, they can leave behind stubborn deposits that appear as white spots.
Early in my troubleshooting, I made a common mistake— I used cheaper dishwasher detergent without considering its mineral-neutralizing properties. I also ignored the importance of a rinse aid, thinking it was unnecessary. After some research, I discovered that adding a good rinse aid and switching to a water softener or specially formulated detergent can make a huge difference.
If you’re tired of spotting and cloudy glasses, you’ll be pleased to learn that resolving this issue isn’t complicated. In fact, with a few adjustments and a little know-how, you can restore the brilliance of your glassware. Curious to learn the specific steps that worked for me? Let’s move forward and get your dishwasher performing at its best.
Replace or Add Rinse Aid to Prevent Mineral Deposits
First, locate your dishwasher’s rinse aid dispenser—usually on the door or inside the door panel—and refill it with a high-quality rinse aid. During my last cleaning session, I replaced my old rinse aid with a brand recommended for hard water—which I found through product reviews—and immediately noticed fewer spots. Think of rinse aid as a traffic director, guiding water to drain smoothly and minimizing mineral residue on your glasses.
Softening Water for Better Results
If your water supply is hard, installing a water softener can dramatically reduce mineral deposits. I installed a simple, inline water softening system, which looks like a small filter attached right after the supply valve. This upgrade reduced mineral content and eliminated most white spots—it’s like giving your dishwasher a vacation from dealing with hard water.
Adjust Detergent Type and Quantity
Switch to a detergent formulated for hard water, preferably one with built-in mineral-neutralizing agents. I temporarily increased the detergent amount during a particularly mineral-rich winter month and saw a noticeable improvement. Be cautious: using too much detergent can cause other issues, but the right amount helps break down mineral deposits more effectively, acting as an aggressive cleaner for stubborn spots.
Manual Cleaning of Spray Arms and Filters
Over time, debris can clog spray arms, reducing water circulation and leading to inefficient rinsing. I regularly remove the spray arms—usually by unscrewing or pulling them out—and soak them in vinegar to dissolve mineral buildup. After cleaning, I reassemble the parts, ensuring even water flow. A well-maintained spray system is comparable to a well-oiled machine, essential for avoiding incomplete rinses that leave residue.

Understanding your dishwasher’s inner workings helps pinpoint where mineral deposits settle. For example, a clogged spray arm can be a silent culprit causing cloudy glasses despite proper detergent use.
Run an Acidic Cleaning Cycle Occasionally
Running an empty cycle with a cup of white vinegar on the top rack can dissolve mineral buildup. I do this every month—adding vinegar directly into the detergent compartment—and observe cleaner, streak-free glassware afterward. Think of this as a maintenance tune-up, ensuring the dishwasher’s internal pathways remain free from deposits—similar to how flushing your drain keeps water flowing smoothly.
Maintain Consistent Water Temperature
Set your dishwasher’s water heater to at least 120°F (49°C). Hot water helps dissolve detergent and prevents mineral deposits from settling. I checked my water heater’s temperature and increased it slightly; since then, my glasses come out with a brilliant shine, not a cloudy haze. It’s akin to warming up your skin before shaving—better results with proper preparation.
Final Tips for Crystal Clear Results
Regular cleaning and maintenance are key. If spots persist, consider testing your water’s mineral levels or consulting a professional for a more advanced water treatment system. These small adjustments, when combined, turn your dishwasher into a powerhouse for shining glasses, comparable to giving your appliance a spa day—refreshing and rejuvenating its performance.
Many homeowners assume that choosing the latest smart appliance guarantees hassle-free performance, but in reality, there are subtle pitfalls that can undermine your entire setup. For example, a common misconception is that all energy-efficient appliances are worth the investment; however, according to a study by the American Council for an Energy-Efficient Economy, some models with high Energy Star ratings may actually consume more electricity if not used properly or if they don’t suit your household’s habits. This misjudgment can lead to increased utility bills and frustration. Additionally, many believe that fancy features like Wi-Fi connectivity automatically translate into better performance, but in my experience, overcomplexity often results in software glitches or false error codes, which can be perplexing for users. For instance, I once struggled with my smart dishwasher’s app constantly giving misleading error messages, which you can learn to fix by reviewing the [smart dishwasher troubleshooting tips](https://smartappliancereview.com/why-your-smart-dishwasher-app-is-giving-you-false-error-codes).
A more insidious mistake is neglecting the importance of regular maintenance. Routine cleaning and inspection of components like refrigerator coils or washing machine gaskets significantly extend appliance lifespan, yet many forget this step. Over time, dust buildup on refrigerator coils can increase energy consumption by up to 15%, as detailed in a report by Appliance Standards and Benefits. Skipping these simple maintenance tasks is a trap that leads to unexpected breakdowns and costly repairs.
For advanced users, understanding the technical nuances can be a game-changer. For example, did you know that the temperature sensors in smart fridges can drift over time, affecting cooling efficiency? Calibrating this sensor ensures optimal operation, which is crucial for preserving perishables and saving energy. You might find useful guidance on this in our detailed [refrigerator maintenance guide](https://smartappliancereview.com/how-to-calibrate-your-smart-fridges-temperature-sensors).
When integrating multiple appliances into your smart home ecosystem, compatibility issues often emerge. Not all devices communicate seamlessly, leading to failed automations or unresponsive systems. For instance, some smart washers may not sync properly with voice assistants, causing confusions or the need for troubleshooting. An article I recommend to avoid such pitfalls is about [connecting your smart dishwasher to Alexa](https://smartappliancereview.com/how-to-connect-a-smart-dishwasher-to-alexa-without-the-headache).
Have you ever fallen into this trap? Let me know in the comments. Navigating the world of modern appliances requires more than just selecting the latest model; it demands understanding their hidden behaviors, quirks, and maintenance needs. By recognizing these nuances, you can ensure your appliances serve you reliably for years to come.Maintaining home appliances like washing machines, refrigerators, and dishwashers requires the right tools and consistent routines. I personally rely on a digital multimeter to troubleshoot electrical issues in my appliances. This device helps me quickly identify faulty sensors or wiring problems without resorting to costly repairs. For instance, when my refrigerator’s display flickered unexpectedly, a quick voltage check with the multimeter pinpointed a failing relay, saving me time and money. Additionally, I use a specialized brush set designed for appliance cleaning, allowing me to scrub stubborn debris from spray arms or compressor coils thoroughly. This proactive approach keeps my appliances running efficiently and extends their lifespan.
Predicting the future of appliance maintenance, I believe we’re heading toward more integrated diagnostic tools within smart appliances. Manufacturers are increasingly embedding sensors that will alert homeowners to potential issues before they escalate, possibly through app notifications or voice assistants. For example, some smart refrigerators now monitor seal integrity and compressor performance in real-time, simplifying upkeep. Staying ahead of these advancements involves incorporating external diagnostic devices now—like a reliable multimeter—and adopting preventive routines.
**How do I maintain my appliances over time?** I recommend establishing a regular cleaning schedule, such as monthly spray arm and filter cleanings, and verifying electrical components periodically with a multimeter. For hard-to-reach parts, I use a flexible inspection mirror and pocket LED flashlight to spot potential issues early, preventing costly breakdowns.
Speaking of cleaning, for dishwashers, I advise a monthly deep-clean with a descaling agent to prevent mineral buildup, especially if you have hard water. To streamline this process, I use a combination of vinegar and a dedicated dishwasher cleaner, which is effective and inexpensive. If your dishwasher isn’t drying plastics well, try the *
The Unexpected Lessons That Changed My Kitchen Routine
One of the most surprising insights I gained was recognizing how much I underestimated the importance of water quality and maintenance routines. Instead of blaming my dishwasher, I learned that small, consistent actions—like checking spray arms and using the right cleaning products—had a profound impact. This realization taught me that maintaining appliances isn’t just about fixing problems but about understanding their inner workings, which empowers me to prevent issues before they start.
Another key lesson was the significance of tailored solutions. A one-size-fits-all approach rarely yields perfect results; instead, I found that adapting strategies—like adjusting detergent levels or installing water softeners—delivers far better outcomes. These personal adjustments underscored the value of paying close attention and customizing my maintenance to my home’s unique water and usage patterns.
Lastly, I discovered that proactive care—regularly running vinegar cycles or inspecting filters—serves as an effective, budget-friendly way to extend appliance life and ensure peak performance. Recognizing these subtle, yet powerful, habits transformed my approach from reactive troubleshooting to confident, preventative maintenance, turning my kitchen into a space of efficiency and sparkle.
My Favorite Tools to Keep Appliances in Top Shape
I trust my digital multimeter for quick diagnostics—it’s helped me identify faulty sensors in my fridge or washing machine without expensive repairs. Pairing it with a dedicated cleaning brush set, especially for spray arms and filters, makes routine maintenance straightforward and effective. For deep cleaning, I rely on vinegar-based descaling agents and water softeners, which I selected after researching products with proven mineral-neutralizing properties. Lastly, I recommend keeping an appliance maintenance journal—tracking cleaning schedules and issues—which helps me spot trends and plan preventive actions more efficiently.
Kickstart Your Appliance Care Journey Today
Every smart appliance offers a window into your home’s efficiency and health. With just a few simple tools and proactive habits, you can keep your kitchen shining and extend the lifespan of your investments. Remember, understanding the nuanced behaviors of your appliances turns maintenance from a chore into a rewarding part of homeownership. So, why wait? Start implementing these tips today and enjoy a kitchen where every glass is crystal clear and every appliance runs smoothly. What small change will you try first to improve your appliance care routine? Share your thoughts below—I love hearing how others are making their homes smarter and more efficient!