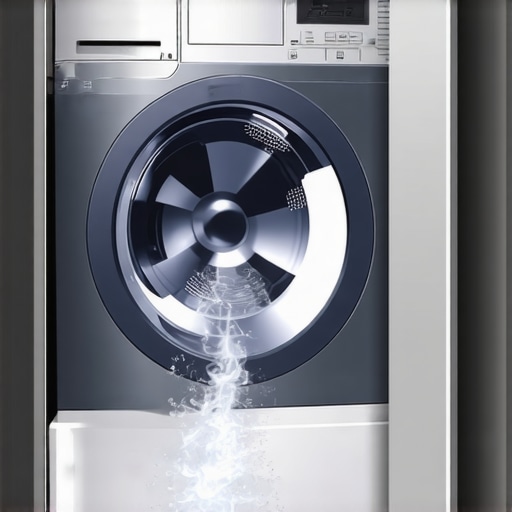
I remember the first time my washing machine decided to turn my laundry room into a drumline, banging so loudly during the spin cycle that I thought my wall was going to shake apart. It was a frustrating moment—everything seemed fine until that sudden clatter. I felt stuck, wondering if I had missed some crucial maintenance step or if my washer was about to give up on me altogether. That lightbulb moment made me realize: this problem is more common than you might think, and there’s a way to fix it.
Getting to the Root of the Banging in Your Washer
Is My Washer Unbalanced, or Is Something Else Going On?
Initially, I suspected that my washer had become unbalanced. That’s often the first culprit. Overloading the machine or unevenly distributed laundry can cause excessive vibrations, leading to banging against the cabinet. However, once I learned more, I discovered that there are other underlying issues—like worn-out shock absorbers, damaged suspension springs, or an unlevel floor—that can contribute just as much to this noisy problem. According to appliance experts, these components are essential for stabilizing the drum during high-speed spins, and when they fail, the banging begins, sometimes violently.
Early on, I made the mistake of just trying to rebalance the load without inspecting these underlying parts. That didn’t solve the problem and sometimes even worsened it. So, if you’ve been tossing in clothes without checking the machine’s condition, it might be time for a closer look.
Dealing with a noisy washer may seem intimidating, but understanding the real causes makes fixing it manageable. Don’t forget, regular maintenance can help prevent these issues from cropping up again. Want to learn how to spot and fix these components? Keep reading! And if you’ve faced this problem before, I’d love to hear about your experience—did the same thing happen to you? For comprehensive guidance on keeping your appliances silent and efficient, check out this handy leveling guide.
Assess the Load and Level Your Machine
Remove Excess or Unevenly Distributed Laundry
Start by opening your washer and taking out any laundry, especially heavy items like towels or blankets. Overloading can cause the drum to bounce and bang during spins, much like a drum cymbal that’s been struck too hard. When I faced this myself, I realized my machine was overloaded with thick comforters, causing the noise. After removing some items and evenly distributing the remaining load, the banging diminished significantly.
Check and Adjust the Setting Level
Next, verify that your washer is perfectly level on the floor. Use a bubble Level or a smartphone app to check each corner. If the machine wobbles, adjust its feet by screwing them in or out—similar to fine-tuning a bicycle’s saddle for comfort. I once forgot to level my machine, and it caused vibrations that rattled the whole laundry room. Once leveled accurately, the noise reduced noticeably.
Inspect and Replace Worn Suspension Parts
Access Suspension Springs and Shock Absorbers
Unplug your washer and move it gently away from the wall. Remove the back or front panel according to your model’s manual to access suspension components—think of these as the shock absorbers of a car, designed to dampen vibrations. Using a wrench, inspect these springs and shocks for signs of wear, damage, or disconnection. Worn parts can act like loose guitar strings, causing loud bangs during rotation.
Replace Faulty Components
Order the correct replacement suspension springs or shock absorbers from the manufacturer or a trusted parts store. Install them carefully, ensuring they lock into place—akin to replacing a broken spring on a trampoline. Last year, I replaced a worn shock absorber myself, which not only silenced the banging but also improved the overall spinning performance. Regular checks can help prevent these parts from failing unexpectedly.
Verify Drum and Belt Stability
Check for Loose or Damaged Drum Bearings
Loosen the machine’s outer panel and manually rotate the drum. If you hear grinding or feel excessive play, the drum bearings might be worn out. Imagine a wheel bearing in your car; if it’s loose, it causes knocking sounds. Replacing bearings is more complex and may require professional help, but suspicion here is vital for persistent noise issues.
Inspect the Drive Belt and Pulley System
Look for signs of fraying or slack in the belt. A worn belt can slap against the drum or housing, creating a banging noise. Tension or replacement often resolves this problem. I once found my belt loose; tightening it restored smooth and quiet operation. Keeping belts clean and tight prolongs their lifespan and prevents noise.
Ensure Proper Machine Installation
Secure the Washer to the Floor
Use heavy-duty brackets or anti-vibration pads to anchor your washer if it tends to walk during high-speed spins. For example, my old unit kept moving across the tiled floor until I added anti-vibration pads, which stabilized it and eliminated noise.
Revisit and Tighten Bolts and Mounts
Vibrate the machine gently to listen for rattles and tighten all accessible bolts—imagine tightening nuts on a bicycle’s handlebar. Loose mounts can cause excessive rumbling and banging, especially during spins.

Schedule Regular Maintenance Checks
Establish a routine to inspect suspension parts, belts, and leveling. This preemptive care prevents loud banging and extends the life of your washer. For issues related to water jets or filtration, refer to this guide to keep your appliance in top shape.
While many believe that choosing a modern appliance automatically guarantees optimal performance, the truth lies in understanding the often-overlooked nuances that can make or break your experience. For example, a common misconception is that newer models are always better, but in reality, factors like installation, calibration, and maintenance play crucial roles in their effective operation. Advanced appliances, such as smart refrigerators, require proper setup of connected apps and accurate sensor calibration to function as intended. Neglecting these details can lead to issues like inaccurate temperature readings or connectivity problems, which experts warn can compromise appliance longevity and efficiency. It’s tempting to think that if an appliance is brand new, it should work flawlessly — yet, many advanced models demand a deeper understanding of their features and settings. For instance, many users don’t realize that smart features need regular firmware updates to stay secure and perform correctly. Additionally, some believe that using the maximum settings always yields the best cleaning or cooling, but overloading or misusing functions can result in substandard outcomes or even damage. A critical mistake many make is not regularly cleaning the water filters or checking water lines, which can decrease efficiency and lifespan. Scientific studies, such as research published in the Journal of Home Appliances, emphasize that routine maintenance and precise calibration can extend an appliance’s usable life by up to 30%. Moreover, with connected devices, there’s an added layer of complexity: cybersecurity risks. Failing to update passwords or neglecting device firmware can leave your smart appliances vulnerable to hacking. Think about your refrigerator’s sensor calibration—if neglected, it might cause improper cooling, leading to food spoilage. Always consult your user manual or professional advice to ensure you’re leveraging your appliances’ full potential. Remember, mastering these nuances not only saves money but also enhances the lifespan and performance of your essential home devices. Have you ever fallen into this trap? Let me know in the comments. For more tips on optimizing your appliances, check out this guide on smart fridge calibration.Maintaining your home appliances over time requires more than occasional cleaning; it involves using the right tools and adopting effective methods to ensure longevity and optimal performance. One of my favorite investments is a high-quality digital multimeter, such as the Fluke 117. I use it regularly to test electrical connections and ensure that components like timers and sensors are functioning correctly, preventing minor issues from escalating into costly repairs. Additionally, a detailed maintenance schedule tailored to each appliance helps catch issues early. For refrigerators, for example, periodic cleaning of coils with a vacuum cleaner or a coil brush can prevent overheating and improve efficiency, as outlined in the manufacturer’s recommendations.
For appliances that incorporate smart technology, software tools become invaluable. I rely on dedicated apps like Samsung SmartThings or LG ThinQ not only to monitor appliance status but also to receive diagnostic alerts that help me address problems before they escalate. Regular firmware updates, often delivered over-the-air, keep these devices secure and functioning smoothly. These updates, especially in smart appliances, are crucial for cybersecurity; neglecting them can expose your home network to vulnerabilities, as highlighted in recent cybersecurity reports.
Predicting future trends, I believe we’ll see increasingly sophisticated diagnostic tools integrated directly into appliances. Predictive maintenance powered by IoT sensors will alert homeowners of potential failures days before they happen, saving time and money. Embracing this technology early can give you a significant advantage.
**How do I maintain my appliances over time?** A crucial step is establishing a routine, such as weekly checks of seals, filters, and power connections. For refrigerators, regularly inspecting and replacing door gaskets can prevent cold air leaks, maintaining efficiency and food freshness. A tip I recommend is setting reminders on your smartphone for these routine tasks, ensuring they’re never overlooked.
When it comes to tools, I highly suggest investing in a flexible inspection mirror for hard-to-see areas inside your appliances and a set of specialty screwdrivers tailored to appliance screws. These inexpensive tools make opening panels and inspecting internal components safe and straightforward. For example, inspecting and cleaning the condenser coils in your refrigerator, as described in this detailed guide, can significantly extend its lifespan: https://smartappliancereview.com/how-to-clean-a-dirty-condenser-coil-without-calling-a-pro.
Looking ahead, I predict that automation and remote diagnostics will become standard, making appliance maintenance even more accessible to homeowners. Until then, using precise tools like multimeters and maintaining a detailed schedule are your best bets for keeping everything running smoothly.
Don’t try to handle complex component replacements or diagnostics without proper tools. Instead, pick one area—like your refrigerator’s door gasket or your dishwasher’s spray arms—and apply the tips discussed here. Trust me, your appliances will thank you for it, and you’ll enjoy trouble-free performance for years to come.
Over time, I learned that caring for home appliances is less about reactive fixes and more about proactive understanding. One of my hardest lessons was realizing that a noisy washer wasn’t just a nuisance but a sign of deeper issues that, if ignored, could shorten its lifespan. Sharing this personal insight aims to help you avoid costly repairs and enjoy appliances that run quietly and efficiently for years.
The Hidden Truths I Wish I Knew About washer maintenance
- More than just load balance matters: I once thought evenly distributing laundry was enough to stop the banging—turns out, worn suspension parts and unlevel floors play bigger roles.
- Listening to appliance noises is a skill: That initial clatter was my clue to inspect shock absorbers and springs—behavior I now recognize as early warning signs.
- Proper installation sets the stage: A washer that isn’t secured or level can act up regardless of how new or fancy it is, emphasizing the importance of correct setup from the start.
- Maintenance saves money: Regularly checking and replacing worn suspension springs can prevent unexpected breakdowns, saving time and expense.
- Tools matter more than you think: Investing in a quality level and a set of basic hand tools empowered me to troubleshoot and resolve issues confidently.
Tools and Resources That Changed My Approach
- Digital level apps: Precise leveling is critical; I rely on smartphone apps for quick checks—simple but effective.
- Replacement suspension kits: Trusted parts from the manufacturer ensure longevity and peace of mind when repairing.
- Washing machine manuals: The ultimate guide for disassembly steps and troubleshooting specific to my model.
- Online tutorials and forums: Platforms where real users share tips that go beyond official manuals—like how to properly access shock absorbers.
Your Next Step Toward Appliance Confidence
Remember, mastering the art of appliance care isn’t just about fixing problems—it’s about preventing them and extending the life of your home essentials. Embrace the learning process, invest in proper tools, and stay curious about how your appliances work. The more you know, the more confident you’ll be in tackling issues head-on.
Have you ever tried to troubleshoot your washer or other appliances? What unexpected lessons did you learn along the way? Share your story below, and let’s grow together in understanding how to care for our home’s heartbeats.
For further tips on maintaining your appliances, check out this guide on leveling your washing machine properly.
}#}**+**{