
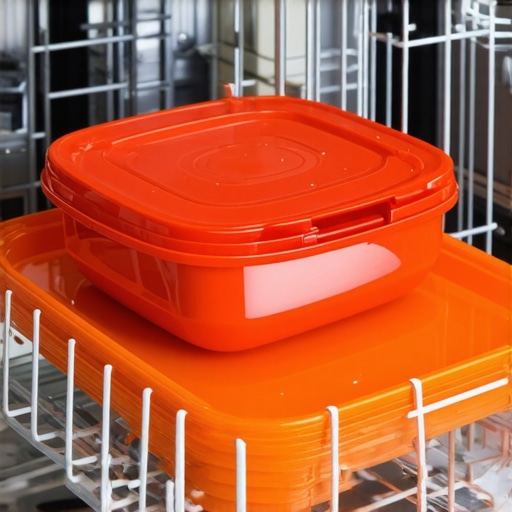
Have you ever thrown a plastic container into the dishwasher, only to find it warped or covered in water spots afterward? I remember the lightbulb moment when I realized I was making a crucial mistake that compromised the cleanliness and longevity of my plastics. It was frustrating—wasted time, detergent, and a handful of damaged items. If you’ve faced similar problems, you’re not alone.
Why Properly Drying Hand-Washed Plastics Matters More Than You Think
Many folks assume that if plastics come out of the dishwasher, they’re dry enough. But here’s a little secret: plastics are tricky. They tend to smear water, develop spots, or even warp if not dried correctly. Especially if you rely on your dishwasher for drying, understanding the best way to handle plastics can save you headaches down the line. Proper drying isn’t just about appearances; it extends the life of your items and keeps your kitchen hygienic.
Did you know that residual water on plastics can promote bacteria growth? According to a study published in Food Control, improperly dried items can harbor bacteria, leading to potential health issues. That’s why mastering the art of drying plastics after hand-washing and dishwasher cycles is essential.
Is Relying on the Dishwasher’s Drying Cycle Really Enough?
In the early days, I naïvely believed pressing the “air dry” button was sufficient. Turns out, I was making a costly mistake. Relying solely on the dishwasher’s cycle often results in plastics still being damp, which defeats the purpose of clean dishes. Plus, the high heat can sometimes deform thinner plastics or cause labels to peel.
If you’ve experienced this frustration, don’t worry. There’s a simple, effective approach that I’ve adopted—and it works wonders. Before diving into the detailed steps, ask yourself: Are my plastics truly dry and safe to put away? If not, I have good news for you.
Set Up for Success: Prepare Your Workspace
Before you start drying your plastics, ensure your countertop or drying rack is clean and dry. Place a microfiber towel nearby to catch drips, preventing water spots and warping. I learned this the hard way when I skipped this step and ended up with water stains on my cereal bowls. Organizing your space streamlines the process and reduces mess.
Use a Gentle Towel: Wipe Down Plastics Accurately
Take a soft, lint-free towel and gently pat each piece dry, focusing on seams and grooves where water can hide. Instead of rubbing harshly, press and lift to avoid scratching or warping delicate plastics. In one instance, I vigorously rubbed a plastic container, causing it to warp slightly—an avoidable mistake. This careful step preserves the shape and appearance of your items.
Employ the Right Techniques: Air Dry for the Win
After hand drying, stand plastics upright on the towel or draining rack to air-dry completely. For thinner or more fragile pieces, prop them with cups or containers to prevent contact with surfaces that might transfer residual moisture. I once placed a plastic lid face-down on a cluttered kitchen counter, which caused water to collect underneath. Using a dedicated drying stand or rack accelerates the process and ensures a thorough dry, preventing water spots and bacterial growth.
Tackle Hard-to-Reach Areas: Use a Cleaning Brush
For corners, edges, and textured surfaces, employ a small brush or a toothbrush. Gently scrub to remove trapped water and detergent residue. When I neglected to clean the grooves of my plastic storage containers, mold started to develop—highlighting the importance of meticulous drying. Regular brushing ensures all water is expelled, reducing drying time and maintaining hygiene.
Final Inspection: Confirm Dryness Before Storing
Hold each piece up to the light to check for lingering moisture. Feel for damp spots, especially inside lids or narrow crevices. If any moisture remains, give it extra time under the towel or air dry longer. I once stored slightly damp plastics, which led to musty odors and discoloration. This step guarantees your plastics are truly dry, extending their lifespan and keeping your kitchen sanitary.
Alternative Drying Tips: Speed Up With a Hairdryer
If you’re in a hurry, set your hairdryer to a cool setting and carefully blow across surfaces to evaporate residual water. Keep the dryer moving to prevent hotspots that could warp the plastic. I used this method when preparing for a last-minute dinner, and it saved me from using worn-out towels or waiting hours. Just ensure the temperature stays cool to avoid damage.
While many users believe proper maintenance is straightforward, seasoned homeowners know that even common appliances like washing machines and refrigerators harbor subtle complexities that can trip up the unwary. For example, a frequent misconception is that newer smart appliances require less attention, but automation can sometimes mask underlying issues. Overlooking these nuances can lead to inefficient performance or costly repairs. One critical mistake is relying solely on default settings without understanding how sensors and calibration impact efficiency.
Why Resetting Isn’t Always the Solution to Smart Appliance Glitches
Many assume that power cycling or resetting smart appliances will fix persistent bugs. While this often helps, it can sometimes suppress symptoms without addressing root causes. For instance, malfunctioning temperature sensors in smart fridges may require calibration rather than a reset to restore optimal cooling. Ignoring calibration can result in energy waste or food spoilage. Remember, the devil is in the details—regular maintenance and understanding sensor functionalities are key to long-term performance.
How can advanced calibration prevent costly malfunctions?
Calibration isn’t just for high-end models; it’s vital across virtually all smart appliances. Proper calibration ensures sensors measure accurately, which impacts everything from cycle times to energy consumption. For example, a miscalibrated water level sensor in a washing machine can lead to overuse of water and detergents, or incomplete rinses. Studies indicate that improper calibration decreases appliance lifespan by accelerating component wear (source). Regular calibration, often overlooked, is a subtle but powerful tool to boost efficiency and prevent breakdowns.
Moreover, understanding the role of sensor calibration becomes crucial when integrating appliances into a smart home hub. Properly calibrated sensors facilitate synchronization, ensuring appliances operate at peak efficiency through intelligent cycles. Check out smart hub options that streamline this process.
Have you ever fallen into this trap? Let me know in the comments. Remember, mastery over the nuances of your appliances isn’t just for bragging rights—it saves you money and extends their lifespan in the long run.
Tools I Recommend for Home Appliance Maintenance
To truly master the art of keeping your appliances in top condition, investing in the right tools is non-negotiable. I swear by a high-quality digital multimeter; it helps me diagnose electrical issues in smart refrigerators and washing machines without guesswork. A digital temperature probe is another essential—perfect for calibrating sensors like those in smart fridges. For cleaning spray arms or filters, a small, flexible cleaning brush ensures thorough maintenance down to the tiniest crevices. Remember, quality tools save time and prevent accidental damage, making regular upkeep more manageable.
Automated Monitoring Can Extend Appliance Lifespan
Software plays a crucial role in today’s smart home. Integrating your appliances with a robust smart hub allows continuous monitoring and early detection of issues like temperature inconsistencies or unusual vibrations. I personally rely on custom alerts that notify me when my refrigerator’s compressor shows signs of failing, based on sensor data. This proactive approach helps me schedule repairs before costly breakdowns happen, extending appliance lifespan and reducing utility bills.
Long-Term Results Require Consistent Care
Implementing a regular maintenance schedule is more than a chore—it’s an investment. For instance, flushing out mineral deposits in your appliances using descaling solutions and vinegar cleansers can keep systems running efficiently. Additionally, periodically recalibrating sensors ensures accuracy—necessary for appliances like smart fridges that adjust cooling based on sensor feedback. Regular filter replacement, like water filters, keeps water tasting fresh and prevents bacterial buildup. These steps, while seemingly minor, accumulate into significant savings over time.
How do I maintain my appliances over the years?
One effective strategy is to schedule seasonal checkups, aligning with your appliance manufacturer’s recommendations. For example, examining seals and door gaskets for wear prolongs their effectiveness, avoiding air leaks that force refrigerators to work harder. Using diagnostic tools, like a smartphone app connected to your smart appliances, can provide real-time alerts on issues such as an overworking compressor (more details here), or irregular cycle times. Regularly updating your appliance firmware also ensures that safety patches and efficiency improvements are applied, keeping everything running smoothly.
In the future, expect appliances to become even more intuitive, utilizing AI diagnostics and augmented reality guides for troubleshooting. But even then, the foundation remains good maintenance habits and the right tools. So, pick up that digital multimeter or calibration kit today—your appliances will thank you!
Lessons the Manuals Never Mentioned—And My Lightbulb Moments
- One of the hardest lessons I learned was that not all plastics are created equal; knowing which plastics can withstand high heat saved me from costly warping.
- I once thought all smart appliances were maintenance-free, only to discover that regular calibration of sensors could dramatically extend their lifespan and efficiency.
- Forget about the default settings—taking the time to understand the calibration options of your fridge or washer can prevent issues like overcooling or unnecessary energy consumption.
- My biggest revelation? A simple tool like a digital multimeter isn’t just for electricians—it’s invaluable for diagnosing appliance quirks early on, saving time and money.
Tools and Guides I Trust for Appliance Mastery
- Smart Appliance Diagnostic Apps: They provide real-time alerts and troubleshooting tips, making preventative maintenance accessible and straightforward.
- Calibration Kits and Digital Probes: I personally rely on these for ensuring my smart fridge sensors and washing machine load sensors operate accurately, which keeps everything running smoothly.
- Reliable Home Maintenance Books: Titles like