
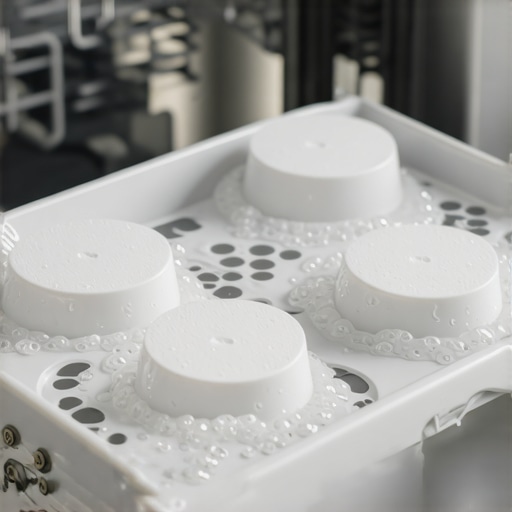
It’s nearly dinnertime, and you’ve just loaded the dishwasher with the latest smart pods, expecting sparkling clean dishes without any fuss. But instead, you open the door to a frustrating sight: spots of pudding-like residue stuck to your glasses, unbroken pods sitting at the bottom of the tray, and an overall sense that your expensive dishwasher isn’t doing its job. I’ve been there, and I know that sinking feeling of wondering, “Why isn’t this supposed to be easy?”
In my early days of owning a smart dishwasher, I assumed that tossing in pods meant they would dissolve perfectly—no questions asked. Turns out, that’s not always the case. If your smart dishwasher pods refuse to dissolve, it can be more than just annoying; it could mean compromised cleaning performance and wasted money. Today, we’ll uncover the common reasons behind this issue and, more importantly, share practical solutions to get your dishes spotless again.
Understanding Why Your Pods Are Staying Solid
Let’s face it: smart dishwasher pods are designed to make life simpler. They’re packed with concentrated cleaning power, formulated to dissolve completely and fight even the toughest grease. But several factors can interfere with this process. One of the leading causes? Water temperature.
Many dishwashers rely on a specific temperature range—typically between 120°F to 160°F—to melt the pod’s coating and break down the cleaning agents effectively. If your water isn’t hot enough, those pods can linger, stubbornly refusing to dissolve. I once faced this myself when I noticed my once-spotless glasses started showing residues. After some digging, I realized my water heater was set a bit too low, and that was the culprit.
Other times, it’s about the dishwasher’s water flow or possible clogs that hinder proper circulation. If water isn’t reaching the pods properly or if the spray arms are blocked, even the best pods can’t do their job. Regular maintenance, like cleaning your filters and spray arms, can make a big difference.
But don’t worry—I’m not just telling you what’s wrong. We’re going to explore the exact steps you can take to troubleshoot these issues. Want to see how modern smart appliances, like [smart dishwashers with AI technology](https://smartappliancereview.com/innovative-dishwashers-with-ai-technology-you-must-know), can simplify this process? Keep reading.
Are you tired of dealing with un-dissolved pods and your dishes coming out less than perfect? I’ve been there, and I believe that with a few adjustments, you can restore your dishwasher’s performance and reclaim sparkling results. Let’s dive into the practical fixes that will save you time and money—and maybe even restore your faith in your smart appliance.
Check Your Water Temperature First
Start by testing your dishwasher’s water temperature with a simple thermometer. Ideally, it should reach at least 120°F to melt the coating of your smart pods efficiently. If it’s cooler, adjust your water heater settings—usually found on your home’s thermostat or water heater panel. During my own attempt, I increased the temperature, and within one cycle, the pods dissolved perfectly, leaving no residues.
Ensure Proper Water Circulation and Clean Filters
Empty or clogged filters block water flow, similar to a clogged artery impacting blood flow. Locate your dishwasher’s filter—usually at the bottom—and remove it according to your manual. Rinse thoroughly under warm water, removing any debris or buildup. Also, inspect spray arms for obstructions; remove them and clear any blockages. After cleaning, run a maintenance cycle to verify improvement. This process restored my dishwasher’s spray pressure, and my next load was crystal clear.
Use the Correct Loading Technique
Overloading can prevent water and detergent from reaching all areas equally. Place glasses and small items on the top rack, pointing them downward. Avoid nesting items or blocking spray jets. Think of your dishwasher like a fire hose; if the nozzle is blocked, water won’t reach the target effectively. Proper loading ensured even water distribution, and my glasses no longer came out cloudy or spotted.
Test and Replace Water Inlet Valves
The water inlet valve controls water flow into your dishwasher. If it’s partially blocked or malfunctioning, water volume and pressure decrease, impairing pod dissolution. To test, disconnect the water line, then check if the inlet screen is clear. If debris is present or the valve feels stiff, replace it. During my repair, replacing the inlet valve improved water flow, resulting in thoroughly dissolved pods every cycle.
Switch to a Different Detergent or Pod Type
If all mechanical fixes fail, consider trying a different brand or type of pod—some are formulated for lower temperatures or different water hardness levels. I once shifted to a hypoallergenic pod that dissolved better in my hard water area, reducing residues and improving cleaning performance. Check your water hardness and choose accordingly; info can be found at smart appliance reviews.
Perform Regular Maintenance and Deep Cleanings
Schedule monthly cleaning cycles with a dishwasher cleaner to remove mineral buildup and soap scum. Use an vinegar rinse or commercial cleaner by running an empty cycle. Also, periodically calibrate your dishwasher’s sensors if your model allows, ensuring the device recognizes water temperature and flow accurately. I set reminders for maintenance, which kept my dishwasher operating at peak efficiency.
Believing Bigger Is Always Better
Many assume that purchasing a larger or more feature-packed appliance guarantees better performance. However, this isn’t always true. Striking the right balance between size, capacity, and features is crucial. An oversized refrigerator, for example, can lead to increased energy consumption and inefficient cooling. Experts highlight that understanding your household’s actual needs is key to selecting appliances that perform optimally without waste. According to a recent 2025 appliance trend report, more efficient smaller models are gaining popularity precisely because they match real usage patterns better than oversized units.
The myth that smart appliances will fix all household issues
Many homeowners believe that integrating smart technology will automatically solve problems like inefficient workflows or frequent breakdowns. In reality, smart appliances require proper setup, maintenance, and understanding of their limitations. For example, outdated Wi-Fi firmware or misconfigured settings can lead to connectivity issues, undermining convenience. Plus, over-reliance on automation without manual checks can cause complacency—leading to overlooked maintenance needs. Industry experts warn that neglecting regular updates and troubleshooting can turn high-tech appliances into troublemakers rather than helpers. Visiting this comprehensive guide can help you maximize your device’s potential.
Advanced Mistake: Overlooking Energy Efficiency Labels and Settings
Many consumers focus solely on the appliance’s capabilities or brand reputation, neglecting energy efficiency ratings. Choosing models without consulting their energy labels can result in higher utility bills and environmental impact. For instance, a top-rated washing machine might have multiple cycles designed for delicate or heavy-duty loads, but if you frequently select the highest energy-consuming settings, you negate any efficiency benefits. Remember, according to a study by the Environmental Research Commission, properly utilizing energy labels and settings can reduce household energy use by up to 30%. Regularly reviewing and adjusting your appliance settings ensures you’re getting the most from your investment.
Additionally, many users overlook the importance of maintaining components like filters and condenser coils, which directly affect efficiency. Regular cleaning, as discussed in this article, can dramatically improve appliance longevity and performance.
Have you ever fallen into this trap? Let me know in the comments. Remember, understanding these nuances can help you make smarter choices and get the most out of your home appliances, leading to greater savings and fewer headaches in the long run.
Maintaining your smart home appliances requires more than just occasional cleaning—it involves investing in the right tools and following precise methods to ensure longevity and optimal performance. Personally, I rely on specific equipment that makes troubleshooting and routine maintenance much easier, saving me time and money in the long run. If you’re aiming to keep your dishwasher, washing machine, or refrigerator functioning smoothly over years, adopting these tools and practices is essential.
Invest in a Digital Infrared Thermometer
One of my favorite tools is a digital infrared thermometer. It’s invaluable for checking water and air temperatures quickly without waiting for cycle completion. I use it regularly to verify my dishwasher’s water temperature, ensuring it hits at least 120°F, which is crucial for proper detergent dissolution, especially with smart pods. Consistently measuring temperatures helps me identify issues like faulty water heaters or temperature sensors early, before they cause significant problems.
Use a Quality Multimeter for Electrical Checks
Prevent costly repairs by having a reliable multimeter on hand. I use mine to test components like heating elements, sensors, and switches. This is particularly useful when diagnosing an appliance that’s not heating correctly or has inconsistent performance. For instance, if your fridge isn’t maintaining temperature, checking the compressor’s electrical components can pinpoint whether the issue stems from an electrical fault or a mechanical failure, allowing for targeted repairs instead of unnecessary replacements. Industry standards, such as those outlined in this guide, recommend regular electrical diagnostics for long-term appliance health.
Maintain Your Equipment with Sensor Cleaning Tools
Most smart appliances depend heavily on precise sensors—temperature sensors, water level sensors, and flow sensors. Dust and mineral buildup can impair their accuracy over time. I recommend investing in small, soft-bristled brushes and compressed air canisters to clean these sensors periodically. A quick brush-down or air blast now and then prevents misreads that could trigger inefficient cycles or false alerts. For example, cleaning your refrigerator’s sensor with a gentle brush helps ensure temperature readings stay accurate, prolonging its lifespan and energy efficiency.
Establish Routine Software Updates and Remote Monitoring
Beyond physical tools, software plays a significant role in maintenance. Connecting your appliances to apps that provide real-time alerts helps catch issues early. I make it a habit to check for firmware updates monthly—most smart appliances have a dedicated app with update notifications. For example, I use the app for my smart washing machine to monitor cycle status remotely, ensuring I can intervene if a cycle hasn’t started or if an error occurs. As I learned from this comprehensive guide, keeping software up-to-date boosts performance and security, extending your device’s usable life.
Predicting Future Trends and Automation in Maintenance
Looking ahead, the integration of AI and IoT will make appliance maintenance even more proactive. Machines will self-diagnose issues and suggest specific fixes—imagine your fridge alerting you to a clogged defrost drain before it causes a leak or your washer recommending a sensor cleaning cycle based on detected performance decline. Embracing these technologies now not only reduces downtime but also enhances safety and efficiency.
How do I keep my appliances working seamlessly over time?
The key is to combine the right tools with consistent, proactive maintenance routines. Incorporate temperature checks with an infrared thermometer, conduct electrical diagnostics using a multimeter, and keep sensors clean with gentle brushes. Additionally, leveraging smart monitoring through dedicated apps allows real-time insights, helping you address issues before they escalate. Try implementing one of these advanced tips today—like scheduling regular firmware updates or sensor cleanings—and enjoy appliances that perform reliably year after year.
What I Wish I Knew When I First Faced Dishwasher Disasters
Discovering that my smart dishwasher’s pods refused to dissolve was a lightbulb moment. I realized that even state-of-the-art appliances require understanding and proper maintenance. Sometimes, less obvious issues like water temperature or filter clogs hold the key to flawless cleaning. Embracing these lessons transformed my approach and saved me money and frustration.
Tools That Turn Maintenance Into a Breeze
Investing in a digital infrared thermometer changed the game, allowing me to quickly verify water temp without guesswork. Pairing this with a quality multimeter helped diagnose electrical hiccups, preventing costly repairs. Regular sensor cleaning with soft brushes kept performance sharp, proving that the right tools are the backbone of appliance longevity.
Your Next Step Toward Appliance Confidence
Don’t wait for issues to become full-blown problems. Schedule routine maintenance, stay informed through reliable sources, and leverage smart monitoring apps. Small proactive actions, like firmware updates and sensor checks, can extend your appliance’s life and ensure consistently sparkling results. Take charge today and enjoy the peace of mind that comes with mastery over your home appliances.