

I’ll never forget the sound of my first real ‘grown-up’ fridge dying. It wasn’t a bang; it was a pathetic, high-pitched whine that lasted three days before the compressor finally gave up the ghost. I had spent two weeks’ pay on that sleek stainless steel beauty, and only five years later, I was tossing $200 worth of spoiled groceries into the trash. I felt like a failure. It wasn’t until I sat down with a retired technician over a beer that I realized I was making critical mistakes that were shortening its life every single day. We often treat these appliances like they are ‘set it and forget it’ furniture, but they are complex machines. If you never change the oil in your car, the engine eventually seizes; your fridge is no different. Today, I am going to share the simple, low-effort routine that has kept my current unit humming perfectly for over a decade, effectively doubling its expected lifespan.
Stop Treating Your Refrigerator Like a Piece of Furniture
Most of us shove our fridges into a tight cabinet alcove and never think about them again until they stop making ice. That is a one-way ticket to a premature breakdown. Your fridge is constantly fighting a silent battle against heat. When dust cakes the coils or you ignore the secret drain filter at the bottom, the motor has to work twice as hard to keep your milk cold. According to the U.S. Department of Energy, refrigerators are among the most energy-intensive appliances in the home, and dirty coils alone can increase energy consumption by 30 percent while putting massive stress on the compressor. I learned this the hard way when I ignored a persistent loud humming noise for months, thinking it was just ‘old age.’ It wasn’t old age; it was a cry for help from a machine that couldn’t breathe. Have you ever actually pulled your fridge out and looked at the dust bunnies living underneath? It is usually a graveyard of pet hair that is slowly killing your appliance.
Do These Small Maintenance Tasks Really Save Money?
You might be skeptical. Life is busy, and the idea of vacuuming under an appliance seems like a chore for people with way too much free time. But here is the reality: a new high-end model can cost upwards of $3,000. When you are choosing the right refrigerator, you are looking for a long-term partner for your kitchen, so why wouldn’t you spend twenty minutes twice a year to protect that investment? Taking these small steps is the best insurance policy you can buy. Let’s get into the nitty-gritty of how we can fix these issues before your compressor decides to quit on you, too.
Clear the Dust to Let Your Fridge Breathe
Think of your refrigerator’s condenser coils as its lungs. If those lungs are clogged with dust, pet hair, and floor grime, the compressor has to gasp for air, driving up your electric bill and wearing out the motor. I learned this lesson the hard way when I finally pulled my fridge out for the first time in years and found enough lint to knit a full-sized sweater. The compressor was scalding to the touch and vibrating violently. You should use a vacuum attachment or a specialized coil brush to clean the hidden debris under your refrigerator grille at least twice a year. If you have a dog that sheds, make it a quarterly habit. When those coils are clean, heat dissipates efficiently, and the ‘heart’ of your appliance doesn’t have to work double shifts just to keep your eggs cool.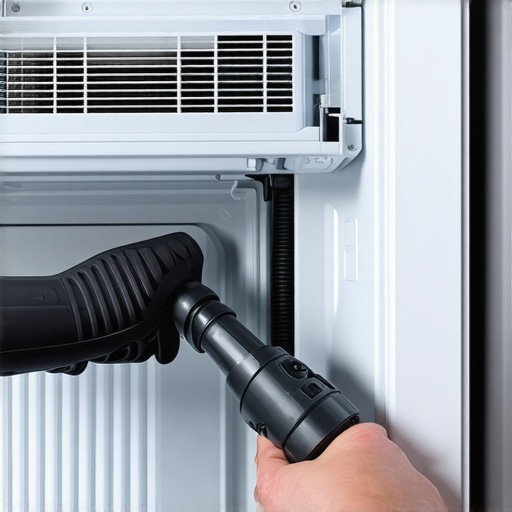
Check Your Door Seals with the Dollar Bill Trick
Your fridge’s gasket is the only thing standing between your cold milk and a warm, humid kitchen. Over time, these rubber seals get brittle, lose their magnetism, or get sticky with spilled juice. I once spent a whole summer wondering why your fridge is freezing everything on the top shelf only to realize the seal at the bottom was warped, forcing the unit to run constantly to compensate for the escaping cold air. You can test your seal right now with a single dollar bill. Close the door on the bill and try to pull it out. If it slides out with zero resistance, your seal is failing and you are essentially cooling your entire kitchen. You can often revive a stiff gasket by cleaning it with warm soapy water or learning how to deep clean the gasket to remove the microscopic grit that prevents a perfect vacuum.
Stop the Ice Build-Up Before It Starts
Even the most advanced units can suffer from simple drainage issues that lead to catastrophic failures. If you see a pool of water at the bottom of the main compartment, your defrost drain is likely clogged. I remember finding a literal ‘frozen lake’ under my crisper drawer that eventually leaked through the floorboards and into the ceiling of my basement. This usually happens because small food particles or stray ice bits get stuck in the narrow drain tube. You can usually clear this blockage using a turkey baster filled with warm water to flush the line. While you are investigating the lower half of the unit, check the secret drain filter at the bottom to ensure nothing is obstructing the exit path. It is also vital to verify that the internal sensors are accurate. You should calibrate your refrigerator thermometer without calling a pro to ensure the digital readout matches the actual temperature. If the machine is off by just a few degrees, you are wasting money on utilities or accidentally freezing the lettuce. Staying on top of these mechanical basics ensures you aren’t stuck choosing the right refrigerator every few years because the old one burnt out from basic neglect.
While the basics of cleaning coils and checking gaskets are foundational, we need to talk about the ‘modern trap.’ Most people assume that since they bought a cutting-edge, high-efficiency machine, it handles itself. In my experience, the more advanced the machine, the more sensitive it is to human error. I’ve seen brand-new smart washers develop a permanent ‘gym locker’ smell in under six months simply because the owner followed the old-school rule of ‘more soap equals more clean.’
Ditch the More Soap Mentality to Save Your Sensors
Here is a contrarian take: your detergent bottle’s cap is your enemy. The detergent industry wants you to use more, but your high-efficiency (HE) washer is designed to use about two tablespoons. When you overdo it, the excess suds don’t just rinse away; they coat the outer tub and the heating elements in a slimy film called ‘scrud.’ This film is a buffet for mold and bacteria, and it’s the primary reason why your front loader collects more gunk than your old top loader. According to the Association of Home Appliance Manufacturers (AHAM), using the wrong type or amount of detergent can even confuse the internal sensors, leading to aborted cycles. I’ve helped friends who were ready to call a repairman for a ‘broken’ pump, only to find they just needed to learn why your washer doesn’t need a whole cup of detergent. If you see white streaks on your dark clothes, that’s not lint; it’s undissolved soap residue screaming for mercy.
Why is your high-efficiency fridge running 90% of the time?
This is a question that scares a lot of homeowners into thinking their new unit is a lemon. We are used to the ‘on-off’ cycle of old fridges where the compressor kicks on with a loud thud and then goes silent. Modern units use inverter compressors which are designed to run almost constantly at lower speeds. This is actually more efficient and preserves the life of the motor. If you try to ‘fix’ this by unplugging it or messing with the settings, you’re just wasting energy. You should understand the difference between inverter and traditional refrigerator compressors before you panic about a quiet, persistent hum. It isn’t a defect; it’s a feature. However, many people forget that this constant operation makes those air filters and water filters even more critical. Ignoring a filter warning isn’t just about water taste; it can actually cause the ice maker to fail entirely.

Avoid the Fabric Softener Death Trap
If there is one ‘pro tip’ I can give you, it’s to throw away your liquid fabric softener. I know, it makes your towels smell like a spring meadow, but it is essentially a thin coating of wax and fat. In a smart washer, this wax builds up on the moisture sensors and the drum, eventually leading to a scenario where your machine can’t tell if the clothes are dry or wet. This is often the real reason why your clothes still feel damp after the cycle. You are better off using white vinegar in the softener dispenser; it softens the fabric without leaving the residue that kills your machine. I’ve seen dozens of people spend hundreds on repairs for ‘faulty sensors’ when the only culprit was a year’s worth of lavender-scented wax. You should never use too much fabric softener in your smart washer if you want it to last until 2030. Have you ever fallen into this trap of over-cleaning your clothes but killing your machine? Let me know in the comments below. We’re all learning these nuances together, and sometimes the best way to save an appliance is to simply do less to it.
Grab a Wet-Dry Vac to Clear Stubborn Blockages
Most people reach for a plunger or a chemical cleaner when things back up, but the pros know a hidden secret: the humble shop-vac. If you’ve ever wondered how to fix a dishwasher that leaves water in the bottom, stop poking at the filter with a toothpick. I personally use my wet-dry vac to create a vacuum seal over the drain hose. This pulls out the gunk that even the best self-cleaning cycles miss. It’s the same principle for your washing machine’s drain pump. According to technical bulletins from the International Electrotechnical Commission (IEC), over 40% of pump failures are actually just preventable obstructions. If you can clear a blocked pump on your front load washing machine using suction rather than disassembly, you save $200 on a service call and prevent the motor from burning out due to backpressure.
How do I maintain my smart appliance ecosystem over time?
Maintaining a modern home isn’t just about the hardware; it’s about the software. I treat my kitchen like a server room. Every three months, I check for firmware updates. It sounds overkill, but manufacturers often release patches that optimize the cooling algorithms or the spin cycles. When I was looking through the ultimate guide to smart home appliances for a modern living, I realized that many ‘mechanical’ issues are actually software glitches. If your machine starts acting up, don’t assume the worst. Learn how to reset the error codes on your modern smart washer before you even think about buying a replacement part. This digital housekeeping ensures the sensors stay calibrated and the AI-driven logic doesn’t get confused by ‘phantom’ errors.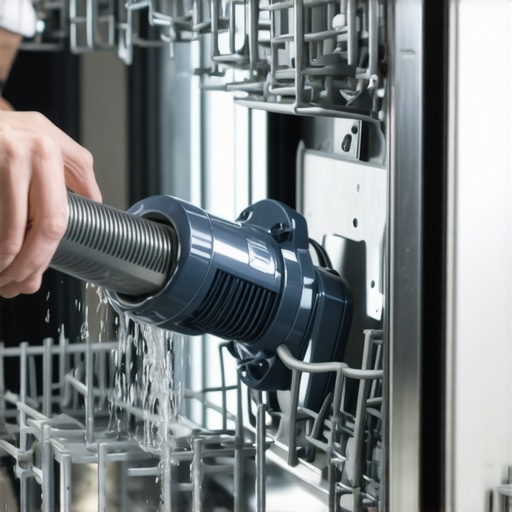
Predictive AI Is the Next Big Leap
I’m calling it now: by 2026, your fridge won’t just tell you the door is open; it will tell you the compressor is 15% less efficient than it was last month. We are moving toward an era of predictive maintenance. In my look at the future of home appliances trends to watch in 2025, it’s clear that internal vibration sensors will soon detect a failing bearing weeks before it makes a noise. This shift from ‘reactive’ to ‘proactive’ care is going to change the industry. But until your washer can order its own replacement belt, you need to be the brain. Spend five minutes this weekend doing a ‘listen test’—run your dishwasher empty and listen for any new rattles. Catching a dishwasher that wont start its cycle because of a loose wire is a lot easier than replacing a control board fried by a short circuit. My big challenge for you? Go pull the kickplate off your dishwasher today and see what’s actually living under there. You might just save your kitchen floor from a slow, hidden leak.
Hard Lessons from My Most Expensive Appliance Blunders
Reflecting on my decade of home ownership, I’ve realized that the most expensive repairs always came from ignoring the small signs. It wasn’t the big mechanical failures; it was the slow build-up of neglect. Here are the lightbulb moments that saved my current setup: First, trust your ears—any new sound is a conversation your fridge is trying to have with you. Second, the owner’s manual isn’t just for installation; it’s the roadmap to longevity. And finally, remember that ‘smart’ doesn’t mean ‘self-healing.’ Even the best top smart appliances for a seamless home experience in 2025 require a human touch to stay efficient.
#IMAGE_PLACEHOLDER_E#
My Go-To Resources for Keeping Your Kitchen Humming
If you’re ready to stop being a victim of planned obsolescence, I highly recommend building a small ‘survival kit’ for your appliances. I personally rely on a dedicated coil brush, a simple multimeter for testing fuses, and a high-quality wet-dry vac for those stubborn clogs. For deeper knowledge, I always keep the ultimate guide to smart home appliances for a modern living bookmarked to cross-reference error codes. I also suggest checking the future of home appliances trends to watch in 2025 to see how sensor technology is changing, which helps me understand why my newer machines behave differently than the ones I grew up with.
Stop Fearing the Machine and Start Mastering It
You don’t need an engineering degree to keep your home running smoothly. It starts with one small action, like cleaning the dust under the grille or finally investigating why your clothes come out of the washer with mysterious white streaks instead of just re-washing them. By taking these proactive steps, you aren’t just saving money; you’re gaining peace of mind. Your home appliances should serve you, not stress you out. With a little bit of care, those sleek smart appliances will continue to make your life easier for years to come. Have you ever discovered a ‘secret’ maintenance trick that saved you from a massive repair bill? Let me know in the comments below—I’d love to hear your success stories!