
I remember the moment clearly. I was standing in my laundry room, frustrated because my dryer wasn’t drying clothes as quickly as it used to. After a quick online search, I found out the vent was clogged, but what struck me most was the realization that many home appliances, including my refrigerator and dishwasher, could suffer from similar neglect. But the biggest eye-opener? My air conditioning unit’s condenser coil was probably filthy too, quietly draining efficiency and pushing up my utility bills. And honestly, I had no clue how to clean it myself without calling in an expensive technician.
So, I decided to dive into the world of DIY appliance maintenance. What I discovered was empowering — cleaning a condenser coil isn’t rocket science. It just takes a bit of know-how and some simple tools. Today, I want to share with you how I managed to clean my dirty condenser coil without calling a pro, saving time and money. This step-by-step guide will demystify the process, so you can keep your appliances running smoothly and efficiently.
Why You Should Wash Your Condenser Coil Regularly
Many folks overlook this critical component, assuming it’s part of the appliance that doesn’t need attention. But in reality, a dirty condenser coil can seriously impact appliance performance. When dust, dirt, and debris accumulate, they act like a blanket, trapping heat and making your appliance work harder. This not only reduces efficiency but can also shorten its lifespan. For example, the U.S. Department of Energy points out that a clean condenser coil can improve air conditioner efficiency by up to 30%, leading to noticeable savings on your energy bill.
The key is regular maintenance, and luckily, it’s a straightforward task you can handle yourself. Over time, I learned that neglect in this area can lead to unnecessary repairs or replacements — and those costs add up fast. Plus, maintaining your condenser coil is good for the environment, reducing your carbon footprint by lowering energy consumption.
Have you ever faced a sudden spike in your energy bills and wondered if your appliances are working overtime? If so, cleaning your condenser coil might be the easiest fix. Let’s get into how you can do it properly, step by step.
Is a DIY condenser coil cleaning actually worth the effort?
At first, I was skeptical. I worried I might damage something or that I’d need special tools. Early on, I made the mistake of using a regular brush and not disconnecting the appliance properly, which only made the process more complicated. But once I followed a proper method and took my time, I realized it’s a simple, effective way to extend the life of my appliances and avoid costly repairs. If you’d like to see more DIY tips for home appliances, you can check out this comprehensive guide on how to [clean your dishwasher’s spray arms without a plumber](https://smartappliancereview.com/how-to-clean-your-dishwashers-spray-arms-without-a-plumber). It’s all about empowering yourself to tackle common issues with confidence, saving money, and keeping your home running smoothly.
Prepare to Dive In
Pull the appliance out from its spot so you can access the coil—think of it like pulling back a curtain to reveal the stage. Turn off the power at the circuit breaker to avoid shocks, just as you’d turn off a garden hose before cleaning the nozzles. Wear gloves and a dust mask for safety, especially if your coil is heavily coated with dirt. Once prepared, remove any vent covers or panels that hide the coil; use a screwdriver if needed, keeping track of screws so you won’t lose them. This initial step sets the stage for an efficient cleaning session.
Clearing the Debris
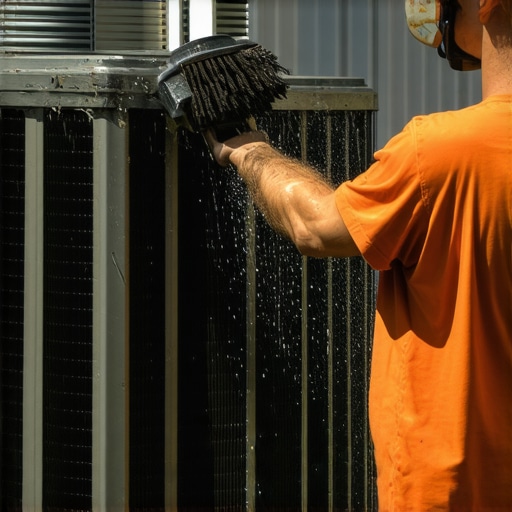
Start by using a handheld brush or a coil cleaning brush (a long, narrow brush that fits into tight spaces) to loosen the dirt—imagine brushing out the lint from a sweater. Gently scrub along the fins to dislodge dust, dirt, and pet hair—don’t push too hard to avoid bending the fins. For stubborn grime, a vacuum cleaner with a brush attachment works wonders; think of it as vacuuming dust from a delicate piece of fabric. Work systematically across the entire coil until the surface appears clean.
Using a Cleaning Solution
If your coil is particularly dirty, apply a coil cleaning spray (available at hardware stores). Spray it evenly along the fins, ensuring coverage of all affected areas—like icing a cake, the more uniformly you apply, the better the result. Let the solution sit for 10-15 minutes to loosen grime. During this waiting period, I once applied the spray to my air conditioner’s coil and watched as the dirt started to break apart, making the next step much easier.
Rinsing and Final Checks
After the solution has loosened the dirt, rinse the coil with a garden hose set to gentle spray. Aim the water along the fins to wash away dislodged debris—imagine watering plants carefully without disturbing their roots. Avoid using high-pressure water directly against the fins, as this can bend them out of shape. When rinsing, make sure no soap or cleaning solution remains—residue can insulate the coil, reducing heat transfer. Once rinsed, dry the area with a clean cloth or allow it to air dry. Reassemble any panels, restore power, and push the appliance back into its place.
Need a Little Extra Help
If you find the process daunting, or if the coil is difficult to access, consider reading detailed tips from a trusted resource on how to clean your dishwasher’s spray arms without a plumber. Remember, regular maintenance keeps your appliances running efficiently, saving you money in the long run and extending their lifespan. With a little practice, cleaning a condenser coil becomes a straightforward task that you can confidently handle yourself, much like the simple steps in manual draining of a washer.
Many homeowners believe they understand the basic maintenance needs of their appliances, but there are hidden nuances that can lead to costly mistakes. For instance, a widespread myth is that regular cleaning alone extends an appliance’s lifespan; however, neglecting specific components or misusing features can cause damage over time. A critical error many make involves the drain pump in washing machines: assuming it can handle all debris without cleaning or inspection, which isn’t true. Over time, lint, hair, and soap scum accumulate, leading to clogs or failures—something that might seem minor but has major consequences. Properly maintaining these parts can prevent the need for expensive repairs; you can learn more about flushing out residual debris by visiting this guide on manually draining your washer.Maintaining your home appliances isn’t just about fixing problems as they arise; it’s about investing in the right tools and adopting effective methods that ensure longevity and optimal performance. One of my favorite tools is a digital infrared thermometer. I personally use the Fluke 62 MAX, which provides accurate surface temperature readings and helps me identify potential issues with refrigerator coils or oven heating elements before they fail. Using this thermometer regularly allows me to detect abnormal heat variations, preventing costly repairs and keeping everything running efficiently. For example, monitoring the compressor temperature of my refrigerator with this device helped me notice it was running hotter than normal, prompting a cleaning of the condenser coils, which improved performance and energy savings.
In addition to tools, software plays an increasingly important role. Smart appliances often come with companion apps that monitor performance and alert you to issues. Connecting my smart dishwasher to Alexa has been a game-changer, allowing me to receive notifications about cycle completion or potential problems directly on my phone, making maintenance proactive rather than reactive. As technology advances, I predict that integration will become even more seamless, with AI diagnosing issues and suggesting fixes in real-time, much like current predictive maintenance solutions used in industrial settings.
When it comes to long-term results, consistency is key. Scheduling a quarterly maintenance routine, such as inspecting filters, cleaning vents, or running cleaning cycles, keeps appliances functioning at their best. For refrigerators, regularly checking and replacing door seals with a silicone gasket lubricant prevents cool air leaks and maintains efficiency. Remember, neglecting small issues can lead to significant damage over time, so staying proactive is the best strategy.
Scaling your maintenance routine as your household grows can seem daunting, but it’s manageable with the right approach. Investing in multi-purpose tools like a cordless drill with precision screwdriver bits can save time when opening panels or replacing parts, especially if you have multiple appliances to service. Additionally, documenting your maintenance schedule and keeping a log helps track recurring issues and plan repairs before they become costly. For appliances with sophisticated features, consulting manufacturer manuals or professional guides can provide valuable insights—one example is the detailed diagnostics for smart refrigerators found in [technical documentation](https://smartappliancereview.com/the-best-smart-fridges-with-internal-cameras-for-shopping).
So, I encourage you to try out a digital infrared thermometer today. Not only does it empower you to diagnose potential issues early, but it also provides peace of mind knowing you’re actively maintaining your appliances. Regularly investing in the right tools and adopting a disciplined routine can dramatically extend the lifespan of your home gadgets, saving you money and stress in the long run.
Lessons That Surprise Even the Most Experienced Homeowners
One thing I realized early on is that appliances are more intuitive than most manuals suggest. My biggest lightbulb moment was understanding that a seemingly simple task like cleaning the condenser coil is intertwined with the overall efficiency of my entire home system, not just a single device. It’s easy to overlook small components, but neglecting them can quietly chip away at your savings and the lifespan of your appliances. Learning through trial and error taught me that patience and meticulousness often trump expensive repairs. For instance, I once rushed through cleaning my dishwasher spray arms, only to find stubborn grime lingering, which compromised dish cleanliness. Taking time to learn and refine my approach has been a game-changer in preventing breakdowns ahead of time.
Furthermore, I discovered that becoming familiar with common myths about appliances can save you from costly mistakes. For example, believing that running dryers or dishwashers on maximum cycles always cleans better led me to unnecessary energy use. Instead, understanding optimal settings improved performance and extended the appliance’s life. These lessons, though simple in hindsight, significantly shifted my perspective from reactive fixes to proactive maintenance. Now, I’m more confident tackling issues myself, empowered by knowledge I wish I had earlier.
Tools and Guides That Elevate Your Maintenance Game
Over years of experience, I’ve curated a set of tools and resources that keep my appliances functioning smoothly. A digital infrared thermometer, like the Fluke 62 MAX, helps me spot irregularities in appliance temperatures early, preventing failures before they escalate. I also rely on detailed manufacturer guides and trusted DIY sites such as the comprehensive tutorials on cleaning dishwasher spray arms to refine my methods. These resources give me confidence in handling tricky tasks without the need for professional help.
Additionally, I use smart technology integration, like connecting my appliances to apps for real-time status updates. It’s as though I have a maintenance assistant reminding me of upcoming tasks or alerting to issues early. Combining these tools and guides has saved me hundreds, proving that investing in a few quality devices and trustworthy info is a smart choice for any homeowner.
Your Next Step Toward a Smoother Home Experience
Embracing maintenance as an ongoing, manageable routine can transform your home life. Whether it’s setting quarterly reminders or investing in specific tools, taking deliberate action today sets a foundation for a more efficient, cost-effective household. Remember, you don’t need to be a technician to keep your appliances singing; it’s about thoughtful, consistent care. I encourage you to start small but think big—your future self will thank you for the effort.
What’s one appliance maintenance habit you’re excited to try or improve? Share your progress or questions below—let’s keep the momentum going!