
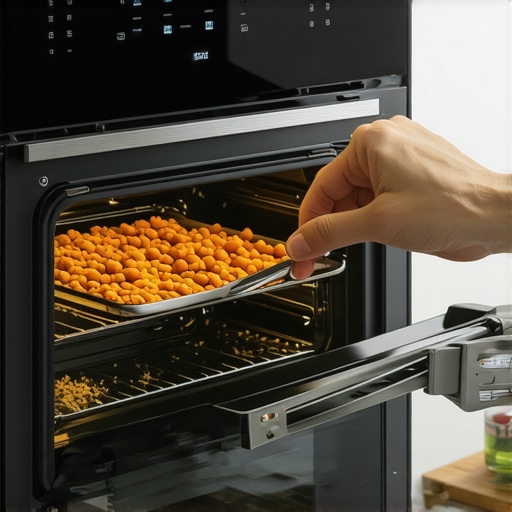
I was standing in my kitchen last Tuesday, feeling pretty proud of my high-tech setup, when the afternoon sun hit my oven door at just the right angle. There it was: a nasty, yellowish drip of ancient turkey fat perfectly preserved between the two panes of glass. My oven is smart enough to tell me when my roast is at 165 degrees, yet it looked like it belonged in a haunted house. I tried to ignore it, but once you see that ‘ghost debris,’ you can’t unsee it. It felt like my kitchen was lying to me—sleek on the outside, but hiding a messy secret within. Today, I am going to show you exactly how to get in there and fix it without calling a professional or breaking the glass.
The Hidden Mess That Makes Your Kitchen Look Old
It is a weird irony of the modern home. We spend time learning the best way to voice control your kitchen from the living room, yet we are often defeated by a bit of spilled soup. That gap between the glass panels in your oven door is a magnet for crumbs and grease. If you have ever wondered why your smart oven takes longer to preheat than your old one, you might be surprised to find that visibility plays a role in how we use them. According to home maintenance experts at Consumer Reports, opening the oven door to check on food can cause the internal temperature to drop by as much as 25 degrees, making a clear window essential for energy efficiency. When I first tried to fix this, I made a classic rookie mistake: I tried to shove a coat hanger with a wet wipe up through the bottom vents. All I did was get the wipe stuck and leave a massive streak that looked even worse. It was a humbling moment for someone who prides themselves on knowing their way around a kitchen. Since then, I’ve learned that while we focus on things like how to recalibrate your oven temperature when it is burning your cakes, the physical hygiene of the unit is just as vital for that ‘new home’ feel.
Is poking around the glass panels actually worth the risk?
I get the hesitation. These are expensive machines. You might worry that you’ll crack the seal or how to fix a smart oven that won’t reach the target temperature if you start unscrewing things. But here is the truth: that debris isn’t just an eyesore; it can actually start to smell if it gets hot enough. Have you ever noticed a faint ‘old grease’ scent even after a self-clean cycle? That is usually the culprit hiding in the door. I promise that if you follow the right steps, you won’t ruin your warranty or your afternoon. Have you ever noticed a drip inside your door that drives you absolutely crazy? Drop a comment and let me know—I need to know I’m not the only one who stares at these things!
Grab These Three Simple Tools First
To get started, you do not need a fancy technician kit. You need a thin, flexible yardstick or a long, slender coat hanger, a high-quality microfiber cloth, and some glass cleaner. I personally swear by a 50/50 mix of water and white vinegar. Just as you might learn the truth about using vinegar in your high-efficiency washing machine, it is equally effective for cutting through baked-on oven grease without leaving streaks. You will also want a few rubber bands to secure the cloth to your ‘wand.’ Think of this like preparing to perform surgery on a very expensive patient; having everything within arm’s reach prevents you from leaving the door half-open while you hunt for supplies.
Find the Secret Entryway at the Base
Most modern ovens, even those high-end models that look like they are sealed tighter than a submarine, have ventilation slots at the bottom or top of the door. These slots allow air to circulate and keep the outer glass cool to the touch while you are baking. Open your oven door fully and look at the bottom edge. You will see several rectangular openings. This is your way in. It is a bit like finding the secret to cleaning a front-load washers hidden filter—it is hiding in plain sight, but most people never think to look there. If your model has a decorative trim, you might need to pop that off first, but in 90% of cases, the ‘mail slots’ are ready and waiting.
Thread the Needle with Your DIY Wand
Wrap your microfiber cloth tightly around the end of your yardstick and secure it with rubber bands. You want it snug; the last thing you want is the cloth falling off and getting trapped between the panes, turning a cleaning job into a rescue mission. I remember the first time I tried this: I used a paper towel and a ruler. Halfway through, the paper towel shredded and I spent forty minutes fishing out white confetti with a pair of tweezers. It was a mess. Now, I dampen the microfiber with cleaner—don’t soak it, as excess liquid will just create new drips—and carefully slide it into the slot. Move the stick in a slow, rhythmic ‘Z’ pattern from top to bottom. It is much like the best way to clean a stainless steel fridge without scratching it; gentle pressure and the right material do all the heavy lifting.
Deal with Stubborn Grease Without Total Disassembly
If those yellowish drips are particularly stubborn, do not force the stick. Instead, let the damp cloth rest against the spot for about sixty seconds to soften the grime. This patience is key for all home maintenance, whether you are wondering how to fix a leaky dishwasher door seal in under ten minutes or scrubbing a stove. If the ‘wand’ method just isn’t reaching a specific corner, check your manual to see if the inner glass panel is designed to slide out. Some brands have two small tabs at the top that, when pressed, allow the inner pane to pop right out. This makes it as easy to clean as a standard window, though you must be extremely careful to place it on a soft towel while you work to avoid any structural stress on the tempered glass.I was standing in my kitchen last Tuesday, feeling pretty proud of my high-tech setup, when the afternoon sun hit my oven door at just the right angle. There it was: a nasty, yellowish drip of ancient turkey fat perfectly preserved between the two panes of glass. My oven is smart enough to tell me when my roast is at 165 degrees, yet it looked like it belonged in a haunted house. I tried to ignore it, but once you see that ‘ghost debris,’ you can’t unsee it. It felt like my kitchen was lying to me—sleek on the outside, but hiding a messy secret within. Today, I am going to show you exactly how to get in there and fix it without calling a professional or breaking the glass.
The Hidden Mess That Makes Your Kitchen Look Old
It is a weird irony of the modern home. We spend time learning the best way to voice control your kitchen from the living room, yet we are often defeated by a bit of spilled soup. That gap between the glass panels in your oven door is a magnet for crumbs and grease. If you have ever wondered why your smart oven takes longer to preheat than your old one, you might be surprised to find that visibility plays a role in how we use them. According to home maintenance experts at Consumer Reports, opening the oven door to check on food can cause the internal temperature to drop by as much as 25 degrees, making a clear window essential for energy efficiency. When I first tried to fix this, I made a classic rookie mistake: I tried to shove a coat hanger with a wet wipe up through the bottom vents. All I did was get the wipe stuck and leave a massive streak that looked even worse. It was a humbling moment for someone who prides themselves on knowing their way around a kitchen. Since then, I’ve learned that while we focus on things like how to recalibrate your oven temperature when it is burning your cakes, the physical hygiene of the unit is just as vital for that ‘new home’ feel.
Is poking around the glass panels actually worth the risk?
I get the hesitation. These are expensive machines. You might worry that you’ll crack the seal or how to fix a smart oven that won’t reach the target temperature if you start unscrewing things. But here is the truth: that debris isn’t just an eyesore; it can actually start to smell if it gets hot enough. Have you ever noticed a faint ‘old grease’ scent even after a self-clean cycle? That is usually the culprit hiding in the door. I promise that if you follow the right steps, you won’t ruin your warranty or your afternoon. Have you ever noticed a drip inside your door that drives you absolutely crazy? Drop a comment and let me know—I need to know I’m not the only one who stares at these things!
Grab These Three Simple Tools First
To get started, you do not need a fancy technician kit. You need a thin, flexible yardstick or a long, slender coat hanger, a high-quality microfiber cloth, and some glass cleaner. I personally swear by a 50/50 mix of water and white vinegar. Just as you might learn the truth about using vinegar in your high-efficiency washing machine, it is equally effective for cutting through baked-on oven grease without leaving streaks. You will also want a few rubber bands to secure the cloth to your ‘wand.’ Think of this like preparing to perform surgery on a very expensive patient; having everything within arm’s reach prevents you from leaving the door half-open while you hunt for supplies.
Find the Secret Entryway at the Base
Most modern ovens, even those high-end models that look like they are sealed tighter than a submarine, have ventilation slots at the bottom or top of the door. These slots allow air to circulate and keep the outer glass cool to the touch while you are baking. Open your oven door fully and look at the bottom edge. You will see several rectangular openings. This is your way in. It is a bit like finding the secret to cleaning a front-load washers hidden filter—it is hiding in plain sight, but most people never think to look there. If your model has a decorative trim, you might need to pop that off first, but in 90% of cases, the ‘mail slots’ are ready and waiting.
Thread the Needle with Your DIY Wand
Wrap your microfiber cloth tightly around the end of your yardstick and secure it with rubber bands. You want it snug; the last thing you want is the cloth falling off and getting trapped between the panes, turning a cleaning job into a rescue mission. I remember the first time I tried this: I used a paper towel and a ruler. Halfway through, the paper towel shredded and I spent forty minutes fishing out white confetti with a pair of tweezers. It was a mess. Now, I dampen the microfiber with cleaner—don’t soak it, as excess liquid will just create new drips—and carefully slide it into the slot. Move the stick in a slow, rhythmic ‘Z’ pattern from top to bottom. It is much like the best way to clean a stainless steel fridge without scratching it; gentle pressure and the right material do all the heavy lifting.
Deal with Stubborn Grease Without Total Disassembly
If those yellowish drips are particularly stubborn, do not force the stick. Instead, let the damp cloth rest against the spot for about sixty seconds to soften the grime. This patience is key for all home maintenance, whether you are wondering how to fix a leaky dishwasher door seal in under ten minutes or scrubbing a stove. If the ‘wand’ method just isn’t reaching a specific corner, check your manual to see if the inner glass panel is designed to slide out. Some brands have two small tabs at the top that, when pressed, allow the inner pane to pop right out. This makes it as easy to clean as a standard window, though you must be extremely careful to place it on a soft towel while you work to avoid any structural stress on the tempered glass. While getting that glass clear is a huge win, I see people making a massive mistake right after: they decide to run a full self-clean cycle to ‘finish the job.’ Everyone tells you that the high heat of a self-clean cycle is the ultimate way to maintain your appliance, but in my experience, it is often a one-way ticket to a service call. The logic seems sound—incinerate the grease—but modern smart ovens are packed with sensitive electronics and Wi-Fi modules that do not always play nice with 900-degree temperatures.
Why the Self-Clean Button Might Be Your Oven’s Worst Enemy
In fact, many appliance repair specialists at Yale Appliance have noted that self-cleaning is a leading cause of blown thermal fuses and fried control boards in high-end units. When you push that button, you are essentially stress-testing the most expensive parts of your machine. If you have already been struggling with how to fix a smart oven that won’t reach the target temperature, a self-clean cycle might be the final blow to your heating element. It is far better to stick to the manual ‘wand’ method for the door and a gentle, vinegar-based scrub for the interior. Speaking of vinegar, just as we debate its use in laundry when looking at the truth about using vinegar in your high-efficiency washing machine, it is the safest bet for your oven’s delicate sensors too.
Is the extra heat from deep cleaning worth the repair risk?
It really isn’t, and here is the nuance most beginners miss: ‘smart’ doesn’t mean ‘invincible.’ These machines are more like computers that happen to bake cookies. When you spray cleaning fluid near those door vents I mentioned earlier, you aren’t just cleaning glass; you are risking a short circuit in the communication modules. If you’ve ever wondered how to stop your smart oven from dropping the wi-fi signal, look no further than moisture or excessive heat getting into the wrong places during a ‘deep clean.’
The Hidden Danger of Liquid Cleaners Near Vents
Here is the ‘oops’ factor I learned the hard way: never spray your cleaner directly onto the oven door. I used to do this thinking it would soak better, but the liquid gravity-feeds directly into those bottom vents and can pool around the internal wiring. This is a common trap that turns a simple aesthetic fix into a technical nightmare. Instead, always dampen your cloth first. This applies across the board, whether you are trying to figure out the best way to clean a stainless steel fridge without scratching it or wiping down a high-tech touchscreen interface. We often get so caught up in the ultimate guide to smart home appliances for a modern living that we forget these units require a gentler touch than the ‘dumb’ appliances our parents owned. Have you ever fallen into the ‘self-clean’ trap and ended up with a dead control panel? Let me know in the comments—I’d love to hear your horror stories (and how you fixed them)!It’s not just about the oven, though. Once I realized my ‘smart’ kitchen was actually a delicate ecosystem, I started looking at my other gadgets differently. For instance, I used to ignore those annoying firmware update pop-ups on my refrigerator screen, thinking they were just adding useless features. But ignoring them is like leaving the lint trap full in a dryer. You need to know how to update your smart fridge software without crashing the system because these patches often fix the very power-draw bugs that cause your Wi-Fi to drop or your ice maker to cycle too often. Software is the new ‘moving part’ in 2025, and keeping it current is as vital as oiling a hinge.
Stop Ignoring Those System Update Notifications
We often treat our appliances like heavy, indestructible blocks of metal, but we should treat them like smartphones with high-torque motors. If you find your laundry is taking forever, you might need to troubleshoot how to fix a washing machine that is stuck on the sensing cycle before the constant stopping and starting burns out the motor. This proactive mindset is what separates a kitchen that lasts twenty years from one that needs a full replacement in five. I’ve seen too many friends lose a $3,000 washer simply because they didn’t want to deal with a sensor calibration issue.
How do I maintain these high-tech machines over time?
The secret isn’t a magic chemical; it’s a regular schedule of clearing both digital and physical clutter. For your fridge, that means getting underneath the unit where the real work happens. I discovered that a thick layer of golden retriever fur on my condenser coils was forcing the compressor to work twice as hard, making it run hotter and louder. I learned how to clean a refrigerator condenser that is covered in pet hair using a specialized long-reach vacuum attachment—a $15 tool that probably saved me $500 in repair bills. According to the Master Samurai Tech appliance training resource, neglected condenser maintenance is the number one cause of premature compressor failure in modern linear-compressor units. If your fridge is humming louder than usual, it isn’t ‘just getting old’; it’s screaming for air.
Save Cash With Simple Tweaks
Beyond cleaning, you should be fine-tuning the internal logic of your home for maximum efficiency. You can actually see a dip in your monthly utility costs if you learn how to save money on your electric bill by tweaking your fridge settings. Small adjustments to the humidity control or the defrost timer can make a massive difference. Looking ahead, I predict we are moving toward a world where washing machines that save water will use AI to detect the exact mineral content of your water and adjust the detergent dose automatically. We are almost there. For now, my best advice is to stop treating maintenance as a ‘once a year’ chore. Go grab a flashlight, peek under your fridge, and if you see a wall of dust, vacuum it out today—your wallet will thank you later.
The Hardest Lessons Learned from My Near-Disaster with a Smart Oven
Looking back at that ‘ghost debris’ incident, I have realized that maintenance is about more than just aesthetics. Here are the lightbulb moments that changed how I treat my tech: First, microfiber is non-negotiable—paper towels are just a recipe for a shredded mess inside your glass. Second, steam is your friend, but liquid is your enemy; always dampen the cloth, never the appliance. Third, keeping the digital side clean is just as vital as the physical; if you have not figured out how to update your smart fridge software without crashing the system, your hardware is likely working harder than it needs to. Finally, the ‘wand’ method is a thousand times safer than disassembling the door, which can lead to stress fractures in the glass over time.
The Essential Toolkit for a Stress-Free Kitchen
You do not need a garage full of gear to keep your appliances in top shape, but a few specific items are game-changers. I swear by a standard wooden yardstick—it is more rigid than a coat hanger and gives you better leverage against those stubborn fat drips. For the digital side of things, I always keep a bookmark for the Master Samurai Tech resource; their deep dives into sensor logic helped me immensely when I had to troubleshoot how to fix a washing machine that is stuck on the sensing cycle without calling a pro. I also recommend a high-quality long-reach vacuum attachment, which is the only way to effectively tackle the pet hair that clogs your fridge’s cooling system.
Take Control of Your Kitchen Ecosystem
At the end of the day, your home is a sanctuary, not a source of stress. Whether you are following the ultimate guide to smart home appliances for a modern living or just trying to get through a Tuesday without the oven smelling like old grease, these small wins add up. When you clear that glass or update that firmware, you are not just ‘cleaning’—you are extending the life of your home’s most important tools. It is about making your space work for you, rather than you working for your space. Let us keep these machines running smooth so we can get back to what really matters: cooking great meals and enjoying our homes. Have you ever tried the yardstick trick only to have the cloth fall off inside the door? Let me know your best (or worst) DIY stories in the comments below!