
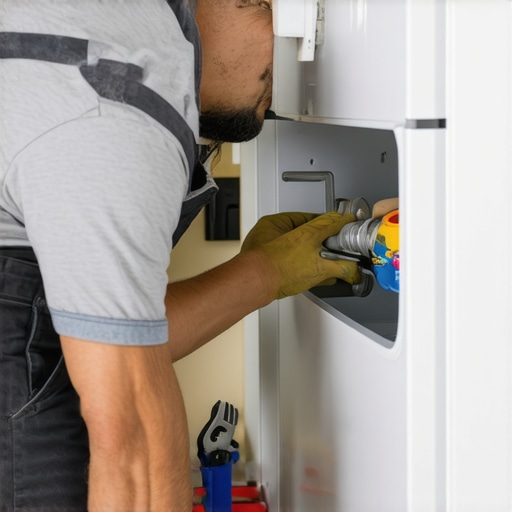
Ever felt that panic when you notice a puddle forming beneath your refrigerator? That sinking feeling that your kitchen is turning into a mini swimming pool because of a water leak? I’ve been there too. One afternoon, I opened my fridge to grab some cold water, only to find the floor soaked and a splotch of water pooling behind the unit. At first, I thought, “It’s just a minor issue.” But the sight of water creeping across the floor made me realize that a simple leak can turn into a costly repair if not addressed promptly.
Why Fixing That Water Line Quickly Matters
A leaking refrigerator water line isn’t just an inconvenience—it can lead to wood warping, mold growth, and increased utility bills. Often, the culprit is a loose or cracked connection that can be fixed swiftly, saving you the hassle and expense of calling in a technician. Plus, tackling this problem in under ten minutes means you get to enjoy peace of mind without disrupting your busy day. The good news? With a handful of tools and a little know-how, you can resolve this issue efficiently.
Is Your Water Line Leak a Major Problem or Just a Nuisance?
Early on, I made the mistake of ignoring minor drips, hoping they’d stop on their own. Spoiler alert: they didn’t. The leak worsened, leading to a flooded kitchen floor and a panic-induced call to a professional. Lesson learned—never underestimate that initial drip. Recognizing when a leak is simple enough for a quick fix versus when to call in experts can save you time and money. In this guide, I’ll walk you through the straightforward steps I used to fix my fridge’s water line in just ten minutes, and I’ll share insider tips to help you do the same.
Before diving into the repair process, it’s helpful to understand the common causes of water line leaks. Whether it’s a loose connection, a cracked tube, or a faulty valve, knowing what to look for simplifies the repair process. Keep in mind, according to appliance experts, taking a proactive approach not only prevents further damage but also extends the life of your refrigerator.
Are you tired of that constant drip, drip sound from your fridge? Or maybe you’ve recently noticed water pooling unexpectedly. If so, you’re not alone. Many homeowners face this issue unexpectedly, but the good news is that most leaks can be fixed quickly without professional help. Ready to get your hands dirty and stop that leak once and for all? Let’s jump into the step-by-step guide to fixing your refrigerator water line in ten minutes or less.
Disconnect and Prepare
First, unplug your refrigerator to ensure safety. Move the unit away from the wall to access the water line. Use a bucket or towel to catch any residual water that might spill during the process. Think of this like turning off a garden hose before fixing a leak—safety first.
Identify the Leaking Spot
Locate the connection point between the water supply line and the fridge. Check for visible cracks, loose fittings, or corrosion. A loose connection resembles a hose starter knot that needs tightening, while a cracked tube looks like a tear in a rubber band. I once found a small crack in my line that was causing continuous drips, and replacing it immediately stopped the leak.
Remove the Faulty Connection
Use an adjustable wrench to loosen the nut securing the water line. Be gentle to avoid damaging the fittings—think of unscrewing a tight jar lid without applying excessive force. If the line is plastic, gently squeeze the release clip and pull the line out. Remember, plastic lines often have quick-connect fittings that are designed for easy removal.
Note:
If your water line has a compression fitting, you might need a wrench, but many modern refrigerators use quick-connect fittings that only require a gentle pull after pressing the release clip.
Replace or Repair the Water Line
If you found a crack or damage, replace the broken section with a new water supply line. When choosing a replacement, opt for a line compatible with your refrigerator model—consult your user manual or visit this guide. Installing the new line involves attaching it to the water inlet valve and securing the connection tightly—imagine screwing in a garden hose connector that needs a firm, but not over-tightened, grip for a leak-proof seal.
Reconnect and Test
Once the new or repaired line is in place, reconnect it to the water supply using the correct fittings. Turn the water back on slowly—think of slowly opening a garden hose valve to prevent sudden water rushes. Plug the fridge back in, restore it to its position, and then check for leaks while running the water through the dispenser. If you see no drips, your fix is successful.
Final Checks and Tips
Inspect nearby areas for any water damage or mold, especially if the leak was ongoing. Consider installing a water leak detector for future peace of mind—these clever devices automatically alert you to leaks before they cause major damage. For added efficiency and smart control, you might explore smart appliances that integrate leak detection features.
Many homeowners assume that following basic usage instructions for appliances like dishwashers, refrigerators, and washing machines guarantees optimal performance. However, as an appliance expert, I’ve seen common misconceptions lead to inefficient operation, increased energy bills, and even equipment failure. Let’s dig deeper into what most people get wrong behind the scenes.
One widespread myth is that setting appliances to their maximum capacity or using the highest cycle setting always results in the best cleaning or preservation. In reality, overloading your dishwasher or washing machine forces the system to work harder, leading to quicker wear and tear, and often, poorer results. Instead, selecting appropriate cycle options based on load size can extend appliance life, save water, and reduce energy consumption, aligning with the latest expert advice on sustainable home management.
Another trap many fall into involves neglecting routine maintenance, which is vital for efficiency. For example, failing to regularly clean refrigerator coils can cause the unit to work harder, increasing electricity use by up to 25%, according to studies from the Department of Energy. Similarly, ignoring the buildup of gunk in washing machine gaskets can lead to mold growth, causing unpleasant odors and potential health risks. Remember, simple maintenance like cleaning filters and coils can significantly prolong appliance lifespan.
Now, for the more advanced homeowner—consider the misconception around smart appliance connectivity. Many believe that once connected to Wi-Fi, appliances will automatically optimize their settings for maximum efficiency. However, without proper calibration and firmware updates, smart features might underperform or even cause connectivity hitches. Regularly updating your device software and understanding the specific capabilities of your smart appliances—like smart fridges that can track groceries—ensures you truly benefit from their full potential. For valuable insights, check out the comprehensive guide on smart home appliances to understand optimal setup and usage.
A common mistake is underestimating the importance of correct load organization inside appliances. Overpacking your washer or fridge hampers airflow and cooling, leading to uneven cleaning or preservation issues. Proper load distribution ensures even operation; for instance, evenly distributed laundry prevents excessive vibration that can damage machines over time. This careful approach ties into the broader conversation on appliance longevity and energy efficiency.
Finally, many overlook the significance of the environment where appliances operate. High humidity or fluctuating temperatures can affect appliance performance—especially in hot climates. Installing appliances in well-ventilated, climate-controlled spaces can minimize strain on systems, conserving energy and preventing overheating.
In summary, understanding these nuanced points can dramatically improve your experience with home appliances. It’s not just about pressing start but about **smart operation, regular maintenance, proper organization, and environment considerations.** Want to get even more advanced? Dive into detailed tips on how to calibrate your smart refrigerator or optimize your washer settings by exploring our expert guides. Have you ever fallen into this trap? Let me know in the comments!Maintaining your home appliances to run smoothly over the years requires more than just routine cleaning; it involves investing in the right tools and understanding effective methods. Personally, I swear by a few specific tools that have saved me countless hours and prevent costly repairs. One such tool is a high-quality digital multimeter, which I use to check electrical continuity in appliances like dishwashers and refrigerators. It allows me to diagnose issues quickly, saving the time and expense of unnecessary replacements. Additionally, a set of precision screwdrivers with magnetic tips ensures I can access and repair components without damaging delicate parts.
For addressing internal components like thermostats or sensors, a reliable infrared thermometer is invaluable. It helps me identify uneven cooling in refrigerators or hot spots in smart ovens, ensuring they operate efficiently. I also utilize a small tube of food-grade silicone for sealing leaks or improving gasket seals, extending the lifespan of seals and preventing leaks. These simple, budget-friendly tools have empowered me to maintain my appliances proactively.
On the software side, I recommend using manufacturer-specific diagnostic apps when available. Many smart appliances come with companion apps that provide error codes, troubleshooting guides, and firmware updates. For example, I regularly update my smart fridge’s firmware through the app, which often includes security patches and performance improvements. Staying current with firmware updates can significantly improve the longevity and performance of your appliances, as highlighted in the [smart appliance industry reports](https://smartappliancereview.com/future-of-home-appliances-trends-to-watch-in-2025).
Looking ahead, I predict that as appliances become more integrated with IoT technology, diagnostic tools will evolve to offer real-time performance monitoring and predictive maintenance alerts. This advancement will allow us to address minor issues before they escalate into major failures, saving money and reducing downtime.
How do I keep my appliances performing well over time?
To ensure your appliances remain in top condition, establish a routine schedule of visual inspections and calibration checks. For refrigerators, periodically clean condenser coils using a coil cleaning brush—this simple action can lower your energy bills, as detailed in our guide on appliance efficiency. For dishwashers, regularly clean filters and spray arms, which prevents clogs and improves cleaning performance. Moreover, consider investing in a leak detector sensor placed near your appliances, providing early warnings and preventing water damage.
Don’t forget that regular firmware updates and app diagnostics for smart appliances can catch issues early. For example, keeping your smart washing machine’s firmware current ensures optimal water and energy use, as discussed in [expert advice for 2025](https://smartappliancereview.com/washing-machines-that-save-water-expert-advice-for-2025). I encourage you to try updating your smart fridge’s software this week—it could be the small step that extends its lifespan significantly. With the right tools and maintenance habits, your appliances can serve you reliably for years to come.
What I Didn’t Know About Appliance Lifespans Until It Was Too Late
One of the biggest lessons I uncovered is that even new smart appliances require diligent care and attention. Ignoring small issues, like a minor leak or a slow drain, can lead to more significant problems down the line. Regularly inspecting and maintaining your appliances—whether it’s cleaning their filters or ensuring tight connections—not only prolongs their life but also saves money and frustration.
Another revelation was that many appliance failures stem from simple avoidable mistakes. Overloading the dishwasher or improperly organizing the fridge can strain the system, causing premature wear. Embracing proper usage habits is a game-changer, and resources like this comprehensive guide offer invaluable advice.
Lastly, I discovered that investing in basic diagnostic tools, like a digital multimeter or an infrared thermometer, empowers homeowners to troubleshoot issues early, often fixing problems in minutes instead of waiting for costly repairs. These small investments pay huge dividends in appliance longevity and peace of mind.