
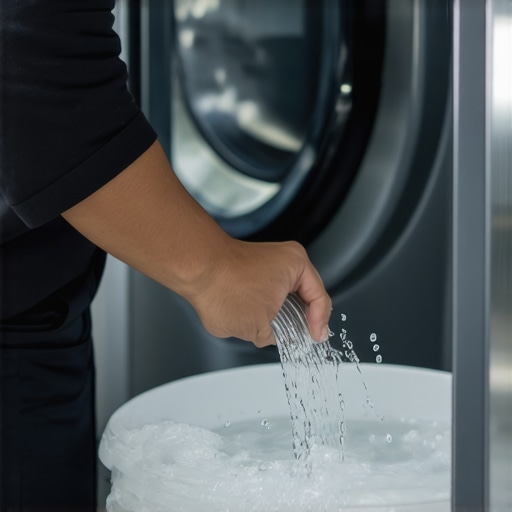
Ever had that sinking feeling when your washing machine is full of water, and you have no idea how to get it out without calling in a repair? I remember the first time my washer decided to hold onto every drop of water, refusing to drain at the end of a cycle. I panicked, thinking I’d need a costly service appointment, but after some trial and error—and a few messes—I discovered the truth: draining a full washer manually isn’t as intimidating as it seems.
Today, I’m here to share the practical, no-nonsense steps I’ve learned to help you tackle this common household hiccup with confidence. Whether your machine is clogged, the drain pump has failed, or you simply want to free it from a stubborn load, knowing how to manually drain your washer can save time, money, and frustration.
Why You Should Know How to Drain Your Washing Machine Manually
When your washer isn’t draining properly, water can pool and cause damage or mold if not addressed promptly. Many owners ignore the problem until it becomes a bigger hassle, but a quick manual drain can be a real lifesaver. Plus, understanding this process helps you troubleshoot other issues, like stubborn odors or uneven load distributions.
Early in my experience, I made a common mistake: I tried to force open the drain hose without securing the water first. This led to a flood on the laundry room floor! According to appliance expert advice, always ensure the water has been safely released before disconnecting any hoses. Doing your homework and understanding your machine’s mechanics can prevent accidents and damage.
If you’re worried about doing it wrong, don’t be. I’ll walk you through the safest, simplest method to drain your washer, step by step. Plus, I’ll include links to related tips, like how to keep your washer from dancing across the floor or how to properly level it, to keep your entire laundry setup running smoothly. Ready to get that water out and restore peace to your laundry routine? Let’s dive into the how-to.
Locate the Drain Hose and Prepare Your Workspace
Start by unplugging your washing machine to ensure safety. Find the drain hose, usually located at the back or side of the machine. Place towels or a shallow basin beneath the hose connection to catch any residual water. Unlike refrigerators that require careful defrosting, draining a washer involves straightforward steps, but safety remains paramount. Once prepared, gently detach the hose end, ensuring you control the flow to prevent water spills.
Drain the Water from the Tub
Gravity Drain Method
Lower the hose into the basin or towel, then slowly lower the other end into a bucket or sink. Gravity will help the water flow out naturally. Be patient; this process can take a few minutes if there’s a significant amount of water. I once drained my machine this way after a clog, and seeing the water trickle out gave me reassurance that I was doing it correctly.
Using a Wet/Dry Vacuum
If gravity isn’t sufficient or the water is stubborn, a wet/dry vacuum is your best bet. Seal the vacuum hose over the drain pipe or hose opening, turn on the vacuum, and watch as it sucks the water out rapidly. This method is quick and less messy, especially useful if you’re dealing with a full drum of water. I used this approach when my washer overflowed unexpectedly, and it saved me from a flooded laundry room.
Clear Blockages and Check the Pump
Once the water is out, inspect the drain hose for kinks or obstructions. Many times, blockages cause draining issues. Disconnect the hose completely, and run water through it to confirm it’s clear. Check your machine’s pump for debris or lint buildup. Clearing these ensures smoother operation in future cycles. If you’re unsure how to access the pump, consult your washer’s manual or explore online repair guides.
Reattach the Hose and Test
Securely reconnect the drain hose to the machine, making sure it’s properly seated to prevent leaks. If you previously experienced leaks, it might help to review how to stop your washing machine from dancing across the laundry room and ensure it’s leveled correctly. Plug the machine back in, run a short cycle, and observe for proper draining and operation.
Prevent Future Drainage Problems
To avoid recurring drainage issues, periodically clean the pump filter, especially if your washer is prone to lint buildup. Also, consider inspecting and replacing old or damaged hoses. Maintaining these components can extend the lifespan of your appliance. For added peace of mind, read about how to level a washing machine to prevent vibrations that might disrupt drainage.
 Many homeowners believe they know how their appliances work, but some widespread myths can lead to costly mistakes. For instance, the notion that all smart appliances automatically optimize themselves or that high energy ratings guarantee lower bills isn’t entirely accurate. According to appliance expert advice, understanding the nuanced features and maintenance needs of devices like refrigerators and dishwashers ensures longer lifespan and better performance. One often-overlooked detail is the importance of properly leveling your washing machine—not just for noise, but to prevent uneven wear and drainage issues. A simple misalignment can dramatically reduce the appliance’s efficiency, as discussed in guides on how to level your washer. Also, many assume that newer models are always more energy-efficient; however, studies have shown that older appliances, if properly maintained, can outperform some of the latest tech in real-world energy consumption. Don’t fall for the trap of neglecting routine cleaning of filters and seals, which can cause unnecessary breakdowns and expensive repairs down the line. For example, cleaning your dishwasher’s spray arms and filters regularly maintains optimal cleaning power and prevents buildup. Recognize that the technology inside modern appliances—like sensors in smart fridges—is sophisticated but requires correct setup and occasional updates to function correctly. So, instead of blindly trusting your gadgets, become familiar with their hidden nuances. Have you ever fallen into this trap? Let me know in the comments.
Invest in Quality Maintenance Tools for Longevity
Having the right tools is essential for maintaining and troubleshooting home appliances effectively. I personally recommend a digital multimeter for diagnosing electrical issues, as it allows precise voltage and continuity checks—saving time and preventing guesswork. Additionally, a flexible drain snake proves invaluable when clearing stubborn clogs in dishwasher or washing machine hoses. For cleaning filters and inaccessible parts, a set of small screwdrivers and brushes can make all the difference, enabling thorough upkeep without damaging delicate components.
Utilize Software and Apps to Monitor Performance
Smart appliances are revolutionizing maintenance by providing real-time data and notifications. I rely on manufacturer apps to monitor my refrigerator’s energy use and to receive alerts on door seals or filter replacements—this proactive approach prevents costly repairs. For non-smart models, consider investing in a Wi-Fi-enabled energy monitor, which tracks power consumption and spots anomalies early. Regularly reviewing these metrics helps establish a maintenance rhythm, extending appliance lifespan and optimizing energy efficiency. The trend here is clear: integrating technology for ongoing health checks is the way forward, with industry experts predicting broader adoption of AI-powered diagnostics in household devices.
Establish a Preventative Maintenance Routine
Preventing issues before they arise is more effective than reactive fixes. Schedule monthly checks of door seals, filters, and hoses, and clean them with natural solutions like vinegar to remove buildup. Also, periodically run self-cleaning cycles on dishwashers and high-efficiency washers—many models have dedicated settings for this purpose. Keeping detailed logs of maintenance activities can help identify patterns and plan future actions. For instance, my habit of inspecting my fridge’s door gasket regularly has prevented many costly repairs, and I recommend others do the same. For a comprehensive guide on this, see how to clean your washing machine’s gasket.
Learn How to Address Common Issues Quickly
Quick troubleshooting saves time and money. Keep a set of diagnostic manuals for your appliances, or bookmark reputable online repair guides. For example, understanding how to stop a dishwasher from leaking can prevent water damage. Also, familiarize yourself with reset procedures—many smart appliances can be recalibrated or rebooted with simple steps, which can resolve minor glitches without professional help. Regular updates and software patches, available through manufacturer apps, often include performance improvements and bug fixes, so stay current. I encourage you to try implementing one advanced troubleshooting tip today: use a multimeter to check your refrigerator’s compressor voltage, following the technical guidance from appliance experts.
Future of Appliance Care Looks Bright
With innovations like predictive maintenance using AI and IoT connectivity, appliances will become smarter at alerting us to issues before they happen. Industry insiders predict that in the coming years, homes will feature integrated systems that automatically schedule repairs, order spare parts, and even perform self-maintenance routines—reducing downtime significantly. Embracing these tools now not only saves money but prepares you for a more reliable, connected home environment. So, take that first step: equip yourself with a quality digital multimeter and learn how to interpret its readings—your appliances will thank you for it.
Uncommon Truths That Changed My Appliance Care Game
One lightbulb moment came when I realized that simply undraining my washer without inspecting the pump led me to overlook a recurring clog issue—costing me more time and money. Now, I always check the pump for debris before attempting a full drain, saving myself headaches. Another lesson was discovering that frequent cleaning of the drain filter not only prevents standing water but also extends the appliance’s lifespan—an easy habit that pays off. Lastly, I learned that understanding my machine’s specific model quirks, instead of generic advice, makes troubleshooting more efficient; for instance, some washers require manual reset steps I wasn’t aware of initially.
My Go-To Resources for Smarter Appliance Maintenance
First, I trust the official manufacturer manuals—they provide specific, model-accurate guidance I can’t find elsewhere. Second, the YouTube channels run by certified appliance technicians often demonstrate repairs and troubleshooting tips that are practical and reproducible. Third, forums like ApplianceJunk.com have helped me troubleshoot unusual problems by tapping into community expertise. Lastly, websites like Smart Appliance Review offer in-depth articles that clarify common misconceptions and share expert insights, helping me make informed decisions and avoid costly mistakes.
Embrace the Challenge and Keep Moving Forward
Fixing a washer’s drainage might seem daunting at first, but every problem is an opportunity to learn and save money. With patience and the right mindset, you can master basic repairs and maintenance—ultimately empowering you to care for all your home appliances with confidence. Don’t hesitate to roll up your sleeves; each small victory builds your skill set and brings a sense of accomplishment. So, why wait? Take that first step today, and discover how much you can achieve in making your home smarter and more resilient.