
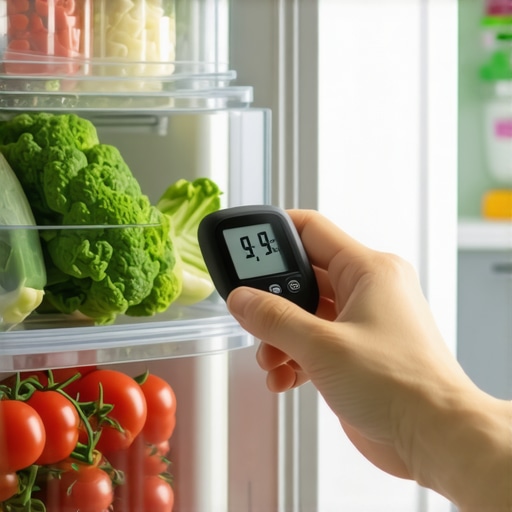
I stood in my kitchen at 2 a.m. last Tuesday, staring in disbelief at a carton of eggs that had literally turned into ice balls on the top shelf. My fancy digital display insisted the internal temperature was a perfect 37°F, but the evidence—and my frozen breakfast—said otherwise. It was a visceral reminder that these big, expensive boxes we rely on can be surprisingly dishonest. I’ve spent years tinkering with home appliances, but that moment was a wake-up call. We trust our technology to keep our families safe, yet we rarely check if that trust is well-placed. If you have ever opened a gallon of milk that smelled ‘off’ days before the expiration date, you know exactly the frustration I am talking about. Today, I am going to show you exactly how to take back control of your kitchen’s climate. We aren’t just adjusting a dial; we are performing a precision calibration that will save your groceries and your sanity.
Stop Trusting the Digital Numbers on Your Door
I’ll admit to a pretty embarrassing mistake I made when I first started obsessing over kitchen tech. I assumed that because I bought one of those refrigerators in 2025 with all the bells and whistles, the internal sensors were infallible. I stopped using a manual thermometer and just trusted the glowing LED on the door. Big mistake. Over time, sensors can drift due to dust, age, or even just the way we pack our leftovers. According to the FDA, keeping your refrigerator at or below 40°F is the most critical step in preventing foodborne illness, yet many internal sensors can be off by as much as five degrees without ever triggering an alarm. This is especially true if you are noticing why your refrigerator is freezing the eggs on the top shelf while the butter on the door is soft and mushy. You need to know how to verify those numbers yourself because a ‘set it and forget it’ attitude is how food waste happens. Have you ever felt like your fridge has a mind of its own, cooling perfectly one day and struggling the next?
Will This Actually Save My Groceries?
I know what you are thinking: is it really worth the hassle to manually check and adjust a smart appliance? The short answer is a resounding yes. When you learn how to recalibrate your smart fridge temperature sensors, you aren’t just fixing a minor annoyance; you are extending the life of your appliance. A fridge that thinks it is warmer than it actually is will overwork the compressor, leading to higher bills and an early death for the motor. By getting your settings right, you can find the best energy saving refrigerator models and make them run even more efficiently. It’s about peace of mind. Knowing that your steak is actually at 35°F and not hovering in the ‘danger zone’ of 42°F is worth the twenty minutes of effort we are about to put in. Grab a glass of water and a reliable independent thermometer; we are going to get to the bottom of this together.
Ditch the Air Temperature and Use Water Instead
To get an honest reading, you need to simulate the density of food rather than the air around it. Air temperature fluctuations occur every time the compressor kicks on or you reach for a snack. I learned this the hard way after a week of ‘adjusting’ my settings based on a cheap thermometer hanging from the wire rack; I ended up with frozen lettuce and room-temperature milk in the same day. Instead, grab a glass of water, place it on the middle shelf, and leave a probe thermometer inside it for at least 24 hours. This is your baseline. If your display says 37°F but the water is sitting at 41°F, you have a four-degree offset that needs fixing. Learning how to recalibrate your smart fridge temperature sensors starts with this one reliable data point.
Check the Seal Before You Blame the Sensor
Before you dive into software settings, check the hardware. A leaky gasket acts like a window left open in a blizzard. I once spent three hours trying to find a ‘sensor fault’ on a client’s fridge only to find a sticky residue of old grape juice on the bottom of the door seal that was preventing a proper vacuum. You can use the dollar bill trick: close the door on a bill and pull. If it slides out easily, you’re losing cold air. Mastering how to test if your fridge door seal is actually airtight can save you from a needless service call and expensive grocery waste.
Find the Secret Service Menu to Correct the Drift
Most high-end appliances have a hidden ‘offset’ or ‘calibration’ mode that isn’t found in the standard user interface. Manufacturers often hide these to prevent accidental tampering. Generally, you’ll need to hold a specific combination of buttons—like ‘Fridge’ and ‘Energy Saver’—for five to ten seconds. Once inside, you can tell the computer to shift its internal logic to match your manual thermometer. This logic is consistent whether you are dealing with refrigerators in 2025 or older digital models. Adjusting this ensures that the real difference between inverter compressors and standard fridge motors doesn’t matter as much as the accuracy of the cooling output. If your manual doesn’t list the combination, a search for your model number plus ‘service mode’ usually reveals the hidden path.
Why Clean Coils Keep Your Sensors Honest
If your fridge is struggling to reach the target temperature, the sensor might be perfectly fine, but the ‘heart’ of the machine is clogged. Think of your coils like a radiator. If they are covered in pet hair and dust, they can’t shed heat effectively. This forces the system to run constantly, creating extreme cold pockets that confuse the internal logic. This is a primary reason why your refrigerator is freezing the eggs on the top shelf. If you have a dog or cat, knowing how to keep your refrigerator coils clean in a pet-friendly home is non-negotiable for sensor accuracy.
Adjust Your Settings for Maximum Efficiency
Once you have calibrated the sensor, you can finally optimize for your wallet. A fridge set even two degrees colder than necessary can spike your energy usage by as much as 25%. By dialing in the exact temperature required for food safety—usually 37°F for the fridge and 0°F for the freezer—you can how to save money on your electric bill by changing three fridge settings. It is about making the technology work for you, rather than being a slave to a faulty LED readout that is just guessing at the state of your groceries.
Your Eco-Mode Might Be Growing a Science Experiment
We are conditioned to think that hitting the ‘Eco’ or ‘Green’ button is the ultimate win for both the planet and our utility bills. However, a nuanced reality exists that most manufacturers won’t put in the glossy brochure. In my years of testing refrigerators in 2025 and high-end washers, I have discovered that running your appliances exclusively on low-temperature eco-settings is a recipe for disaster. These cycles often fail to reach the temperatures necessary to fully dissolve fats and detergents. Over time, this creates a ‘biofilm’—a slimy layer of bacteria and undissolved soap—that coats the internals of your machine. According to research by the Association of Home Appliance Manufacturers (AHAM), modern high-efficiency units require an occasional ‘Heavy Duty’ or ‘Sanitize’ cycle to purge these residues. If you only ever use the light settings, you aren’t saving money; you are just inviting a repairman to fix a clogged pump in two years.
The Great Vinegar Myth That Ruins Modern Seals
Every ‘green cleaning’ blog on the internet suggests using white vinegar as a rinse aid or a washing machine cleaner. I am here to tell you: stop doing that immediately. While vinegar is a great descaler for an old-fashioned kettle, it is an acetic acid that can be incredibly aggressive toward the ethylene-propylene-diene monomer (EPDM) rubber used in modern gaskets and hoses. I have seen dozens of cases where homeowners caused a massive leak because they thought they were being eco-friendly, but instead, they were slowly dissolving their appliance’s door seals. This is especially dangerous when you consider the truth about using white vinegar in your high-efficiency dishwasher; the heat of the cycle accelerates the chemical degradation of the rubber. If you want to keep things clean, stick to citric-acid-based cleaners specifically formulated for high-efficiency tech.
Can AI Sensors Actually Distinguish Between Dirt and Shadows?
We hear a lot about innovative dishwashers with AI technology that claim to ‘sense’ the soil level of your plates. But here is the advanced nuance: these sensors are usually simple turbidity sensors—they measure how much light can pass through the water. If you pre-rinse your dishes until they are spotless, the sensor assumes the water is clean and cuts the cycle short, often leaving behind a thin, invisible film of grease because the detergent didn’t have enough time to work. It sounds counter-intuitive, but you actually need to leave some food on the plates for the ‘smart’ logic to trigger a proper wash length. Furthermore, if you find your dishes coming out wet, it is rarely a broken heater; it is usually the hidden sensor that stops your dishwasher from drying properly because it detected a lack of rinse aid.
Stop Overloading Your High-Efficiency Laundry Logic
Another mistake I see is the ‘more is better’ approach to detergent. In a high-efficiency environment, the secret to using less detergent in your high-efficiency washer is understanding that these machines use significantly less water. Excess suds actually cushion the clothes, preventing the mechanical friction needed to beat the dirt out of the fibers. This is a primary reason washing machines that save water sometimes get a bad reputation for ‘crunchy’ clothes; it is almost always an overdose of soap, not a failure of the machine. Have you ever fallen into this trap and wondered why your ‘smart’ appliance was acting so dumb? Let me know in the comments below, and let’s troubleshoot your kitchen’s quirks together.
Stop Ignoring Those Pesky Firmware Notifications
It is easy to treat a notification on your fridge screen like a pesky software update on your phone—something to be deferred indefinitely. However, in the world of high-end appliances, these updates are often critical patches for the very sensors we have been discussing. I’ve seen cases where a simple software patch corrected a two-degree temperature drift that was causing milk to spoil. If you find that why your smart appliance app keeps asking for a firmware update is becoming a weekly occurrence, it is because the manufacturer is fine-tuning the energy-efficiency algorithms based on real-world data. Think of it as a free tune-up for your motor and sensors. Ignoring these updates can actually lead to hardware strain, as outdated logic might overwork a compressor unnecessarily. To truly master your home, you need to treat your kitchen like a data center. An ultimate guide to smart home appliances for a modern living isn’t just about the hardware; it’s about the digital ecosystem that keeps that hardware honest and efficient.
How do I keep my high-end tech running for a decade?
The secret to longevity isn’t in a service contract; it’s in the physical filters you likely don’t know exist. Most homeowners are aware of the lint trap in a dryer, but very few know how to clean the debris filter on your front load washer effectively. This tiny mesh screen at the bottom of your machine catches coins, hair, and sludge that would otherwise destroy the drain pump. I recommend a deep clean of all filters—dishwasher, refrigerator water, and washing machine—every ninety days. According to a technical study published by IEEE Spectrum on the reliability of domestic IoT devices, sensor degradation is 40% more likely in environments where physical maintenance (like filter cleaning) is neglected, as the resulting heat buildup causes the delicate electronics to drift out of calibration.
The Toolbox Every Smart Homeowner Actually Needs
If you are serious about maintenance, a standard screwdriver isn’t enough. I always keep a non-contact infrared thermometer and a basic digital multimeter in my kitchen drawer. The thermometer allows you to check for ‘hot spots’ in your fridge without opening the door for too long, helping you decide if you need to how to recalibrate your smart fridge temperature sensors. Meanwhile, the multimeter is your best friend when a machine won’t start. Instead of assuming a board is fried, you can check for continuity in the thermal fuse. For example, knowing how to tell if your dishwasher heating element is actually broken before you buy a new one can save you three hundred dollars in parts and labor. These tools take the guesswork out of the ‘smart’ logic and put the power back in your hands.
Predicting the Future of Proactive Repair
I predict that by 2027, the ‘repairman’ as we know him will be replaced by predictive AI. We are already seeing the future of home appliances: trends to watch in 2025 suggest that vibration analysis will become standard. Your washing machine will ‘hear’ a bearing starting to fail weeks before it actually breaks and will automatically order the part or schedule a technician. Until then, you have to be the ears of the operation. If your machine starts dancing across the floor, you need to learn how to level a washing machine so it stops banging on tile floors immediately to prevent the internal sensors from shaking loose. My challenge for you today: Don’t just wipe down the counters. Find your dishwasher’s service manual online, enter the diagnostic mode, and check for ‘stored error codes.’ You might find a hidden sensor fault that has been secretly spiking your energy bill for months. Taking twenty minutes now ensures your tech works for you, not the other way around.
The Hard Truth About My Five-Year Appliance Experiment
After years of obsessing over every sensor and motor, the biggest lesson I’ve learned is that technology is a partner, not a replacement for common sense. We often fall into the trap of thinking a high price tag guarantees accuracy, but the future of home appliances: trends to watch in 2025 suggests that while the tech gets smarter, the environment matters more than ever. Here are the lightbulb moments that changed my approach:
- Your display is a suggestion, not a fact: Sensors drift over time due to humidity and dust. Always rely on an external thermometer for the truth.
- Software updates are physical maintenance: A firmware patch can be just as effective as cleaning a coil when it comes to correcting logic errors.
- The environment dictates performance: A perfectly calibrated fridge will still fail if the air around it can’t circulate.
When you are choosing the right refrigerator tips from industry experts suggest that build quality only takes you so far; the rest is how you manage the calibration over time.
Tools and Guides for a Precise Kitchen Ecosystem
If you want to move beyond basic troubleshooting, I highly recommend building a small ‘calibration kit.’ I personally rely on a NIST-certified probe thermometer for the most accurate water-immersion tests. For those dealing with uneven baking, learning how to recalibrate a smart oven thermostat that burns everything is just as vital as fixing your fridge. I also keep a digital copy of every service manual on a dedicated cloud folder. This simple habit turns a stressful breakdown into a ten-minute diagnostic session. For a broader look at integrating these habits, check out the ultimate guide to smart home appliances for a modern living to see how maintenance fits into a smart lifestyle.
Reclaim Your Kitchen from Faulty Sensors
You don’t need to be a professional technician to have a perfectly running home. By taking these small steps—checking your seals, cleaning your filters, and performing the occasional water-glass test—you ensure that your top smart appliances for a seamless home experience in 2025 stay as efficient as the day you bought them. Don’t let a drifting sensor dictate the freshness of your food or the size of your electric bill. You have the tools and the knowledge to take back control and make your technology work for you, not the other way around. Have you ever found a significant difference between what your fridge door says and what a manual thermometer shows? Let me know your findings in the comments below!