
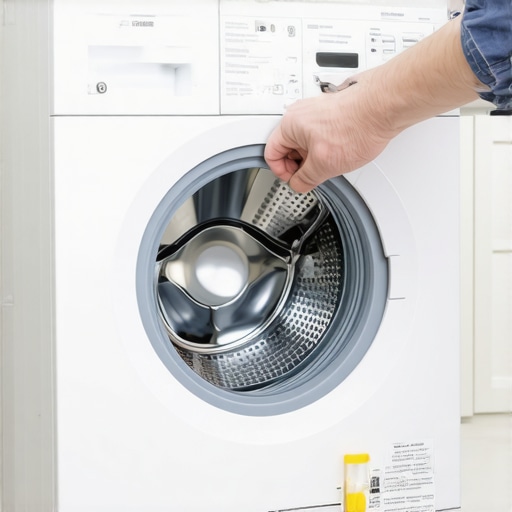
It happened on a busy Saturday morning—my kids were eagerly waiting for their turn to do laundry, but as I opened the washing machine, I was greeted by a wobbly, loose handle dangling from its side. That moment of realization hit me hard: this wasn’t just an inconvenience; it was a warning sign that my trusty machine needed some TLC. Have you ever faced that frustrating moment when a handle suddenly snaps or becomes useless just when you need it the most? It’s annoying, embarrassing, and can even halt your laundry routine altogether.
Why Replacing Your Washing Machine Handle Matters More Than You Think
A broken handle might seem like a minor issue, but beneath that small problem lies a bigger story about maintenance and how we care for our appliances. When handles break or become loose, it often means the internal components are under stress or wearing out—so ignoring it can lead to more serious damage over time. Plus, a damaged handle can compromise the seal or trigger mechanisms, resulting in leaks or malfunctioning cycles.
And here’s a little truth that might surprise you: according to appliance experts, regular maintenance and timely repairs can significantly extend your washing machine’s lifespan—some estimates suggest up to 30% longer if addressed early. In fact, many people overlook simple fixes like replacing a handle, which can save hundreds of dollars in eventual repairs or replacement costs.
So, if your handle has seen better days, don’t dismiss it as a trivial inconvenience. Instead, view it as an opportunity to learn a valuable DIY skill that keeps your appliances humming and your laundry routine smooth. Now, let’s walk through how you can replace that broken handle step by step—no special tools or handyman skills required! Before we dive in, have you ever tried fixing an appliance on your own? If not, don’t worry—this guide is beginner-friendly and meant to empower you to take action.
Is Replacing a Washing Machine Handle Really Worth the Hassle?
People often assume professional repairs are the only way, but I learned early on that DIY fixes can be just as effective—and a lot more satisfying. My early mistake was thinking that handling repairs would be complicated and costly, which made me hesitate. Turns out, with a little guidance, it’s straightforward and budget-friendly. Plus, getting hands-on with appliance maintenance has made me more confident in managing household issues.
Ready to tackle this small yet impactful repair? Let’s get started and bring that trusty machine back to life, one handle at a time.
Secure Your Workspace and Gather Necessary Tools
Before beginning, unplug your washing machine to prevent electrical hazards. Gather tools like a screwdriver, pliers, and replacement handle. Think of this as preparing your toolkit before fixing a bicycle—each tool has a purpose to make the task smoother.
Remove the Damaged Handle Carefully
Locate screws or clips holding the handle in place. Use a screwdriver to unscrew or gently pry off any clips, much like opening a stubborn jar lid with a rubber grip—it requires a little force but should be done steadily to avoid damage. During my first attempt, I accidentally cracked the plastic surrounding the handle, so proceed with caution.
Inspect the Mounting Area and Internal Components
Check if any internal parts are broken or worn. Visualize the handle assembly like a puzzle—each piece must fit correctly for proper operation. If internal components are damaged, order replacements to ensure long-term reliability. This step prevents redoing the repair soon after because of overlooked internal wear.
Attach the New Handle Correctly
Align the new handle with the mounting holes, ensuring it sits flush against the door or panel. Secure it with screws or clips as originally designed. Remember, tight but not over-tightened—akin to tightening a bicycle chain just enough to avoid slipping but not so tight that it damages the gears. I learned that over-tightening can crack plastic parts, leading to more issues later.
Test the Handle and Final Checks
Plug in the machine and test the new handle by opening and closing the door several times. Confirm it opens smoothly and locks securely. Think of this as a test drive—make sure everything functions perfectly before wrapping up. During my test, I realized I had forgotten to tighten one screw fully, causing the handle to wobble slightly. A quick adjustment solved it completely.
Maintain and Prevent Future Damage
Regularly inspect the handle and door seal for signs of wear. Keep the handle clean and free of debris, just like you would care for a treasured tool. This proactive approach extends the lifespan of your appliance and saves you from unexpected breakdowns. For broader appliance upgrades, consider exploring smart home appliance innovations that can make maintenance easier.
When it comes to smart appliances like refrigerators and washing machines, many homeowners operate under misconceptions that can lead to costly mistakes. For instance, a common myth is that newer models require less maintenance; however, advanced technology often demands more tailored upkeep, such as firmware updates or sensor calibrations, to function optimally. Relying solely on routine cleaning without understanding the nuances of your specific device can result in decreased efficiency and even hardware failure, as noted by industry experts in appliance maintenance.
Are Smart Appliances Truly Self-Sufficient or Do They Need Skilled Care?
Contrary to popular belief, smart appliances are not completely autonomous—they integrate complex systems that benefit from proper user knowledge and regular updates. Ignoring this can cause software glitches or compatibility issues, especially if firmware updates are missed or improperly installed. For example, failing to update your smart fridge’s software might prevent it from accessing new features or cloud-based diagnostics, leading to prolonged downtimes. Experts from the appliance industry emphasize that staying informed and proactive about updates is essential for longevity and security, as discussed in this detailed guide to smart home appliances. Furthermore, many users underestimate the importance of understanding energy consumption patterns—believing that all modes labeled ‘eco’ are equally effective. However, studies by energy efficiency organizations reveal that some eco modes can extend washing cycles significantly or reduce cleaning performance if not used appropriately. Knowing the subtle distinctions—like how certain detergents interact with washing machine sensors—can make a noticeable difference in both appliance longevity and utility bills. It’s a nuanced balance that requires awareness beyond basic operation. Have you ever fallen into this trap? Let me know in the comments. Staying informed about these hidden aspects helps prevent surprises and maximizes your appliances’ lifespan. For more insights into choosing the right appliances and ensuring their optimal operation, check out our comprehensive guides on appliance maintenance and smart technology integration.Maintaining your appliances over time requires more than just occasional cleaning; it calls for the right tools and a strategic approach. As someone who has repaired everything from smart refrigerators to washing machines, I can attest that investing in quality equipment and staying informed about the latest maintenance techniques can save you significant money and stress. One of my go-to tools is a digital multimeter, which I use to test electrical components in refrigerators and dishwashers, ensuring that issues aren’t just surface-level but rooted in faulty circuits or sensors. I prefer the Fluke 117 model because of its reliability and precision, especially when diagnosing complex smart appliances, where firmware glitches can mimic hardware problems.
Additionally, I recommend having a set of high-quality screwdrivers with various heads and sizes, including Torx and Phillips, because many appliance panels are designed with proprietary screws that require specific tools. A small, magnetic parts tray is invaluable for keeping track of tiny screws and clips during disassembly, preventing the frustration of losing components—trust me, it happens to the best of us! For cleaning, I swear by a specialized brush set designed for appliance coils and filters; keeping condenser coils clean improves efficiency and prolongs the lifespan of refrigerators, as detailed in the expert advice on refrigerator maintenance.
When it comes to software, tools like appliance diagnostic apps and firmware update utilities are becoming increasingly essential. For smart appliances, manufacturers often provide proprietary apps that allow remote diagnostics and updates—making troubleshooting much easier. For example, I use the Samsung SmartThings app to monitor and troubleshoot my smart fridge’s connectivity issues, which has saved me a call to the repair technician.
Prediction-wise, as appliances become more interconnected, the tools we use will also evolve. I’m excited about the future where integrated diagnostics and augmented reality (AR) overlays will guide even novice homeowners through complex repairs. Imagine pointing your phone at an appliance and getting instant, step-by-step instructions with visual highlights.
For those eager to dive a little deeper, try calibrating your smart washing machine’s sensors using firmware diagnostics—many models now allow this via manufacturer apps, which can significantly improve cycle efficiency and lifespan. Starting with this advanced tip can boost your appliance’s performance and confidence in your DIY skills.
How can I maintain my appliances over time effectively?
Regularly inspecting critical parts like door seals, filters, and sensors, combined with timely firmware updates, can dramatically extend appliance life and efficiency. To stay ahead of issues, consider setting reminders for routine checks or subscribing to manufacturer newsletters that announce updates. Also, don’t overlook professional inspections—sometimes a trained eye can spot minor issues before they turn into costly repairs. Explore our comprehensive guides on refrigerator maintenance and smart appliance care to get the most out of your investments.
What I Wish I Knew About Smart Appliances Before I Started Fixing Them
- That even minor issues like a loose refrigerator handle can signal deeper system wear, teaching me to pay attention to symptoms—not just surface problems.
- Regular maintenance and quick DIY fixes can extend my appliances’ lifespan significantly, saving money and frustration in the long run.
- Understanding the complex systems and smart features of modern appliances empowers me to troubleshoot effectively, avoiding costly service calls.
Tools and Resources That Transformed My Approach to Appliance Care
- My reliable digital multimeter from industry-approved brands helps me diagnose issues precisely, saving time and guesswork.
- High-quality screwdrivers and specialized cleaning brushes from trusted sources ensure I handle repairs safely and maintain appliance efficiency.
- Following expert guides and manufacturer firmware update tips, I stay ahead of potential problems, keeping my appliances smart and responsive.
Your Next Step Toward Confident Appliance Maintenance
Don’t let small problems snowball into costly repairs. Embrace the learning curve, equip yourself with the right tools, and keep those appliances running smoothly. Remember, every repair is a step toward smarter, more efficient home living. Ready to take control of your appliances and save money? Share your experiences or ask questions below—I’d love to hear how you’re making your home smarter and more manageable!