
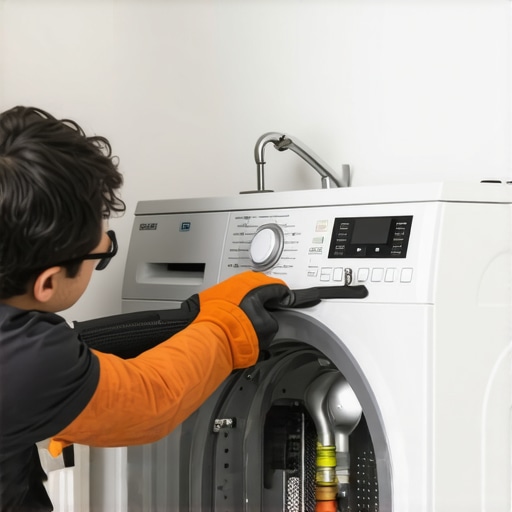
Ever stared at your washing machine mid-cycle and wondered why it suddenly stopped filling or dripping water? I know that sinking feeling all too well—those moments when your laundry day turns into a frustrating guessing game. One day, I was hurriedly tossing in clothes before work, only to hear that dreaded hum of an empty drum and see no water. That was my lightbulb moment. Turns out, the culprit was a faulty water inlet valve, an oft-overlooked component that can cause serious headaches if left unchecked.
Knowing how to replace the water inlet valve not only saves you money but also keeps your laundry routine running smoothly. Today, I’m going to walk you through the entire process, sharing tips based on personal experience—so you can tackle this repair confidently without calling in a costly professional. If you’ve faced similar issues with your washer, stick around. I promise, it’s easier than you think.
Why Your Washer Might Be Struggling to Fill
Is Replacing the Water Inlet Valve Actually Worth the Hype?
Many folks hesitate at the thought of repairing appliances themselves, fearing it’s too complicated or dangerous. I admit, I made the mistake early on of rushing into a fix without enough research, which only led to more problems. Take it from me: the process is straightforward if you understand the basics and proceed carefully. Plus, with modern guides and tutorials, DIY repair has never been more accessible.
Knowing the signs of a faulty water inlet valve—such as constant leaks, poor water flow, or complete filling failure—can help you catch issues early. According to appliance experts, replacing this valve can significantly improve your washing machine’s performance and extend its life. So, if your washer isn’t filling properly or leaks water when it shouldn’t, don’t ignore the signs. Instead, take action.
For alternative solutions and tips to optimize your appliance’s performance, you might want to check out resources like [this guide on smart appliances](https://smartappliancereview.com/smart-appliances-revolution-how-to-choose-the-best-dishwasher), which covers how modern technology is transforming our homes. Now, let’s get into the practical steps that will help you restore your washer to its full glory.
Turn Off Power and Water Supplies
Before starting, unplug your washing machine from the electrical outlet to prevent shocks, and turn off the water supply valves behind or near your appliance. Think of it as shutting down crucial systems before a repair—just like turning off your home’s main electricity during a storm to avoid surges.
Access the Water Inlet Valve
Carefully pull the washer away from the wall to access the back panel. Use a screwdriver to remove the screws securing the panel—these are like the bolts securing a hatch. Once open, locate the water inlet valve, a small component with hoses attached, resembling a tiny gatekeeper regulating water flow into your machine.
Identify and Disconnect Hoses
Place a towel or small basin under the hoses to catch residual water. Loosen the hose clamps or unplug the hoses directly if they are push-fit. Gently disconnect them, being cautious not to damage the hoses—think of detaching garden hoses without tearing the rubber.
Remove the Faulty Valve
Unscrew the mounting nuts holding the inlet valve in place. Keep track of the screws—they’re your rescue kit for reassembly. Gently lift the valve out, noting the orientation. At this point, I once ended up dropping the valve onto the floor, which taught me to do this step slowly and carefully.
Install the New Valve
Position the new valve in the same orientation as the old one. Secure it with the mounting screws—tighten them snugly but avoid over-tightening, as this could crack the plastic. Attach the water hoses back onto the inlet ports—ensure they are fully seated and clamped or pushed into place tightly to prevent leaks, similar to securing garden hoses for a steady flow.
Reconnect the Power and Water
Restore the water supply valves and check for leaks by turning the water on gradually. Plug the washer back into the outlet. Turn on the machine and run a short cycle to ensure the replacement was successful—like running a test drive after replacing a vital engine part.
Final Tips for a Smooth Repair
Keep your workspace organized—set aside a small container for screws and parts. Wear gloves if you have sensitive skin or want extra grip. If any leaks occur, double-check all hose connections. Remember, patience and attention to detail are key to a successful DIY repair—similar to fine-tuning any complex appliance.
For more advanced troubleshooting or to explore how smart appliances can simplify your household tasks, visit this comprehensive guide to modern smart home devices, and transform your living experience.
While smart appliances promise to revolutionize our homes with convenience and efficiency, many users fall prey to misconceptions that can hinder their effectiveness. One common myth is that all smart devices automatically optimize performance without user intervention. In reality, features like energy-saving modes or AI-driven cycles often require proper setup and regular maintenance to truly benefit from their capabilities, as highlighted in expert reviews on smart home guides.
Choosing the Right Tools for Appliance Maintenance
To keep your appliances running smoothly over the years, investing in quality, specialized tools is crucial. I personally rely on a digital multimeter, which allows me to troubleshoot electrical issues with pinpoint accuracy, saving me time and avoiding unnecessary replacements. A reliable screwdriver set with both Phillips and flat-head bits is essential for opening panels and securing components without damaging delicate fasteners. Additionally, a narrow pair of pliers helps in disconnecting stubborn hoses or clips, especially when working within tight spaces.
For cleaning and preventive maintenance, I recommend a silicone spray lubricant. Applying it to door hinges and moving parts minimizes wear and noise, extending the lifespan of mechanisms such as refrigerator drawers or washing machine door latches. A microfiber cloth and a gentle cleaning brush are also invaluable for removing dust, lint, or grime from vents and filters.
Leverage Smart Technology for Maintenance Tracking
Modern smart appliances often come with built-in diagnostics and maintenance alerts, but to extend their functionality, I integrate third-party apps that sync with my devices. Using platforms like this comprehensive smart home guide, I set reminders for filter replacements, cleaning cycles, and firmware updates. These proactive steps prevent minor issues from escalating into costly repairs, ensuring my appliances remain efficient and dependable over the years.
Additionally, investing in a Wi-Fi-enabled diagnostic tool can help monitor appliance health remotely, providing early warnings of potential failures before they become severe. I personally utilize a smart sensor system that tracks vibrations and temperature fluctuations in my refrigerator and washer—delivering real-time alerts to my phone. This proactive approach means problems are addressed swiftly, often saving money and inconvenience.
Long-Term Care: Keeping Appliances at Peak Performance
Consistency is key. Regularly inspecting hoses for cracks or leaks and cleaning filters every few months can prevent unexpected breakdowns. For example, I’ve found that periodically cleaning the ice maker’s water line with an approved descaling solution reduces blockages and maintains water quality. Staying vigilant about appliance noise or performance irregularities helps catch issues early, much like regular health check-ups for your body.
Looking ahead, I predict that the integration of AI-driven diagnostics and predictive maintenance will dominate appliance care by 2025. Manufacturers are increasingly embedding sensors that analyze usage patterns and predict failures before they happen, similar to industry advancements discussed in this trend report. Embracing these innovations now will ensure your appliances adapt seamlessly to future upgrades, reducing downtime and repair costs.
How do I maintain my smart appliances over time?
The best practice is establishing a routine maintenance schedule that leverages both physical tools and smart diagnostics. Regularly updating firmware via your appliance’s app ensures you benefit from the latest performance improvements and security patches. I recommend trying to calibrate your refrigerator’s temperature sensor annually, which is a simple process that profoundly impacts energy efficiency and food preservation—details for which can be found here. Consistent care combined with modern tech will keep your appliances reliable for years to come—so don’t hesitate to experiment with these advanced tips and see tangible results.
Lessons That Changed My Approach to Appliance Fixing
One of the most unexpected lessons I learned was the importance of patience when working with sensitive components like water inlet valves. Rushing through the process nearly caused a crack in the plastic housing—something I wish I had known sooner. Additionally, I realized how crucial it is to have a complete set of tools on hand; skipping a screwdriver or failing to have a spare hose clamp can turn a quick fix into a lengthy ordeal. Lastly, I discovered that taking meticulous notes and photos during disassembly can save considerable time during reassembly, especially when dealing with multiple hoses and tiny screws. These insights have empowered me to approach DIY repairs confidently and accurately, ensuring my washer continues to serve me reliably.