

Last July, I stood in my kitchen holding an electric bill that actually made me gasp. It wasn’t the heatwave or the kids leaving the back door open; it was that constant, aggressive hum coming from my kitchen corner. My refrigerator was working overtime like it was trying to cool the entire neighborhood. I felt like I was paying for a private jet instead of a place to keep my milk fresh. I realized right then that I’d been treating my appliances like ‘set and forget’ robots, but they are more like demanding houseguests that need boundaries. If you have ever looked at your utility statement and felt like your kitchen was conspiring against your savings, you are not alone. Have you noticed your bill creeping up even when you are trying to be careful? I discovered that by making just three small adjustments, I could stop the bleeding. I’m going to show you how to take control of that humming money-pit and keep your food perfectly chilled without the financial heartache.
Stop Letting Your Refrigerator Steal Your Hard-Earned Cash
The biggest mistake I made early on was the “colder is better” fallacy. I had my freezer set to Antarctica levels, thinking I was being a superior home manager. Instead, I was just creating a massive energy drain. I didn’t realize that freezing the eggs on the top shelf was a cry for help from my compressor, not a sign of a powerful machine. Your fridge is likely the only appliance in your home that never takes a break, and even the top energy-saving models will struggle if the internal settings are working against the environment. When I finally sat down to look at the best energy-efficient settings, I was shocked at how far off I was. According to the U.S. Department of Energy, refrigeration accounts for about 3% to 5% of the average home’s energy use, but poor settings can spike that consumption by 25% or more. By following some expert tips from industry pros, I learned that the balance between food safety and energy savings is much narrower than most people think.
Does Tweaking a Few Dials Really Save That Much?
I know what you are thinking because I thought it too: is it really worth the hassle to mess with these settings? You might fear your food will spoil or your ice maker will quit. But the reality is that most of us are over-cooling. I spent years ignoring the factory defaults until I learned how to calibrate my fridge sensors properly. Once I realized that my “cold” setting was actually four degrees lower than necessary, the savings started to pile up. It isn’t just about the temperature dial, either. It is about how the fridge interacts with the air around it. We are going to look at the three specific areas where your fridge is likely wasting juice right now, and how you can fix them in under five minutes. Let’s get into the nitty-gritty of why your current setup is probably costing you an extra twenty bucks a month for no reason.
Master the Mechanics of Fridge Efficiency
The secret to a lower bill isn’t magic; it’s physics. Think of your refrigerator like a marathon runner. If the runner has to wear a parka and breathe through a straw, they’ll burn out fast. Your fridge is the same way. The first thing you must check is the door gasket—that rubber strip that keeps the cold in. If it’s brittle or dirty, you are literally throwing money into the air. I once tried the old ‘dollar bill test’ where you close the door on a buck and try to pull it out. Mine slid out like it was on ice. That’s when I knew I had to figure out how to test if your fridge door seal is actually airtight before I spent another dime on repairs.
Test Your Door Seals with the Dollar Bill Trick
If that dollar bill slips out easily, your compressor is working twice as hard to fight the warm room air. You don’t always need a replacement; sometimes a good scrub with warm, soapy water is all it takes to restore the suction. However, if the rubber is cracked, you are fighting a losing battle. This is one of those expert tips from industry pros that actually moves the needle on your monthly expenses. When the seal is tight, the internal temperature stays stable, and your motor doesn’t have to kick on every ten minutes.
Vacuum Away the Dust Choking Your Machine
Next, let’s talk about the ‘lungs’ of your appliance: the condenser coils. These are usually tucked away at the bottom or the back. Their job is to release the heat removed from the inside of the fridge. If they are covered in a thick layer of dust or pet hair, the heat gets trapped, forcing the machine to run indefinitely. I remember pulling my fridge out for the first time in three years. My golden retriever, Max, had basically donated enough fur to the coils to knit a small sweater. The back of the unit was hot to the touch and the hum was deafening. After ten minutes of careful vacuuming, the silence was immediate. It was like the machine finally caught its breath. Learning how to keep your refrigerator coils clean in a pet-friendly home is arguably the single most effective way to extend the life of your motor.
#IMAGE_PLACE_HOLDER_B#
Stop Blocking the Internal Air Vents
Inside the fridge, airflow is king. Many people make the mistake of shoving a giant pack of soda or a massive milk jug right against the back wall. This usually blocks the vents where the cold air enters. When you block these, the sensor thinks the fridge is too warm and tells the compressor to keep chugging. You end up with frozen lettuce in one corner and warm milk in the other. If you know how to organize your freezer to prevent frost burn and food waste, you can apply those same spatial rules to the main cabin. Keep a two-inch gap around the walls. This allows the air to circulate like a gentle breeze, ensuring the inverter compressor or standard motor can do its job without straining. By simply rearranging my top shelf, I stopped the ‘crying’ compressor sounds and noticed my food stayed consistently cold.
Let’s dig deeper into a nuance that most homeowners miss: your appliances are now smarter than your habits, and sticking to old-school cleaning rituals is actually costing you money. Most of us grew up in a ‘pre-rinse’ culture where we scrubbed dishes until they were practically clean before loading them into the machine. You might think you’re being helpful, but you’re actually sabotaging the sophisticated sensors in innovative dishwashers with AI technology. Modern sensors measure turbidity—the ‘cloudiness’ of the water—to determine how long to wash. If you load clean dishes, the sensor tells the machine to run a shorter, weaker cycle. Ironically, this often results in gritty white film on your plates because the detergent didn’t have enough organic matter to latch onto during the main wash. Trust the tech; scrape the solid food, but leave the grease behind. Have you ever fallen into this trap of over-cleaning? Let me know in the comments.
Why Does My High-Efficiency Cycle Take Three Hours?
It seems counterintuitive, but a longer cycle is almost always more efficient than a quick one. Research by the Association of Home Appliance Manufacturers (AHAM) indicates that modern machines use significantly less water and lower temperatures to meet strict federal energy standards. To compensate for the lack of heat and high-pressure water, the machine requires more ‘dwell time’ for the enzymes in your detergent to chemically break down stains. It’s the difference between slow-cooking a meal and microwaving it; the slow way uses far fewer resources over time. This is precisely why your washing machine takes much longer than the timer says—it is constantly recalibrating the time to ensure the highest efficiency possible without wasting a drop of hot water.
The Detergent Trap That Ruins Modern Pumps
Here is the ‘Oops’ factor that costs modern homeowners hundreds in avoidable repairs: the belief that more soap equals cleaner clothes. In reality, using too much high-efficiency (HE) detergent creates a ‘suds lock’ condition. I learned the secret to using less detergent in your high-efficiency washer after my own machine started throwing error codes and refusing to drain. 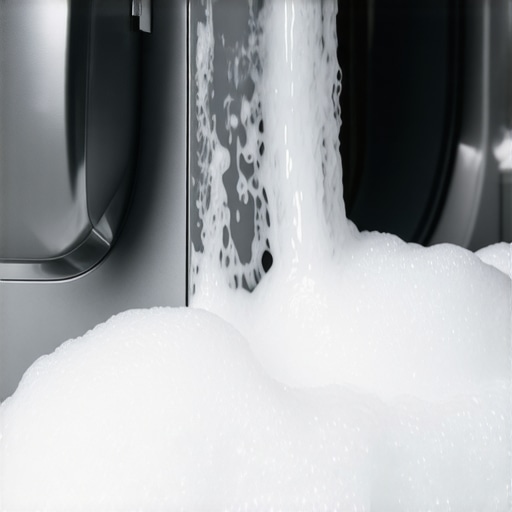 The excess suds act as a literal cushion between fabrics, preventing the mechanical friction needed to lift dirt. Even worse, that extra soap builds up as a slimy biofilm inside the outer tub, which is exactly why your front load washer smells like a swamp and leaves black spots on your laundry. If you see any bubbles at the end of a rinse cycle, you’ve used too much. Most experts recommend only one to two tablespoons for a full load.
Manage Your Smart Features to Save Even More
Finally, we have to talk about the ‘hidden’ energy drain of top smart appliances for a seamless home experience. While the Wi-Fi connectivity is great for alerts, many people are surprised at why your smart fridge is using more data than you expected and staying in a high-power state. To maximize your investment, utilize the ‘Night Mode’ or ‘Energy Saver’ settings on your smart hub. By allowing the machine to perform heavy tasks like ice-making or self-cleaning during off-peak utility hours, you take full advantage of the ultimate guide to smart home appliances that we discussed earlier. Your appliances are built to be autonomous; your only job is to stop getting in their way with outdated habits.
I’ve spent way too many Saturdays wrestling with heavy machinery to not have a ‘go-bag’ for appliance care. If you really want to protect your investment, you need more than just a rag and some spray. I swear by my 24-inch flexible condenser brush; it reaches the back corners that a vacuum hose just can’t touch. I also keep a small torpedo level in my laundry room drawer. Why? Because if your machine isn’t perfectly flat, the centrifugal force during a high-speed spin cycle will eventually shred your drum bearings and destroy the motor mounts. Learning how to level a washing machine so it stops banging on tile floors saved me from a four-hundred-dollar repair bill last year. These aren’t just ‘nice-to-haves’; they are the frontline defense for your household budget.
Don’t Let Your Washer Dance Across the Floor
I learned the hard way that a vibrating machine isn’t just a noise nuisance; it’s a structural threat to your home. When your washer is ‘walking,’ every jump is fatiguing the metal frame and putting immense pressure on the suspension springs. I always recommend using a dedicated physical level rather than eyeballing it or using a smartphone app, as the tactile accuracy of a bubble level is still the gold standard for high-vibration equipment. Keeping everything balanced is one of the best expert tips for 2025 washing machines because modern units spin at much higher RPMs than older models to extract more water and save energy during the drying phase.
How do I keep these machines running like new for a decade?
It comes down to a ‘Monthly Minimum’ checklist that most homeowners simply ignore. Most people forget the debris filter on their washing machine until the floor is already flooded. I make it a point to drain that little trap every thirty days. If you haven’t done it yet, you’ll likely find a collection of coins, hairpins, and pet hair that’s choking your pump. Knowing how to clean the debris filter on your front load washer effectively is the difference between a ten-year lifespan and a sudden, expensive breakdown. The same applies to your kitchen hygiene; the easiest way to clean the filter in your dishwasher involves a simple twist-and-rinse method that ensures your machine doesn’t recirculate old food particles back onto your ‘clean’ plates.
My Must-Have Maintenance Arsenal
Beyond the basics, I recommend a bottle of high-quality stainless steel cleaner that doesn’t rely on heavy oils, which actually attract more dust over time. But the real ‘secret weapon’ in my kit is a small LED flashlight for inspecting door gaskets and a set of hex keys for tightening loose handles. If you’re managing a suite of high-tech gear, your most important tool is actually your smartphone’s update log. Don’t ignore the notification regarding why your smart appliance app keeps asking for a firmware update; those patches often contain crucial ‘thermal management’ fixes that prevent your control board from frying during a power surge.  Looking ahead, I see a massive shift toward ‘Predictive Maintenance’ modules. According to technical documentation from the Association of Home Appliance Manufacturers (AHAM), we are moving toward a standard where appliances will use internal vibration sensors to detect early bearing failure long before you hear a single squeak. This is the future of home appliances—machines that tell you exactly what part is wearing out so you can fix it before it breaks. My challenge to you: go find your dishwasher filter tonight, pull it out, and give it a scrub. You will be horrified by what you find, but your machine will thank you with years of extra service.
Why I Stopped Treating My Appliances Like Set-and-Forget Robots
The most expensive mistake I ever made was assuming that my high-tech gear could take care of itself. I’ve learned the hard way that home appliances are more like high-performance cars than simple boxes. Here are the three lightbulb moments that changed everything for me: First, the “auto” sensor is only as good as the cleanliness of the glass it’s looking through. Second, using high-efficiency cycles is a marathon, not a sprint—it takes longer but uses 40% less energy. Finally, ignoring a vibration in the laundry room is basically writing a check to a repairman for next month. By following expert tips from industry pros, I shifted from reactive repairs to proactive care.
The Secret Weapon Kit for a Five-Minute Maintenance Routine
Maintaining your home shouldn’t feel like a part-time job. I’ve narrowed my arsenal down to three specific items that I keep in a dedicated “Appliance Drawer.” I swear by my long-reach condenser brush for the fridge and a simple bubble level for the washer. If you aren’t sure how to use them, start with my guide on how to level a washing machine so it stops banging on tile floors. I also keep a bookmark for the ultimate guide to smart home appliances because it helps me troubleshoot software glitches without calling support. #IMAGE_PLACEHOLDER_E# Staying informed about the future of home appliances is just as important as the physical tools, as it prepares you for the next wave of AI-integrated care.
Your Move Toward a More Efficient Household
You have the knowledge now to turn your kitchen and laundry room from energy-hogs into efficient, well-oiled systems. It only takes a few minutes a month to save hundreds of dollars a year. Don’t let the technical jargon of modern home appliances intimidate you; they are designed to be managed by homeowners just like us. Have you ever discovered a hidden filter in your machine that was completely clogged? Let me know in the comments below!